Reviewed Camera:
Overall rating:
4/5

PRO’s
- Easy operation
- High resolution still photos
- Full HD videos with stereo sound
- Ranges from macro photography to wide angle images to long distance, telephoto shots
- Tilting monitor
- Use WiFi or NFC to upload images and videos
- Uses four AA batteries
CON’s
- Lacks option for full manual control of camera settings
- Lacks compatibility with iOS devices
- Lacks capability to upload from the camera directly to the internet
- Lacks touch screen capability for monitor
- Has difficulty with face recognition if subject is not facing camera
Those looking for an easy to use everyday camera that lets them grab a quick but high quality photo or video to share online should seriously consider the Nikon Coolpix L840.
KEY FEATURES
- This Nikon Coolpix captures images measuring 4608 x 3456 MP — a high enough resolution to create posters as gifts or to frame and display on your walls.
- It also captures full HD video in stereo at resolutions of 1920 x 1080p that you can show on your big screen TV. If you need a smaller file size to share in an email, though, you can also capture HD video at a resolution of 1280 x 720p, HS video at a resolution of 1920 x 1080 or 640 x 480p, or VGA video at a resolution of 640 x 480p.
- You can shoot everything – macro shots, wide angle landscapes, towering skyscrapers, portraits of people or pets, group selfies, backlit subjects, sports action shots, or telephoto close-ups of birds, butterflies, and wild animals — without changing lenses because the lens zooms from a close-up wide angle optical zoom range of 22.5mm to a telephoto range of 855mm.
- The 76X digital Dynamic Fine Zoom lets you crop in even closer.
- Macro mode lets you take pictures from as close as 1 cm.
- If your main subject is in motion, the Coolpix L840 even tracks him, her, or it to stay in focus.
- Nikon’s optical Vibration Reduction system eliminates camera shake from still photography and works with the digital vibration system to eliminate camera shake in movies.
- The Coolpix L840 can be set to shoot automatically when it recognizes the face of a pet, a person, or a smile, and to shoot two images in smart portrait mode in case the subject blinks. In addition, the shutter can be delayed for 2 seconds or 10 seconds.
- At the beach, out in the snow, indoors, dawn, daylight, dusk, or nighttime; it doesn’t matter, you can capture your image under most lighting conditions. You choose the scene or let the camera choose it for you.
- Download the connecting app, and you can make sure that everyone is in the picture by controlling the camera’s shutter from your Android phone or tablet, or use the WiFi or NFC (Near Field Communication) connections to upload photos or videos to your Android phone or tablet to share or store on the internet.
- You also can print images directly from a PictBridge compatible printer.
Nikon Coolpix L840 Review
Ease Of Use: 4.0/5.0
Whether you are shooting still photos or movies, the Nikon Coolpix L840 is designed to be easy enough for almost anyone to use.
Shooting Movies With The Nikon Coolpix L840
To shoot a movie, just press the record button on the back of the camera to start. Press the button again if you want to pause your recording or stop your recording. If you want to start recording after pausing or stopping, just press the record button again.
Shooting Still Photos With The Nikon Coolpix L840
If you are taking photos, choose “scene auto selector” from the “shooting mode” menu, and the camera will analyze the image and automatically select its most appropriate scene mode. You can also choose the scene mode for yourself.
The available scene modes, some of which are listed under “other scenes” under the scene auto selector menu, include:
- Portrait mode – the default, for shooting close-up portraits of one or two people.
- Night portrait mode – for shooting close-up night portraits of one or two people.
- Portrait mode 1 – for capturing portraits of large groups.
- Night group portrait mode 1 – for capturing night portraits of large groups of people.
- Pet portrait mode – for capturing images of dogs and cats.
- Backlighting – for capturing backlit images of subjects other than people.
- Backlighting 1 – for capturing backlit portraits.
- Landscape mode.
- Night landscape mode.
- Close-up mode – for shooting close ups of subjects other than dogs, cats, and people.
- Party/indoor mode – for shooting indoors in lowlight.
- Sports mode – for shooting bursts of up to seven action images.
- Food mode.
- Beach mode – for shooting images in brightly lit settings where the sun reflects off of the water and sand.
- Snow mode – for shooting images containing snow-filled backgrounds, especially if the sun is reflecting off of the snow.
- Fireworks show mode – for capturing images of fireworks.
- Birdwatching mode – lets you choose between shooting single images or bursts of up to seven images.
- Dusk/dawn mode.
- Sunset mode.
- Moon mode.
- Easy panorama mode – allows you to pan horizontally for landscapes or vertically for skyscrapers.
You can get a description of each scene mode by selecting a scene mode and then moving the zoom lens control from “W” for wide angle or portrait shots to “T’ for telephoto or action photography.
Each scene mode also provides you with several options to help you take the best possible picture. The options are:
- Handheld or tripod.
- Flash mode.
- White balance.
- Metering.
Tripod Or Handheld
Low light scenes that require slower shutter speeds for longer exposures will ask if you are holding the camera by hand or using a tripod.
- Tripods and remote shutter releases are strongly recommended in low light settings because they stabilize the camera and eliminate the potential for camera shake. You can also use the timer to trigger the shutter and eliminate camera shake.
- When you are using a tripod, you should turn off Nikon’s in lens VR (vibration reduction) system to eliminate the possibility that the system could be activated and cause camera shake with its adjustments. If you should forget to turn off the VR system and you select tripod, the camera automatically deactivates the system for you.
- If you holding the camera by hand, either brace yourself against a stable structure, such as a wall or a tree, or support the camera and your hands and forearms on a surface such as a piece of furniture, an architectural feature such as a bannister, a fence, or a similar structure.
- If you are holding the camera, it will automatically shoot a series of up to seven images which are combined and aligned to form a single image to counteract camera shake.
Flash Modes For The Nikon Coolpix L840
When set to auto select mode, the camera will automatically choose the flash mode that best fits the scene mode it has chosen. If you select a scene mode, the camera also will automatically select the flash mode that best suits your chosen scene mode. You can choose the flash mode yourself, however, if you prefer.
While you should open the flash whenever you are shooting in low light situations, the scene modes allows you to choose from among four flash modes:
- Automatic mode triggers the flash whenever the camera’s meter reading determines that it is needed.
When used with the portrait scene modes, automatic mode with red eye reduction fires when necessary to illuminate the scene while reducing any red eye caused by the flash. - Use slow sync for nighttime or evening portraits when you also want to capture some of the background behind the subject. The camera will trigger the flash when it’s needed to illuminate your main subject, but the flash is synced with the slow shutter speed used to capture the dimly lit background.
- The fill flash setting triggers the flash every time a photo is taken. Use it to illuminate a backlit subject or to help capture the details of heavily shaded or very dark areas of an image.
Whether you are shooting in auto scene mode or in one of the scene modes, the camera will automatically select the flash mode based on the reading it receives from its light meter, but if the camera’s meter is tricked by the lighting in some way and reads it incorrectly, adjusting the flash mode is one way to improve the picture.
White Balance Settings For The Nikon Coolpix L840
The camera will automatically select a white balance setting based on its light meter reading, but you can change it to make the lighting appear warmer, with more orange and red tones, or cooler with more blue tones, or to correct for images that are very dark or that have a lot of blacks and grays or dark colors or to correct for images that are very bright or that have a lot of white or light colors.
The camera uses the white balance setting to determine what portions of the image should appear white and then bases how dark or light or warm or cool the other portions of the image should be based on the white balance setting. A sunset image, for example, can be filled with yellows, oranges, and reds with no white areas. The camera may then select a very pale yellow area as an area that should be white. That would cause the camera to lighten the other colors in the sunset and wash out the entire image, resulting in a photograph that is much less vibrant and dramatic than the image you saw with your eyes and attempted to capture. Using the sunset scene mode corrects this by automatically shifting the white balance setting so that the camera recognizes pale yellow as pale yellow and does not use it as a substitute for white.
The white balance settings on the camera allow you to compensate for certain lighting situations yourself, or to use the settings to cause the camera to shift the white balance to create a lighting effect. The available white balance settings are:
- Automatic – the default setting, the camera automatically selects the white balance setting.
- Preset manual – under the white balance menu in the auto mode menu, allows you to manually set the white balance for the exact lighting in which you are shooting.
- Daylight – for use under full, bright sunlight to compensate for the lack of shadows and reflected sunlight or for images that contain lots of white or light colors; helps the camera to find contrasts and details within such a bright shooting situation.
- Incandescent – for shooting scenes lit by incandescent lights; incandescent lights add a yellowish cast to skin tones, colors, and white; this setting shifts the white balance to compensate for the yellowish cast of the lighting.
- Fluorescent – for shooting scenes lit by fluorescent light; fluorescent lights add a blue or green cast to skin tones, colors, and white; this setting shifts the white balance to compensate for the bluish or greenish cast of the lighting.
- Cloudy – for use on cloudy, overcast days than can make white look gray; this setting adds more warmth to the colors of the overall image.
- Flash – for use with the flash to compensate for the brightness of the flash; this setting also adds warmth to the colors of the overall image, but it adds more warmth than the setting for cloudy days.
(source)
The preset white balance setting for the Coolpix L840 is simple to use:
- Select preset manual in the white balance menu.
- The camera zooms in to the correct position to measure the white balance.
- Select “measure”.
- Choose a portion of your image that is all white or use a sheet of white paper, cardboard, or a photographer’s white card and frame it in the measuring window, filling the window with white.
- Press “OK”, and the shutter is released to take the measurement, but no image is retained.
The camera retains the preset white balance reading until you take another reading. This is the most accurate way to set the white balance for any shooting situation, and it is also the one way of getting an accurate white balance setting when you have multiple light source, such as indoor incandescent lights with sunlight from a window.
Light Meter Settings For The Nikon Coolpix L840
As you may have noticed, the Nikon Coolpix L840 relies on readings from its light meter to determine several camera settings. The camera will automatically select the meter setting based on the scene mode that either you or the camera select.
The available metering settings are:
- Matrix
- Center-weighted
- Spot
The metering setting determines what portions of the image the camera uses for its light meter readings and how much importance it gives the readings from those areas.
Metering And Wide Angle Photography With The Nikon Coolpix L840
For wide angle shots of landscapes, for example, you want everything in the background in the image, and you probably want most or all of the foreground. The camera will automatically set the zoom lens to focus to infinity. When the camera is set to infinity, it will select matrix metering, which takes light meter readings from multiple points within the image. Each point is contained within one section of a grid or matrix that evenly divides the image into portions. If you are choosing the settings for the camera, these are the settings that you should use as well.
Metering Portraits And Still Lifes With The Nikon Coolpix L840
When you are shooting a portrait or a subject in the mid-ground, such as a still life, you want the focus and the best lighting to be on your subject. You don’t want the background to distract. In some cases, though, some part of the background or foreground may add context or meaning to the image. In other cases, the background or foreground may be meaningless as well as cluttered or distracting, and you might even want both to be blurred.
You can control how much or how little of the foreground and background are in focus and how much are blurred through the depth of field you choose. Depth of field refers to the amount of the foreground and background that is included in sharp focus with your main subject. You control it by choosing how tightly to zoom in on your subject. The more tightly you zoom in, the narrower the depth of field.
In this situation, the camera will select center-weighted metering. The camera will take light meter readings from the center of your image, where it expects your main subject to be, as well as the foreground and background, but it will give priority to the readings from the center of the image when choosing the lighting settings for the image.
If you have composed your image so that your main subject is off center, you can use the arrows on the camera’s multi-selector button to move the focus area shown on the monitor to the area of your image where you want the focus to be, or you can use focus lock to lock the camera’s focus on your off-center subject. Either method will tell the camera to weight its light meter readings for the section of your image where your subject actually is located.
To use focus lock, turn your camera so that your subject is in the center of the frame and press the shutter button half way down. The camera will focus on your subject and lock the focus. Continue to hold the shutter button half way down as you turn back and recompose your shot as you want it to be, with the off-center subject, and then press the shutter down completely to capture your image.
If you are selecting the metering settings for a portrait, still life, or similar subject, you should select center-weighted metering.
Metering Telephoto Images With The Nikon Coolpix L840
However, when you zoom in on a distant subject, the settings that the camera automatically selects could leave parts of your image slightly blurred if you crop the image to focus in more tightly on your subject. This could be due to the very narrow depth of field used in telephoto photography.
When you are shooting a subject from a great distance or when you are shooting sports or action photography, you want the light meter readings to be taken from the subject because the lighting of the background and foreground may be very different from the lighting that is directly on your subject. You also don’t want the background and foreground to distract from or minimize your subject. So, you want to focus as tightly as possible on your subject to eliminate the distraction of the background and foreground as well as eliminating their influence on the lighting of your subject. This creates a very narrow depth of field. You need to make certain that your subject fits completely into that depth of field range.
More access to manual control of the camera would allow you to better fine tune the adjustments, but with the Coolpix L840, you can try zooming in less tightly on the subject or using center-weighted metering rather than spot metering.
Image Quality And The Nikon Coolpix L840: 3.5/5.0
The Nikon Coolpix L840 includes many features that help produce clear, sharp images in most situations. These include a 1/2.3 16 MP CMOS image sensor, a dual phase detection and contrast detection autofocus system, and Nikon’s Vibration Reduction system. It does, however, only shoot still photos in the JPEG file format. RAW format captures and retains all of the details of your images. Each time you edit and resave a JPEG file, it will condense the image and lose more detail. To counter this, save your photos in PNG or TIFF format before editing them.
The Nikon Coolpix L840 Image Sensor
The image sensor receives the image through the light detected by the photoreceptors it contains. The Nikon Coolpix L840 comes with a 1/2.3 16 MP CMOS image sensor. Of the two types of image sensors, CCD and CMOS, CCD image sensors can contain more photoreceptors than a CMOS image sensor of the same size because of differences in the way the two are “wired.” However, again because of the difference in the wiring, CMOS image sensors operate more quickly than CCD image sensors.
Improvements in the speed and capabilities of image processing software mean, however, that these differences between CCD and CMOS image sensors become less and less discernible. You may find either type of image sensor in cameras at many different price levels. With images that measure 4608 x 3456 MP, the 16 MP CMOS image sensor found in the Nikon Coolpix L840 produces high resolution photos that you should be able to enlarge to almost any size without graininess or blurring in most cases.
The Nikon Coolpix L840 Autofocus System
Another important factor in producing sharp image is the focusing system. The L840 uses a dual system that employs both phase detection, or tracking, and contrast detection.
Phase detection systems split the image as your optometrist would during an eye exam and then they compare the two images to determine how far apart they are from right to left and front to back. They also determine whether they are coming closer together or separating. When focusing on a stationary subject, the camera brings the two images together to obtain a focused image. In tracking mode, the camera’s software uses the information regarding the distance from the camera and the distance between the two images and the speed and direction of the changes in distance to track the subject as it brings the two images into focus.
In a dual focus system, the contrast detection system takes over from the phase detection system to bring the image into sharper focus. Contrast detection systems compare the information from adjacent pixels in the image and sharpen the image by sharpening the contrast between each one so that the portion of each image contained within that pixel is distinct and is not overlapping or being influenced by the portion of the image contained within another pixel.
Contrast detection systems, however, do have problems focusing in situations where contrast is difficult to detect. These situations include settings with low light; compositions that place a light subject in front of a light colored background or a dark subject in front of a dark colored background; subjects that have little differentiation in colors, such as you might find when taking architectural photos of buildings with white walls; or subjects with a repeated design or element, such as a series of identical windows in the wall of a building or repetitive pattern in a mosaic or frieze. A manual setting that would allow you to take full control of the camera’s settings would let you adjust the aperture or shutter opening, the shutter speed, and the ISO sensitivity to achieve a sharp focus.
The Coolpix L840 does allow you to adjust the ISO sensitivity, which is the camera’s sensitivity to the light received through the image sensor. The ISO numbers correspond to film speeds with 100 and lower representing slower speed films for use in lowlight situations and 800 and higher representing high speed films for use in brightly lit settings or for capturing stop motion, high speed action, and sports shots. In low light settings, the Nikon Coolpix L840 can choose a shutter speed that is too slow, allowing for blurring due to either camera or shutter movement. Any time the camera is likely to use a slow shutter speed, you should use a tripod to eliminate the chance of camera movement. You can also cause the camera to give priority to the ISO sensitivity over the slow shutter speed by using the ISO menu to select “fixed range auto” and setting the ISO range to 125-800. This may add some noise to the image, but that can be corrected with photo editing software.
The EV or exposure value setting also gives you some control over the aperture setting and shutter speed. Most photos range from very dark, shadowy areas to very bright. Cameras choose a midpoint between these two extremes as the exposure value. When the scene consists of many very light, brightly lit areas – such as a snow scene or an architectural scene containing white walls – cameras can choose a midpoint that is too bright leaving areas that should be white looking gray. When the scene consists of many very dark, shadowy areas – such as nighttime or forested scenes — areas that should be dark will be too light and bright.
To correct this with the Coolpix L840, when the scene is brightly lit or contains many areas of bright, you can increase the EV setting up to two steps above the camera’s automatic setting by 1/3 of a step each time. When the scene is heavily shaded or when it contains many dark colors, you can decrease the setting down two steps below the camera’s automatic setting by 1/3 of a step each time.
Versatility: 4.0/5.0
The range of the zoom lens, from 22.5mm to 855mm, surpasses the recommendations of both PCMag.com and Arstechnica.com. Both Arstechnica.com and PCMag.com recommend a zoom lens with a wide angle range of at least 28mm for group portraits. For panoramas, landscapes, and shots of architecture, Arstechnica.com recommends an even wider 24mm range, but the Nikon Coolpix L840 surpasses that with its 22.5mm wide angle range.
For telephoto images of wildlife, performances, sporting events, and action images, Arstechnica.com recommends 200 mm zoom lenses or even 400mm superzoom lenses, but the Coolpix L840 far surpasses that with its 855mm zoom range. In addition, the Coolpix L840 adds an additional 76X digital Dynamic Fine Zoom and macro mode with a range of 1 cm.
Near or far, you should be able to capture any image.
If you want to capture movies, you can capture them in full HD with stereo sound for showing on your widescreen TV or in smaller file sizes for sharing by email or on the internet.
You can send your movies or photos to your Android phone or tablet for sharing on the internet either by WiFi or NFC.
You can easily take portraits and movies of friends, family, and pets or record still images and videos of interesting things you encounter during the day. So, whether you use social media, a blog, or a vlog, this camera lets you share everything and anything you want to share.
How Does It Compare
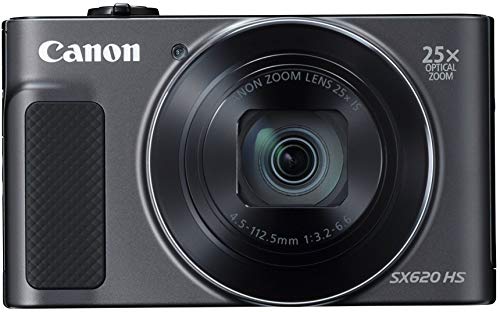
The Nikon Coolpix L840 Vs. The Canon PowerShot SX-620
These two are very similar cameras. Both have CMOS image sensors, but the Canon PowerShot SX-620 has a larger image sensor at 20.2MP versus a 16 MP image sensor for the Nikon Coolpix L840. On the other hand, the Canon PowerShot has a smaller optical zoom range than the Nikon Coolpix – 25mm to 620mm as compared to 22.5mm to 855mm. Both have the same macro zoom range of 1 cm.
Both have single subject tracking, but while the PowerShot can keep up to nine faces in focus, the Coolpix only focuses on two faces. Both have face and smile detection, and the self timer on both camera’s can be tied to face and smile detection. The Canon PowerShot also detects winks, and wink detection also can be tied to the self timer to trigger the camera shutter.
Both capture full HD videos at a resolution of 1080p, but the Canon PowerShot only records monaural sound while the Nikon Coolpix records sound in stereo. However, the PowerShot offers a hybrid mode that captures up to four seconds of video along with each still shot. The Canon then stitches the hybrid images into an HD highlight reel at a resolution of 720p that you can share.
Between these two cameras, the Canon PowerShot has the more sophisticated optical image stabilization system. The PowerShot senses when you are panning to take a panorama shot and allows motion in the direction of your pan while correcting for other motion. When you are shooting a movie while holding the camera, it compensates for camera shake that is created if you walk to follow the action. If you zoom in for a telephoto shot of a distant subject, such as a hot air balloon or a flying bird of prey while capturing a movie, it compensates for the magnified reaction to camera movement that occurs in long range zoom shots.
While both offer WiFi and NFC connections, the Canon PowerShot can upload photos and videos directly to social media sites. The PowerShot also connects to both iOS and Android devices, and an app is available that allows you to take full control of the PowerShot from your phone or tablet. By comparison, the Nikon Coolpix is compatible with Android devices only, and you can control only the shutter from your phone or tablet. Further, before you can share your videos and photos n the internet, you must upload them to your Android device.
The biggest difference between the two, though, is that the Canon PowerShot offers P mode, which allows you access to full manual control of the camera.
So, the Nikon Coolpix L840 is a versatile camera with a lot to offer, especially if you want a camera that reliably takes really good pictures without requiring you to learn how to use a lot of features and controls that can be confusing and frustrating. On the other hand, if you think you or someone else who will be using the camera might want to learn more about photography and eventually take more control of the camera settings, then the Canon PowerShot is a camera that allows you and your family to grow as photographers.
The Nikon Coolpix L840 Vs. The Sony DSCWX220/B
The CMOS image sensor on the Sony DSCWX220/B comes in in between the Nikon Coolpix and the Canon PowerShot with 18.2 MP. It has a smaller optical zoom range than either of the other two cameras at 25mm to 250mm. Like the Nikon Coolpix and the Canon PowerShot, the Sony DSCWX220/B captures movies in full HD with a resolution of 1080p, but like the PowerShot, the Sony DSCWX22/B offers monaural sound only. However, the Sony has a control setting to reduce wind noise as you record movies.

While the optical stabilization system in the Sony DSCWX220/B isn’t quite as sophisticated as that of the Canon PowerShot, it does recognize sweep panorama shots of up to 360° and stabilize those.
The Sony DSCWX220/B takes face recognition one step beyond either the Nikon Coolpix or the Canon PowerShot, though. Like the other two, face recognition can be tied to the delay timer so that the camera waits for a few seconds after recognizing a new face entering the scene so that the photographer has a chance to get into the picture, but it also uses face recognition to prevent distorted images in panoramic images, even if people are moving as you sweep the camera to create the shot. Face recognition depends on whether or not the people in the image are directly facing the camera lens for all of these cameras, though.
Like the Nikon Coolpix, the Sony DSCWX220/B relies mostly on its automatic settings and does not allow photographers to take full manual control of the camera. Also like the Nikon Coolpix, the Sony DSCWX220/B is compatible only with Android devices. You can share your images and movies with these devices or control the camera’s shutter through either a WiFi or NFC connection.
One thing you can do with the Sony DSCWX220/B that you can’t do with the other two cameras is make BluRay discs of your images and movies directly from the camera.
The Sony DSCWX220/B, like the Nikon Coolpix, is for those who want a camera that captures images and movies without requiring them to master complicated controls and settings.
The Nikon Coolpix L840 Vs. The Nikon CoolPix B500
YI is becoming a formidable name in the action camera category given its affordable and capable offerings. The YI 4K Action and Sports Camera is another solid product from the company. It also shares some features with the 4K+ including the ability to record 4k content but with a slower framerate per second of 30. It also has a lower battery life of just 120 mins of 4K/30fps recording. One advantage it has over the 4K+ is that it comes with a slightly newer processor, the Ambarella A9SE.

