
Children’s photography is an integral part of our lives. We want to document the childhoods of these young ones that represent the future, in different places and at different times, to create an amazing memento that will be preserved for years to come.
For the upcoming vacation, here are some great tips to upgrade your photos:
Choose the right background for your picture
The background is a crucial element of a picture, and we are not always careful about it. I recommend avoiding a busy background that attracts the viewer’s eyes and competes for attention with the child being photographed.
It is important to keep the background as clean and uniform as possible. To this end, I’d recommend taking pictures with the aperture setting as open as possible – if you can control the shutter function on your camera, of course – and thus create a uniform and blurred background.
In addition, try to maintain contrast in terms of children’s colors against the background. It is important to try to “break” the background and dress the children in distinct colors that differ from the background behind them, so you can highlight them and create a very interesting effect for the viewer.
Correct Composition equals the key to a successful image

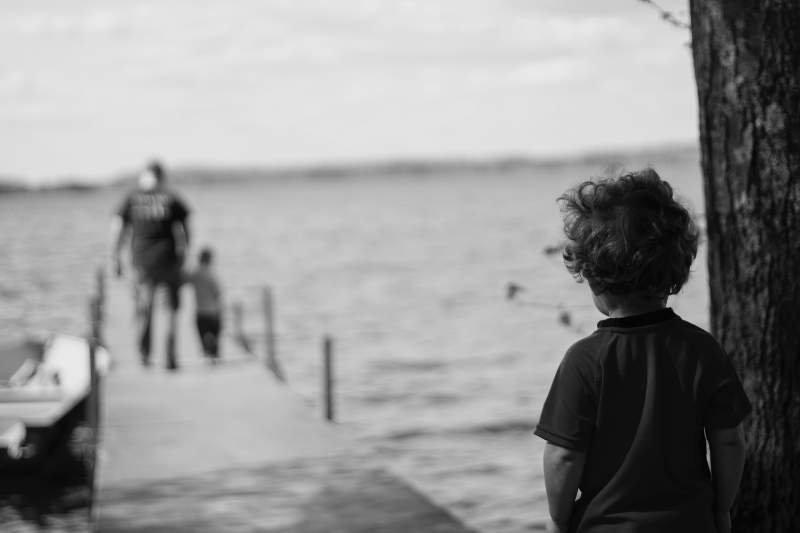
My tip for you here is to try to deviate from the children’s typical and boring position in the center and place them on the right or left side of the frame for a change.
With this simple action, we get a picture that breaks routine, interesting and pleasing to the eye. How do you figure out which side to position the child being photographed?
I’ve got an excellent tip for that as well:
Position the child on the opposite side of their gaze or the direction of their body. That is, if the subject is looking at or facing the left, we will position them on the right side of the picture and vice versa.
We want to leave the viewer a place to look at or a kind of imaginary space of motion. Something that opens the picture and creates a pleasant feeling for the viewer.
Tell a story in your pictures

Children’s photography can easily become tedious documentation of the trip or activities they engage in, so try to avoid it. When there is a story in the picture, it interests the viewer and creates meaning for them.
To tell a story, we are looking for special moments in the children’s lives. Try to create interesting cuts in the picture and focus on their facial expressions.
Look for places and situations that will cause them to experience emotions such as joy, laughter, and excitement. These are just the ingredients of a good story.
The ideal time to take pictures

It is important to try and choose the more convenient times during the day with daytime lighting, if possible, and go out to shoot at times when the sun is not high up in the sky and shining on the head.
In fact, there are two times when the sun is not high up in the sky during the day – up to three hours after sunrise and about three hours before sunset.
At these times when the sun is low, it does not cast strong shadows like the hours when it is high, so the image will have more balanced lighting and naturally get soft and more gentle lighting, with beautiful and flattering colors.
It is better to place the photographed child when the sun comes from the side, not with the back to the sun and not with the face to the sun.
In most photographs where a child sits with his face to the sun, it mostly comes with closed eyes. But when positioning the child with the back to the sun, his face will probably be very dark in relation to the lightning behind him (this problem can be solved by filling flash)
How to create an interesting sparkle in the eyes (without editing)
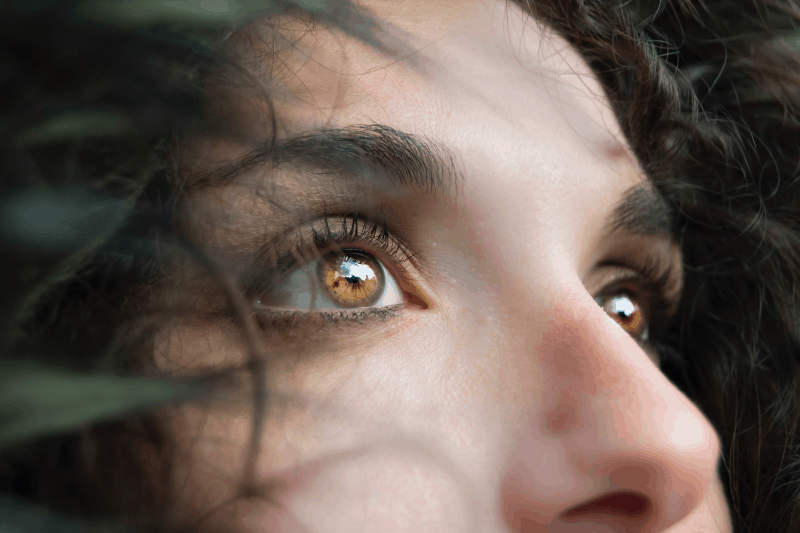
Catchlights are actually a reflection of a light source on the eyes of the subject of a photograph. This reflection creates a sparkle in the eyes of the subject and adds depth and dimension to the picture. With this technique, we can give a sense of “life” to the subject and the picture.
The effect can vary, depending on the shape, size, and distance of the light source we use. That is, when we use light, flashes of sunlight, we will get different results.
So how do you create a catch light?
There are, of course, a wide variety of ways, but I recommend the following two ways:
The first way is to look directly at the sun and the sky – ask the photographed child to look at the source of light, i.e. the sun and the sky.
It is important to take pictures when the sun is not too strong to ensure that the children can look high without being dazzled.
The second way is to reflect the light onto the face of the photographed child using a reflector. A reflector is an accessory designed to reflect light onto the subject.
This is recommended for use when we want to control the light and create uniformity in the light on the face of the photographed child, and also as a way to soften the shadows in the picture.

