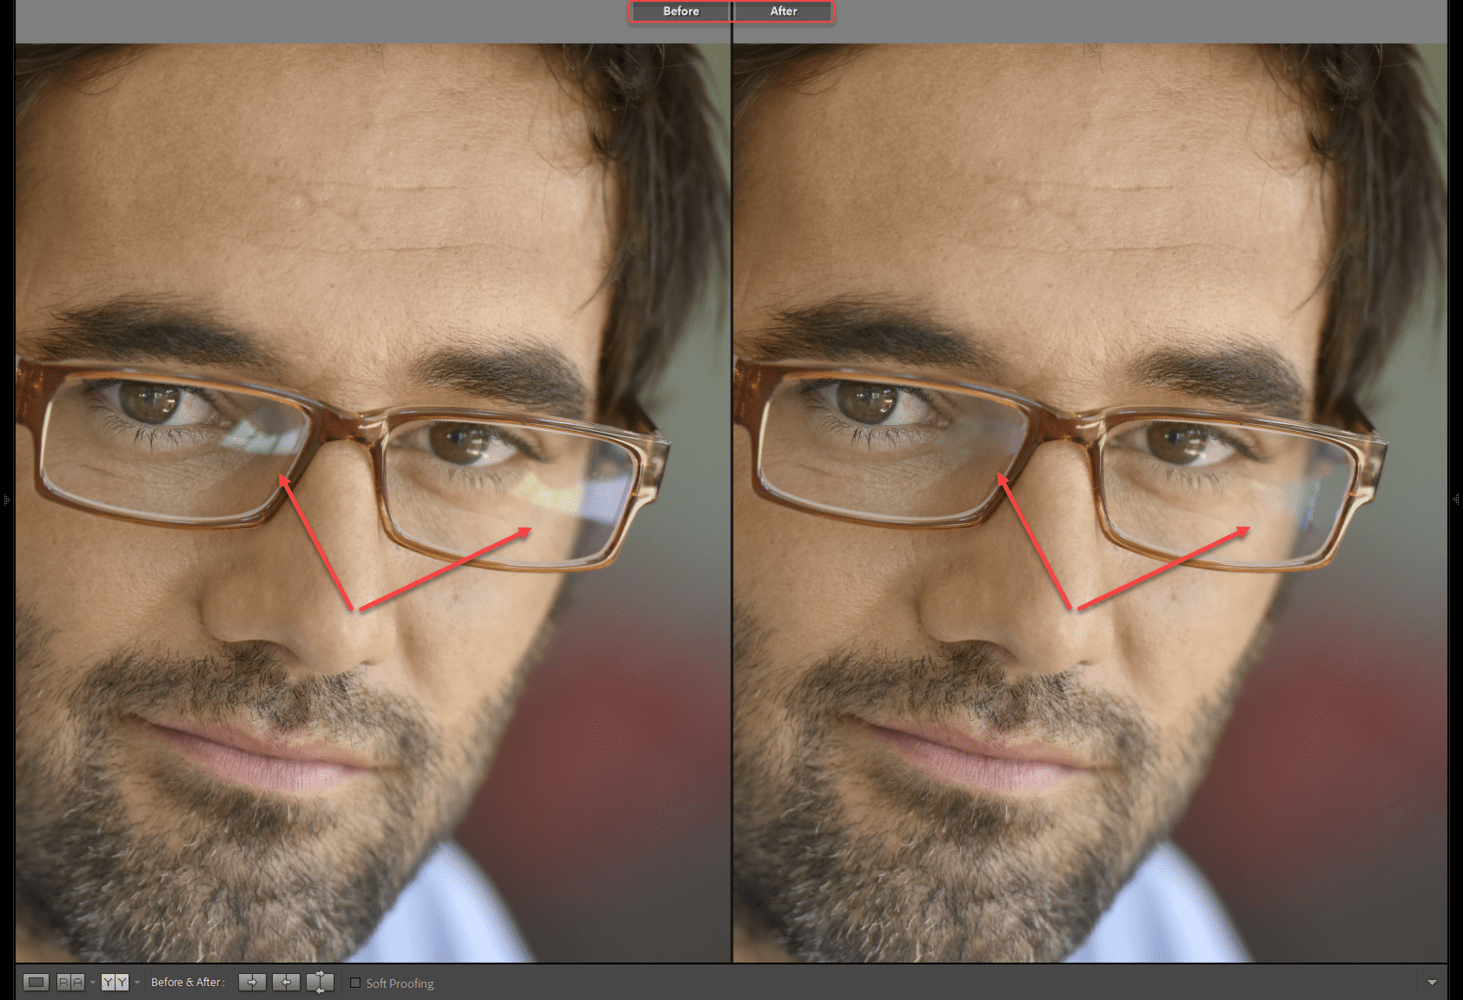
Sitting down to edit your images and finding some unwanted glasses glare can be extremely annoying.
Everyone will be quick to tell you that the best answer is to prevent glare when shooting the image. We all know that does not always happen, though.
So when you have no choice but to edit the glare on the images you have, what is the best way to remove it?
Photoshop is often considered the go-to program for this type of editing. Instead, this article is for those photographers who don’t use Photoshop, or who want to stick to a Lightroom-only workflow.
Here we will take you through the main tools in Lightroom Classic (LrC) that will remove glasses glare from your images.
Can you really remove the glare from eyeglasses?
The basic issue with glare is that the area is too bright. There may also be a loss of detail as the area is overexposed. It often has a bright, but flat appearance.
It is important to understand that completely removing all traces of glare is often not possible. What you can do is reduce the intensity of the glare. Make it less distracting.
To achieve this, your image still needs to contain some information to work with. If the glare is so strong that it has totally washed out all the face details behind, these techniques cannot rescue it.
Glare which harshly cuts across and major eye details will also be more difficult to remove.
Assess your image
Glare characteristics vary depending on the location and source of light causing the issue. A strobe, a window, and a bright sky will present different shapes and editing challenges.
Identify the key areas in your image which need editing. There may be several areas with slightly different requirements.
Reduce bright spots with the Spot Removal tool
Start with the Spot Removal tool to edit the brightest and most obvious patches of glare.
This tool is good for repairing small overexposed patches that have no image data. It is also very useful for softening harsh edges on the glare or minimizing any distinctive patterns in the glare, like parallel lines.
In principle, the Spot Removal tool is reasonably basic. You paint over an area you wish to edit, then find a source area to clone into it.
In reality, you will probably need to spend some time practicing to get the hang of using the Spot Removal tool. It can be a tedious process, and experience helps to achieve higher quality results.
How to use the Spot Removal tool to remove glare from glasses
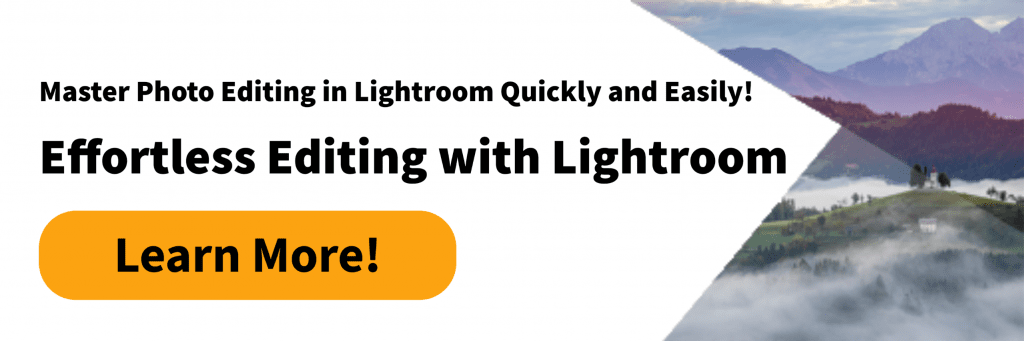
The Spot Removal tool is located underneath the Histogram on the right side of the LrC interface. If you have the new version that just came out, it looks like a bandaid, and in earlier versions, it is a big circle with a little arrow pointing from it.
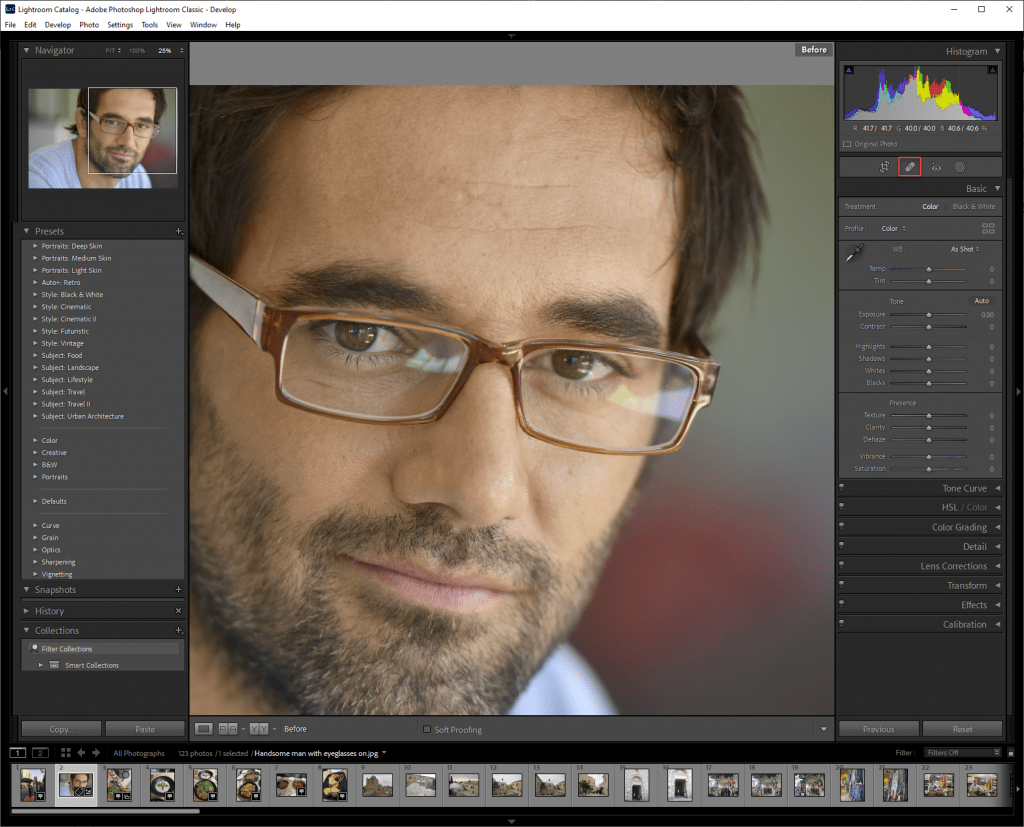
1. Tool options
Pick from either Heal or Clone.
Heal will attempt to blend the edit with the surrounding area. Clone will insert an exact copy of the source. Not one or the other is always better. Try both.
2. Cloning
Select an appropriate brush size and paint over the area you wish to edit. Set the feather to 100.
Lightroom will automatically create a second pin as the source area. However, it does have a habit of not selecting the best source area to clone from. You will likely have to adjust the source each time.
Selecting the best source spot takes some practice. For very defined spots, keep your brush small and clone in patches rather than attempting to take all the glare out at once.

3. Tips for using the Spot Removal tool
A good trick is to copy areas from one eye to the other. When the glare falls unevenly on each side, clone the unaffected parts across from each other.
For a more subtle look, clone and then use the slider to lower the opacity. Here you can use a larger brush.
Delete a pin and try again painting a different area, if it is not working.
Do not attempt to clone large areas of glare away completely.
Use the Adjustment Brush to tone down the glare
The adjustment brush tool also allows editing of specific local areas of an image.
The effect sliders which are most helpful to remove glare are Exposure, Highlights, Whites, and Dehaze.
1. Select the adjustment brush
Select the Adjustment Brush from the tool strip under the Histogram—click on the Masking tool (round circle), and you’ll see it, it looks like a brush, or use the keyboard shortcut K.
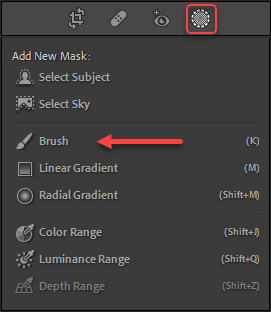
At the bottom of the Adjustment brush panel are the brush options controlled by sliders. Here you can use sliders to adjust the brush size, the feather value, and brush flow.
2. Adjustment brush options
Use a relatively small brush size when retouching in detailed areas like around the eyes. When your cursor is over the image you will see the brush size and feather radius.
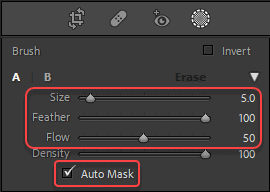
Feather: controls edge softness of the brush. Set to 100.
Flow: this controls brush opacity. Set to 50.
Start with these settings, as they work in most cases.
Turn on Auto-mask. This restricts your brush stroke to areas with similar color. It is useful to select only the glare and not the glasses frame.
Reduce the feather if necessary when the glare area is very defined and you need a cleaner edge.
3. Paint on the adjustment
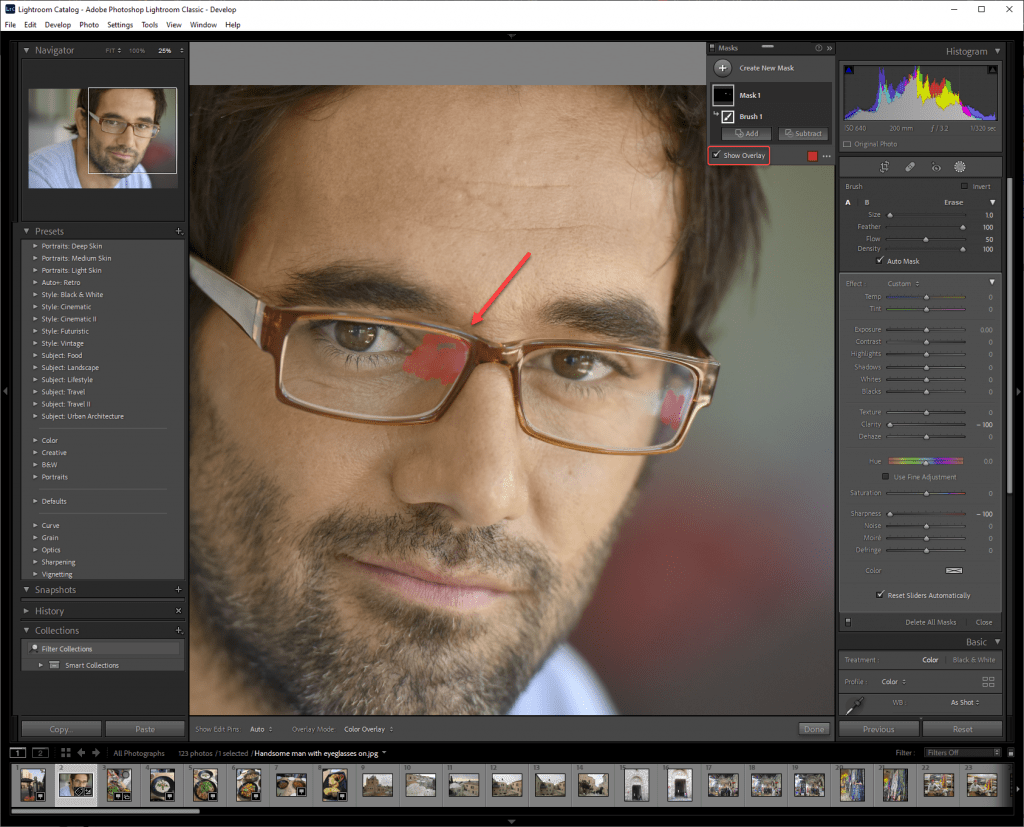
Once you are happy with your brush settings, paint on the image over the area of glare.
A grey pin is created at the point where you started painting with the adjustment brush. As a default, you will see the area of the effect as a red overlay.
You can paint in multiple locations, and it will all be added to the same pin. All the areas allocated to that pin will have the same adjustments. So go ahead and paint the effect on all the glare areas that will need the same adjustment.
4. View and apply the adjustments to darken the glare
At the bottom of the work area is a tick box that allows you to show or hide the red overlay. The keyboard shortcut is O.
With the overlay off you will be able to see the effect of your editing.
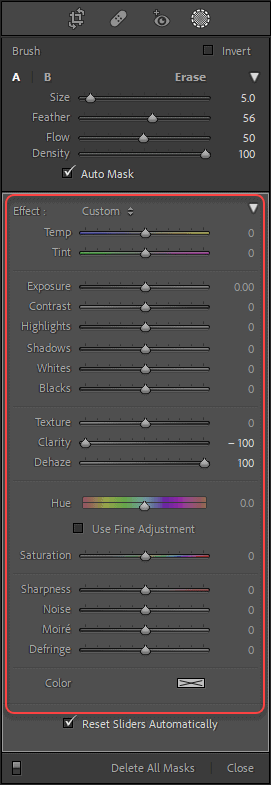
Start with setting the Clarity and the Sharpness to -100 (all the way to the left). It will help to blur and smooth the area even more after the Spot Removal tool.
Adjust the sliders to reduce the brightness of the glare. The aim is to match the exposure level and look to that of the surrounding face and eye areas not affected by the glare. Any combination of slider adjustments can be used.
These sliders are a good place to start.
Exposure: darkens mid-tones of the adjustment area, and can recover some detail.
Whites: use to recover detail in brightest and overexposed areas.
Highlights: use to reduce the glare in the light tones, and recover more highlight detail.
Do not go so far that you get a grey-looking blob appearing. It is better to err on the side of a little light than too dark.
Dehaze: this is extremely effective at correcting glare that has an even washed-out look. It increases local area contrast and will help recover more depth and define details.
If you are lucky, Dehaze might be all you need to correct the glare in your image.
Used with a fine brush, Dehaze is also a good way to bring back definition to the surrounds of the iris and the eyelash areas.
Hue and Saturation: these two sliders are useful for correct glare that has a color cast to them.
Click Done at the bottom right, when you are finished editing.
5. Make new adjustments
You most likely will need to create a number of separate adjustments for different areas of the glare. Not all areas will need to be darkened the same amount or adjusted the same way.
At the top of the adjustment brush panel, select New to create another pin.
There is no problem with having multiple pins which cover the same area. Just avoid having so many pins that it gets difficult to follow what you have done.
Double-click Effect to zero out all the settings for the brush. You can then start fresh by adjusting the sliders.
6. Edit adjustments
You can edit and adjust the settings of any adjustment brush as many times as you need.
Click again on the Adjustment Brush tool. Then click on a grey pin to edit its sliders. A black dot in the center of the pin shows the current selection. Pressing H will show and hide the grey pins.
To refine the editing you may need to change your brush and feather size to paint in the precise areas you require. In the last section is also an Eraser option, which you can use to further refine your areas.
Combine the techniques together
Here we have outlined the most useful Lightroom tools for removing glare from glasses. You will find there is no single best tool to reduce glasses glare.
Expect to use a combination of these techniques on your images. With experience, you will be able to quickly choose the tools and adjustments that best suit the image you are working on.

We have now covered what you need to know to get in and correct the unwanted glare in your images. With knowledge of the best tools in Lightroom, you should feel ready to start editing your own images.

