Shooting with a wide aperture gives a nice separation between the subject and the background. The shallow depth of field smooths unwanted detail that might compete with the subject.
So, the question often arises—how do you achieve that when you shot with a larger depth of field? Or, when your lenses aren’t quite up to the task?
You can still add some of that lovely cinematic quality by blurring your background in Lightroom. It is a great trick that can give your images a more professional feel.
Lightroom has a few different tools you can use. Here we take you through exactly how to blur the background using Lightroom Classic.

Blur in Lightroom is not the same as natural lens blur
The lovely bokeh effect that photographers so often adore is not going to be reproduced by Lightroom.
Blurring the background in Lightroom is a bit of fakery. But, done well it can enhance your photo compositions.
It is almost always better to create the depth of field effect you are after at the time of the shooting.
We know that doesn’t happen every time. So, this is the next best option.
Assess your image
It is very important to take some time to look closely at your image before you start.
Think about where blur would occur if the image was shot with a wider aperture. The more familiar you are with how natural blur looks, the better you will be at creating images that don’t look obviously edited.
Making the choice of what to blur is the key to improving your images. Poor choices or careless selections can be very obvious and lead to less than convincing results.
Keep in mind that the depth of field in an image is one-third in front of the focus point and two-thirds behind. Use that to guide your selection decisions.

Select your background area with local adjustments
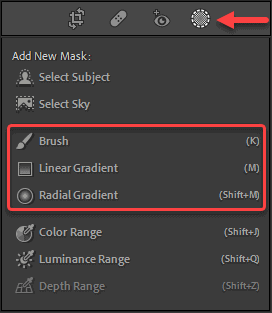
There are three main tools in Lightroom to select the areas you want to adjust. These are the Adjustment Brush (K), the Linear Gradient filter (M), and the Radial Gradient filter (Shift M).
Each one has a different method for creating selections and will achieve a different kind of result.
Access the local area adjustment tools in the Develop Module, via the tool strip under the Histogram.
Settings to create blur
There is no tool in Lightroom that is marked as a blur. For each of the adjustment tools, you need to use the Sharpness and Clarity sliders.
The Sharpness slider defaults to 0 in the center. When dragged to the left Sharpness is reduced and the effect is to blur the image.
Clarity works a little differently from Sharpness. Taking the slider to the left softens and reduces textures in the image.
You can probably take both of these sliders to -100 as a starting point. The effects of both are quite subtle compared to shooting with a shallow depth of field.
Useful shortcuts for the local Adjustments tools
- Use O to hide and show the mask overlay
- H will hide and reveal your pins
- To reset the sliders, double-click the word Effect at the top
Blurring the background with the Brush

The adjustment brush is very versatile and lets you paint the blur effect exactly where you need it. This is often the best choice to apply the blur accurately across various parts of the image.
When to use the Brush?
The Adjustment Brush works well when the background is all at the same distance from your camera, and there is no ground in the shot. Use it to select and blur all areas except your subject.
It is also useful for more complex shots. You might have some mid-ground areas which are distinct from the background. With some effort, these can be adjusted separately with less blur.
How to use the Brush
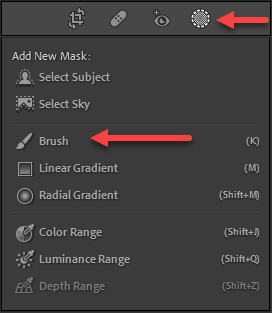
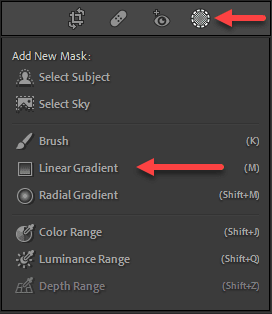
Click the round Masking icon in the tool strip underneath the Histogram, and select the brush icon (Or hit K).
The bottom section of the panel controls the brush settings.
You will see a cursor with two circles that indicate the Brush Size and Feather amount. Adjust both of these with the Sliders to get values that suit.
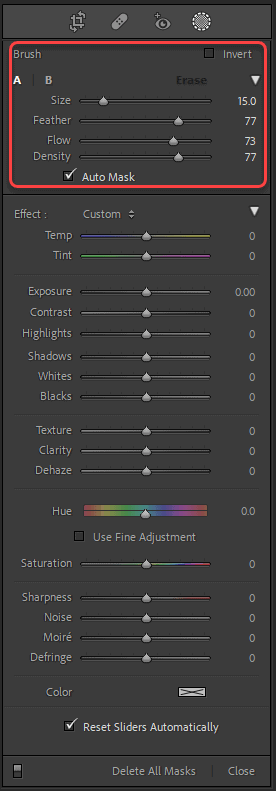
Use a large brush to cover big areas of the background first. Then use a smaller brush with almost no Feather for going around your subject. This will prevent you from getting any weird halos at the edges.
Take your time to get your selection as accurate as you can. Use the Eraser option to clean up any areas you need to correct.
For most areas, set the Flow on your brush to 100. You can adjust this if you have any areas which require less blurring.
Use the Auto Mask setting to constrain your selections to only areas of similar color. It works very well in some cases, but may not always work how you want, or with all images.
Typically only a single selection area is required for the background blur. When necessary, add more pins by clicking on New at the top of the panel.
Blurring the background with the Linear Gradient Filter
The Linear Gradient Filter (M) allows you to apply the blur in a gradient across your image.
What makes the Linear Gradient Filter very useful is that it simulates how focus naturally falls away in an image.
When to use the Linear Gradient Filter?
This is the ideal local area selection tool to use when you have the ground in shot.
The point where your subject is located is where you want the focus to be. Then any areas behind your subject, or in front will be gradually less in focus as you move further away.
Another use for the Linear Gradient Filter is when shooting along a wall. Any plane or line of objects which is angled or perpendicular to your camera sensor would have focus decrease as it recedes into the distance.

How to use the Linear Gradient Filter
The Linear Gradient Filter is the rectangular icon in the middle of the tool strip.
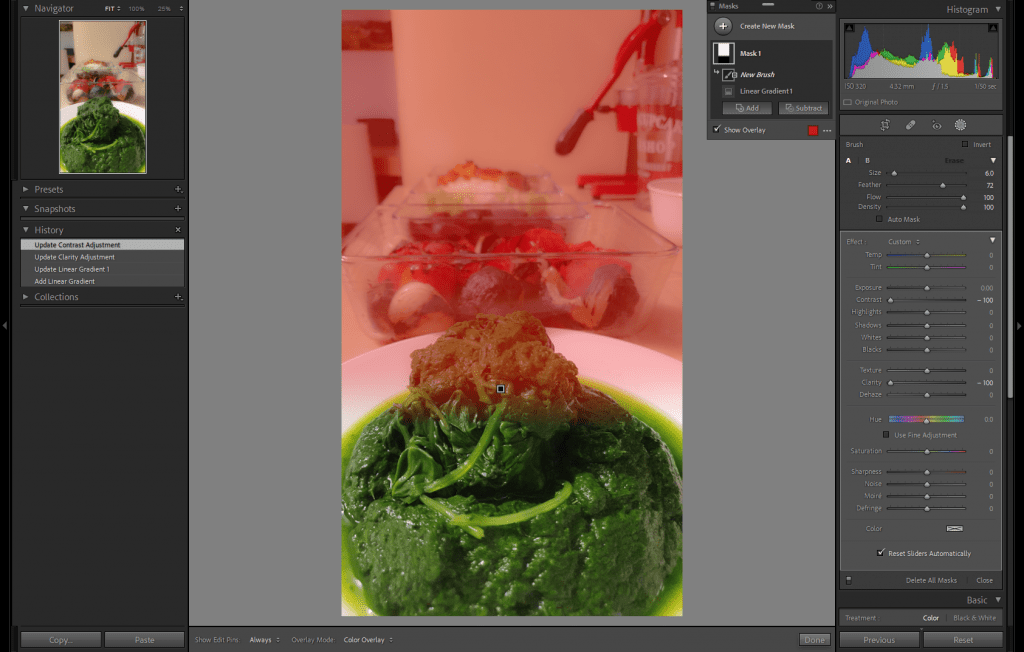
Usually, a two-step process is needed. First, you will create the gradient selection. Next, you need to remove parts of the gradient from the subject.
What you want to end up with is a gradient selection that only covers the background.
Step 1: Create the gradient selection
To define the selection area, click and drag the cursor across the image.
Three lines will appear across your image with a gray pin in the center. At the midline, the effect is applied at 50% strength. The two outer lines represent 0% and 100% strength.
Grab and move the center pin to reposition the gradient. Drag the outer lines to extend it. Hold down Option or Alt to expand the outer lines evenly, whilst keeping the midpoint fixed. Rotate the gradient by dragging the midline anywhere except the center.
The ideal position for the zero line of the gradient is close to your subject. It might need to be placed a little away. You need to judge this by the content and composition of your photo.
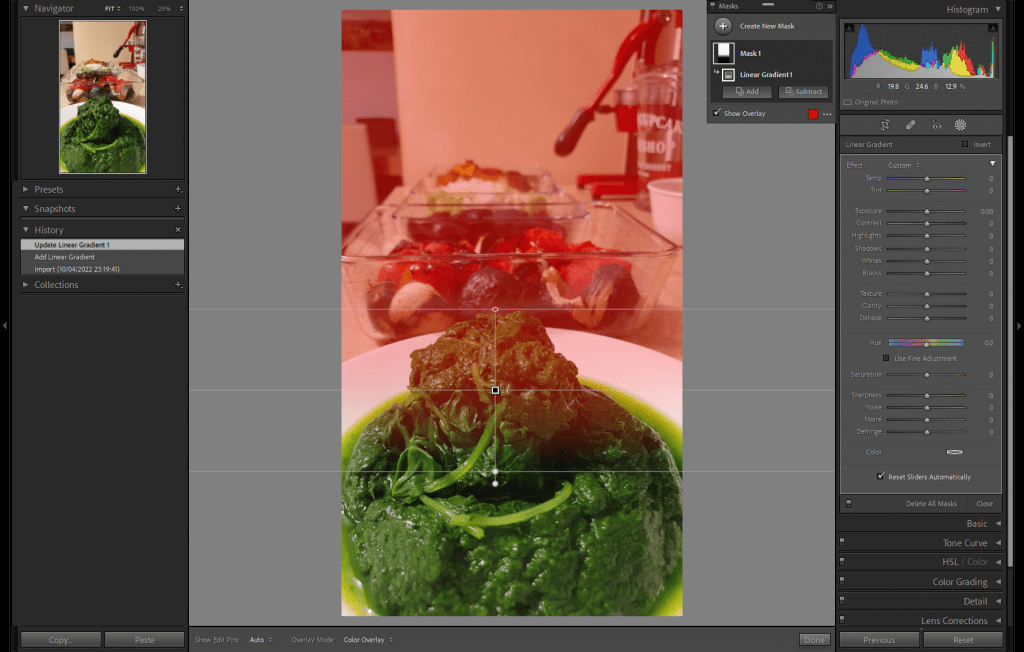
Adjust the blur amount with the Sliders. Make sure the position is correct before you move to Step 2.
Add a new gradient pin when there is some foreground area to blur. Click on New at the top of the panel to add another pin.
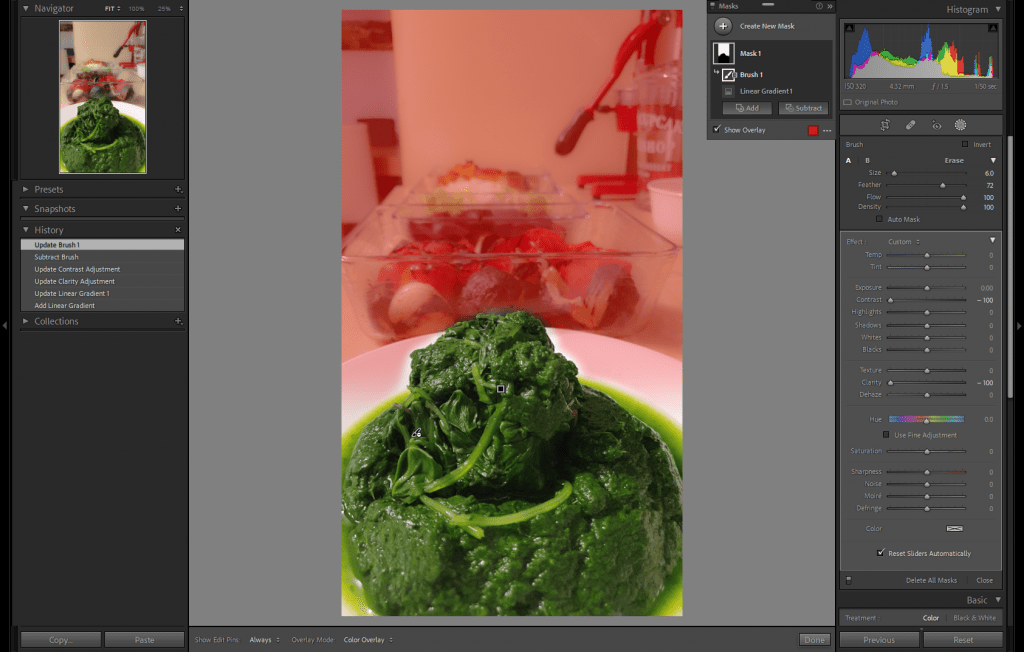
Step 2: Remove the selection from the subject
At the bottom of the Masks panel, click on the Subtract to add a Brush to the Mask you are working on in addition to the Linear Gradient you already have.
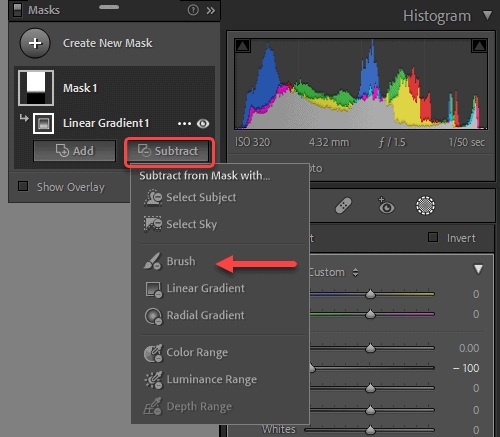
You will see a New Brush with the minus sign (-) added above the Linear Gradient.
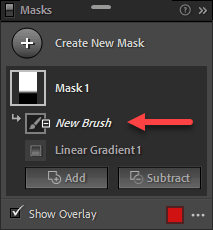
Choose a brush size to suit and set the flow to 100 so the effect is completely removed from your subject.
You may find that Auto Mask is useful. Turn it on using the check box in the Brush setting panel. It can help restrict your erasing to just your subject.
Otherwise, make sure you select a fairly small brush. Carefully erase the mask from your subject and leave the gradient in place. Take your time.
Avoid having to paint any areas back in. You want to keep the gradient selection intact in all areas which are not your subject.
Blurring the background with the Radial Gradient Filter

The Radial Filter will apply blur to your image with a round or elliptical mask. It is not going to achieve a very realistic background blur in most cases. This is more about emphasizing your main subject in a stylized way.
If you want a realistic background blur, then stick to the other selection tools.
When to use the Radial Gradient Filter?
Use this simple selection to bring a romantic or fantasy quality to an image.
It can work on outdoor portrait photography, wedding images, and still lifes. With the right composition, it may also be useful to add drama to sports and action photography.
How to use the Radial Gradient Filter
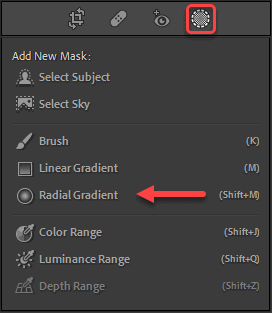
Click the round Masking icon in the tool strip underneath the Histogram, and select the Radial Gradient, or click Shift + M.
When you drag the cursor across the image you will create a circular selection. Check the Invert, so the blurring effect will be outside the marquee.
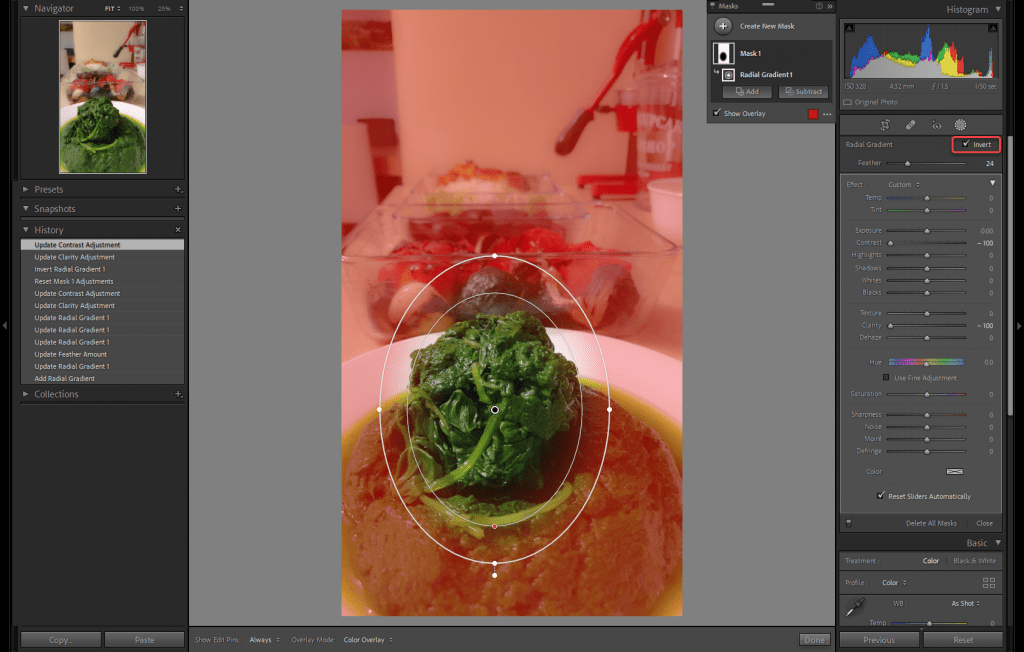
Constrain your selection to a perfect circle, by holding down the shift key as you drag. Use the handles to adjust the size and shape, and grab the central pin to move it around.
The softness of the gradient is controlled with the Feather slider at the bottom of the panel. The more feathering you add the softer the selection area.
Again you can use the brush tool to edit areas that you don’t want to be blurred.

How to make the blur more intense
Many times a subtle blur is all that is needed. Yet, there are cases when even with settings at -100, the amount of blur is less than you hoped.
The easiest way to multiply the effect is to duplicate your existing Mask with the blur. Right-click on the Mask and select Duplicate from the menu. Duplicate a few times if necessary.
You will find that duplicating Clarity may create an unnatural fuzziness or haze across the image. Try using the Clarity slider on just the final of the duplicate pins for a better result. Use only the Sharpness setting on the others.
That concludes the run-through of options to blur the background in Lightroom. Take this knowledge and start adding some extra depth and sophistication to your photographs today. You will be very glad to have this technique in your arsenal of photo editing know-how.

