To work quickly and accurately in Lightroom Classic you must be able to efficiently navigate your image. Sometimes you need to see the full image. Other times viewing the fine details is crucial.
Speedy navigation from one view to the next is a real time saver.
Zooming in and out on your image might seem like a simple operation. Yet, Lightroom has plenty of different options for this. Not all of them are obvious.
Here we take a thorough look at how to zoom in Lightroom Classic.
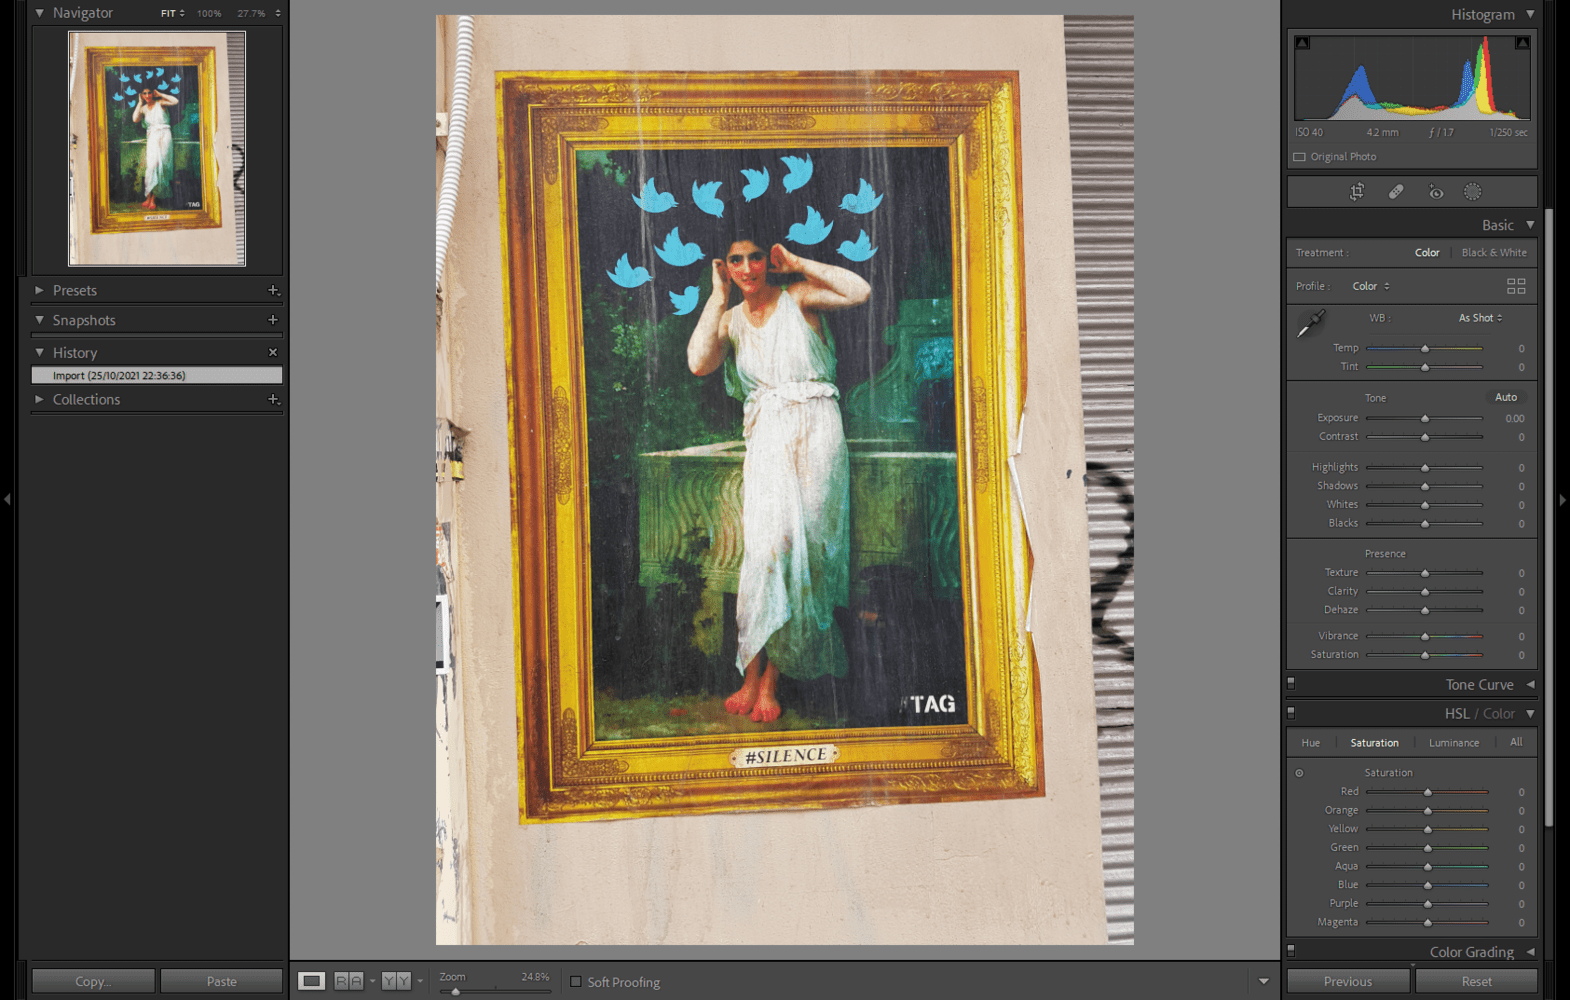
The Navigator Panel
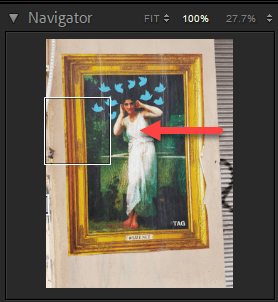
This is the center of control for moving around your image in Lightroom Classic.
You will find the Navigator Panel at the top of the left side panels in both the Library and the Develop Modules.
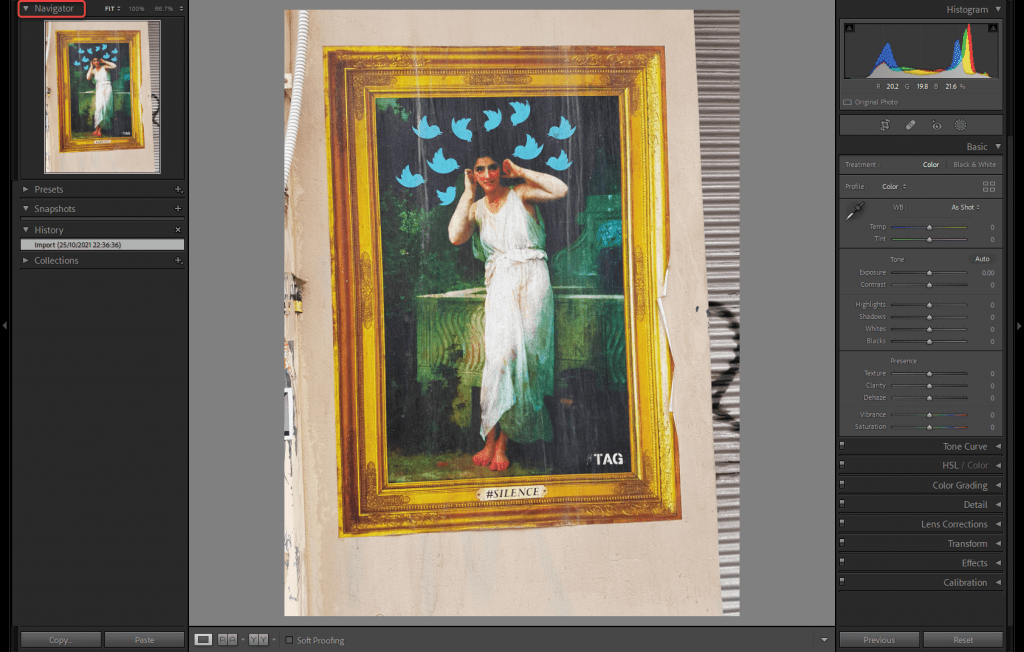
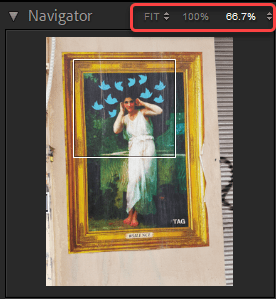
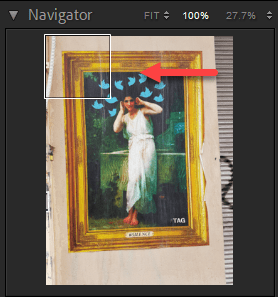
A white frame overlay on the image thumbnail indicates which part of the image is displayed in the work area. Click anywhere on the thumbnail and the main view will update.
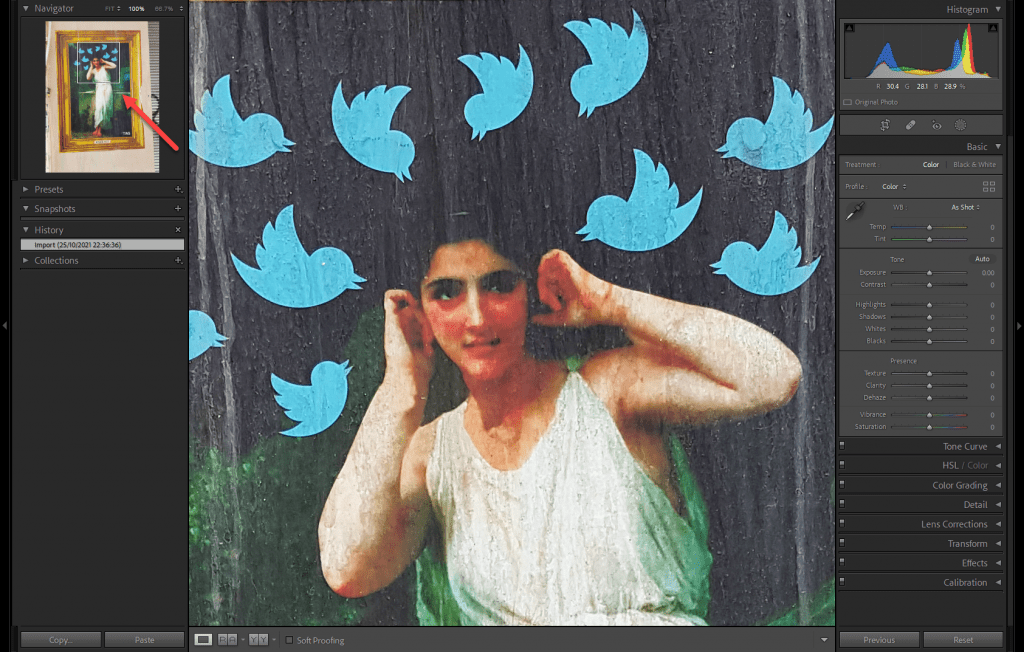
You can also drag the frame overlay around in the thumbnail. Or, drag the image in the main work area to pan across different parts of the image. The cursor shows as the hand tool.
Zoom Levels
At the top right of the Navigation panel is a list of zoom levels. The current selection will have white text, the others grayed out.
It is arranged into two drop-down menus and 100%.
The Zoom level only changes how the image is displayed in Lightroom. No changes to the actual image size are made.
The first drop-down option is Fit or Fill.
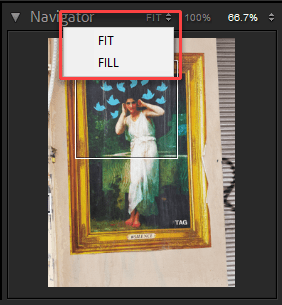
Fit: ensures the entire image is visible in the main work area. The size of the image on the screen varies with how your interface is set. If you show and hide the filmstrip at the bottom, the image will increase and decrease accordingly.
Fill: makes the image cover the entire work area. It will crop the image as needed so this happens. Again, it dynamically updates when you hide or show parts of the interface.
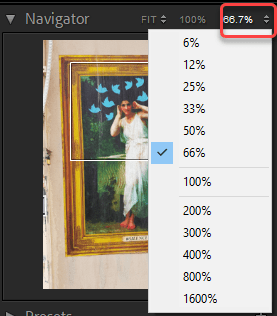
100% shows the image at actual pixel size.
Preset zoom levels: The final zoom level option can be selected from the drop-down menu. The options range from 6% to 1600%.
Lightroom remembers your last zoom level
When you select a zoom level, Lightroom remembers it. Click on the image or press the spacebar to toggle between two zoom levels. Pressing Z works the same way in most cases.
When viewed at either Fit or Fill, clicking on the image will automatically zoom to your last zoom level.
In Fit view, the cursor will show as a magnifying glass with a + or -. This tells you whether Lightroom will zoom in or out when you click. You can see your last zoom level at the top right in the Navigation Panel.
Click again and the zoom level goes back to either Fit or Fill view. Lightroom remembers whatever you had selected last.
This works in the Library and the Develop Modules in Loupe View, Compare View, and Before and After. In Compare View in the Develop Module, the two images must be zoomed independently. This method does not work if you are using another specific tool like the Brush.
Other methods of controlling the zoom level
Lightroom offers multiple further options to control the zoom.
Keyboard shortcuts for zooming
This is generally the easiest and most commonly used method.
Use Cmd-+/- (Mac) or Ctrl-+/- (Windows) to zoom in and out. Each time you use the shortcut, the zoom level changes in steps. The presets levels are the same as listed in the Navigation Panel menu.
Use Cmd-Option-0 (zero) on Mac, or Ctrl-Alt-0 (zero) in Windows to zoom to 100%.
Use the Zoom slider
You can adjust the image magnification with the slider in the Toolbar.
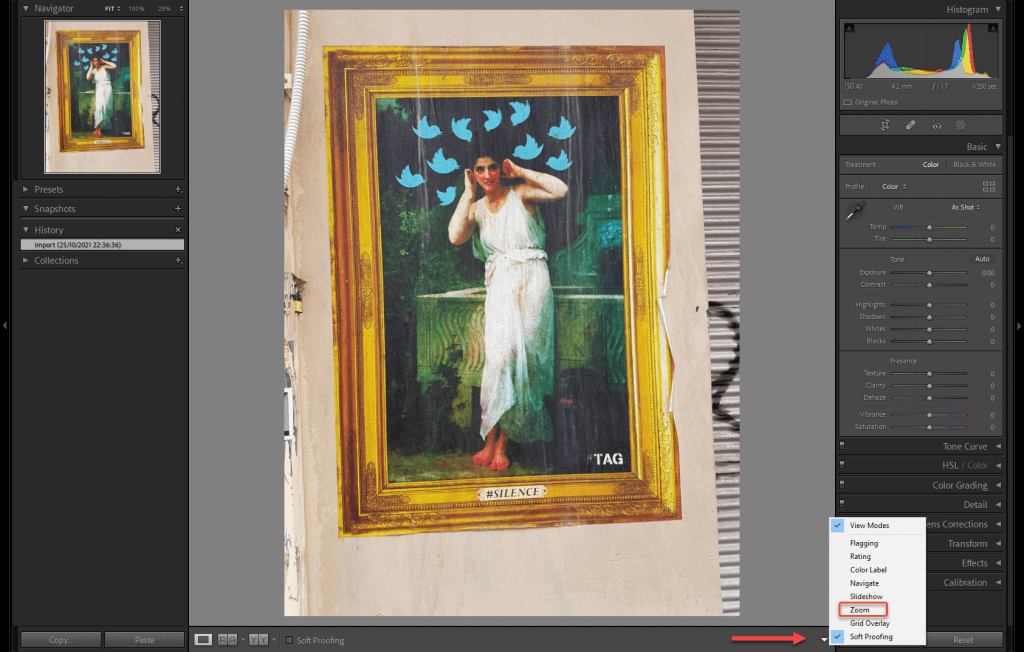
The Zoom Slider may not be visible by default. You can add it to the Toolbar under the work area. Press T to show the Toolbar if it is not visible.
Add the Zoom Slider by clicking on the triangle at the right side. The drop-down menu lists which tools are visible. Make sure there is a tick next to Zoom.
The Zoom Slider has a midpoint marked at 100%. To the left zooms out. Slide to the right to zoom in.
Double-click on the word Zoom in the Toolbar to return to 100% at any time.
Box Zoom
This allows you to zoom to a specific place in your image. The great thing is that it’s a lot faster than zooming in steps and then panning to get to where you need.
Hold down the Cmd or Ctrl key. You will see a little dotted box appear behind the cursor. Now drag out a marquee across the image area you want to enlarge. This area will then jump to fill your viewing area.
Box Zoom works in the Library Module Enlarge or Compare Views. In the Develop Module Compare View you need to zoom each image individually.
Zoom with the mouse
The Box Zoom feature also allows you to use a mouse scroll wheel to zoom.
Hold down Cmd or Ctrl, then scroll in and out using your mouse scroll wheel. Lightroom will zoom in or out in steps.
Scrubby Zoom
Scrubby Zoom lets you zoom zoom to any level smoothly. Not just in set steps. It works in the Develop Module.
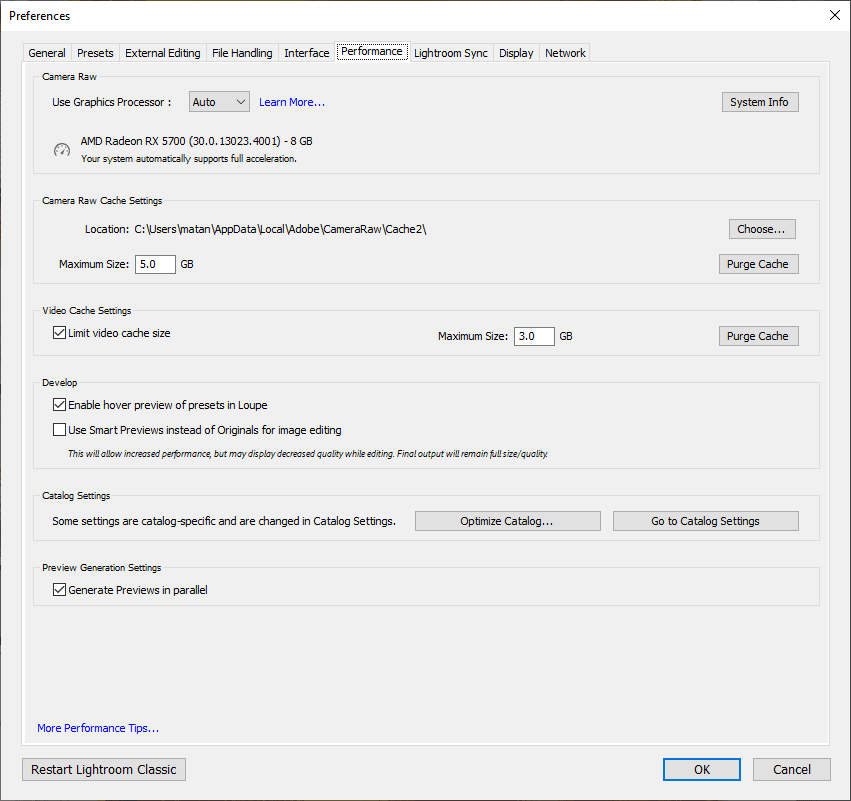
You need to ensure that Use Graphics Processor is not off for this feature to work. Open Preferences. You will find these in the Lightroom menu on a Mac, or the Edit Menu in Windows. Select Performance to check the setting, then hit OK.
Hold down the Shift key and two arrows appear around the magnifying glass cursor. Now hold down the left mouse button and move right to zoom in. Move the mouse left to zoom out.
This works best with a mouse. You can do the same thing on a trackpad, but it is not always as comfortable to make work.
Zoom with Gestures
With a trackpad, standard gestures can be used to change the image magnification. Lightroom will zoom in steps that match the preset zoom levels.
Move two fingers apart to zoom in. Pinch together to zoom out. This gesture action should be familiar from other applications, or mobile device interfaces.
Use two fingers together on the trackpad to pan across the image.
Your computer trackpad settings may affect exactly how the gesture functions work. Double-check there if you have any issues.
How to Center the zoom point
This is a handy option that keeps the point you click as the center of your zoomed view.
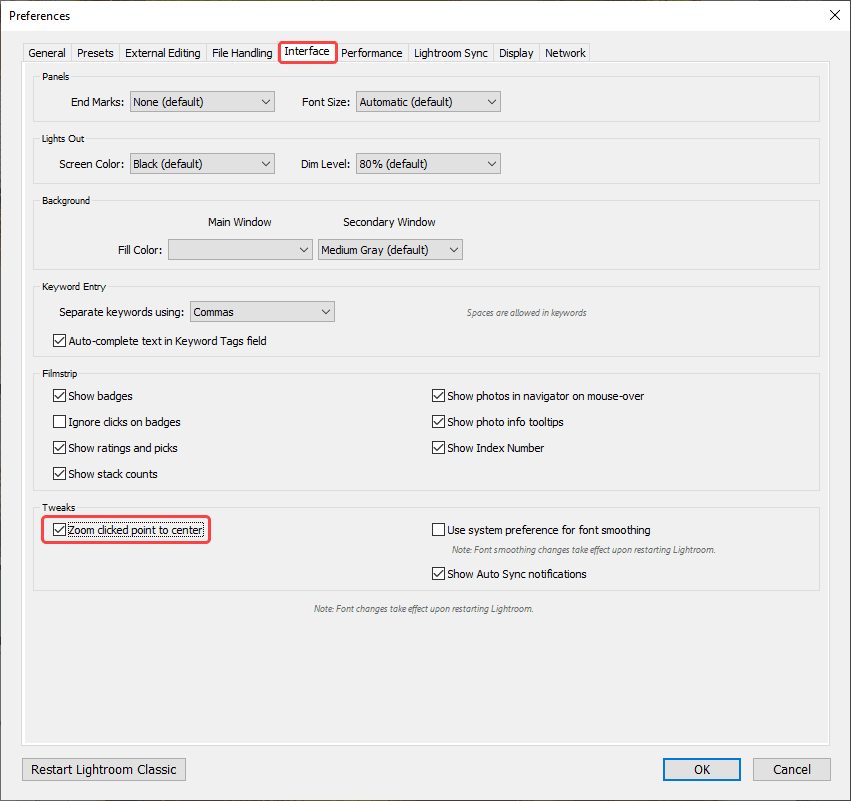
Open Preferences. Go to Interface and at the bottom is Tweaks.
Check the box next to “Zoom clicked point to center”.
How to lock the zoom
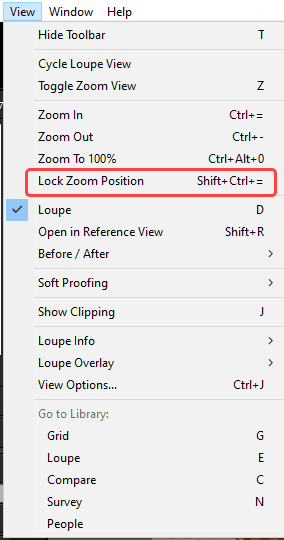
Lightroom has a menu option that allows you to lock the zoom position. Go to View > Lock Zoom Position.
This means that when you move from one image to another the zoomed image area that is visible remains the same. It does not jump about.
This is very useful when comparing images, or for culling.
Methodical zooming
Sometimes you need to make a thorough assessment or final check of all areas across your image.
Set your view to see the desired level of detail. Make this at least 100%.
On windows press the Home key. This sets the view area to the top left corner. Navigate down the image using Page Down. Each time you press it will show the next section of the image until it has reached the bottom right corner. End and Page Up can be used to start from the bottom right.
On a Mac use fn + left arrow to go to the start or fn + right arrow to go to the end. Navigate using fn + down or up arrows.
That concludes our walk-through of how to zoom in Lightroom Classic. There are numerous options, so you can select whichever suits you.
The best advice is to test each one out to get a feel for them. You should naturally start to gravitate towards the ones you prefer.

