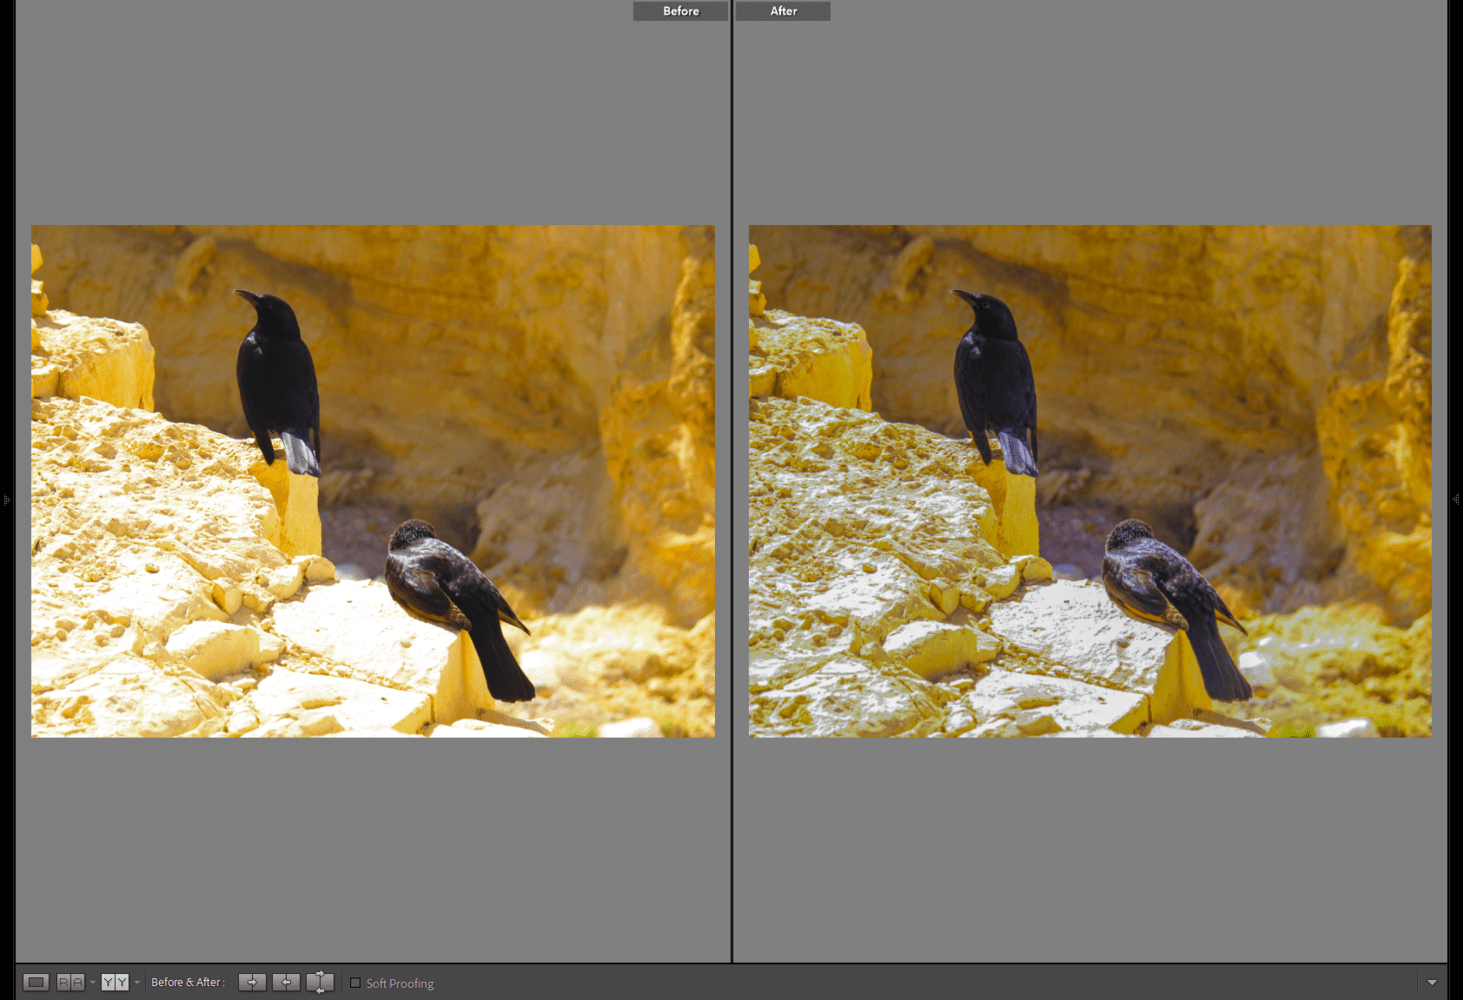
It is impossible for anyone to always hit the perfect exposure. So, learning how to handle an overexposed image is an essential skill for every photographer.
In the world of digital photography, cameras are generally quite good at capturing detail in the shadows. They can be lightened and overall image balance restored. Overexposed files are more likely to have missing detail.
This makes an overexposed file one of the more tricky editing tasks. In this article, we explain the best editing techniques to rescue your overexposed images and recover as much detail as possible.
This tutorial is especially written for Lightroom Classic (LrC) users.
Correcting the exposure is the first step in post-processing. Get this right, and you have a solid base upon which you can craft a fabulously well-edited final image.
RAW versus JPEG files
There are definitely times to shoot each format. Yet, when it comes to editing overexposed images, you will be very glad you shot in RAW. A RAW file will result in a significantly better final image.
A JPEG file has already been processed by the camera’s internal software. Some level of contrast, sharpening, and noise reduction are applied. A RAW file contains all the image data the sensor captured and a wider dynamic range. When converted to a JPEG some of the data is inevitably discarded.
This is the reason that a JPEG straight out of the camera looks better than a RAW file. A RAW file can look flat and dull in comparison. The file is intended to be processed externally. The extra detail it contains is what allows maximum flexibility and post-processing possibilities.
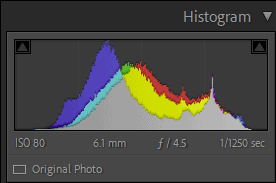
You can see an overexposed file in the Histogram
In the Develop module, the Histogram is located at the top of the right side panels.
The Histogram shows how much of an image falls within each level of luminance. It runs from completely black at the left to completely white at the right.
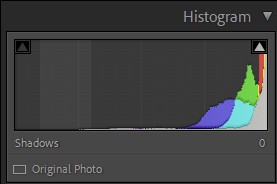
The graph of an overexposed image will appear as if it has been pushed to the right in the Histogram.
A well-exposed image tends to have the majority of its pixels in the mid-tones, highlights and shadows, and fewer in the whites or blacks. Though it will depend on the subject and the look that was shot.

How badly overexposed is your image? Take a look at the clipped areas
To understand the true state of your overexposed image you need to find out how much detail is there, and how much is missing.
Areas of a file that have no information are described as clipped. Clipping can happen in either the whites or the black areas of an image. The detail that was in the original subject has been lost due to too much or not enough light hitting the sensor.
In overexposed files, the clipped areas will be completely white, or blown-out.
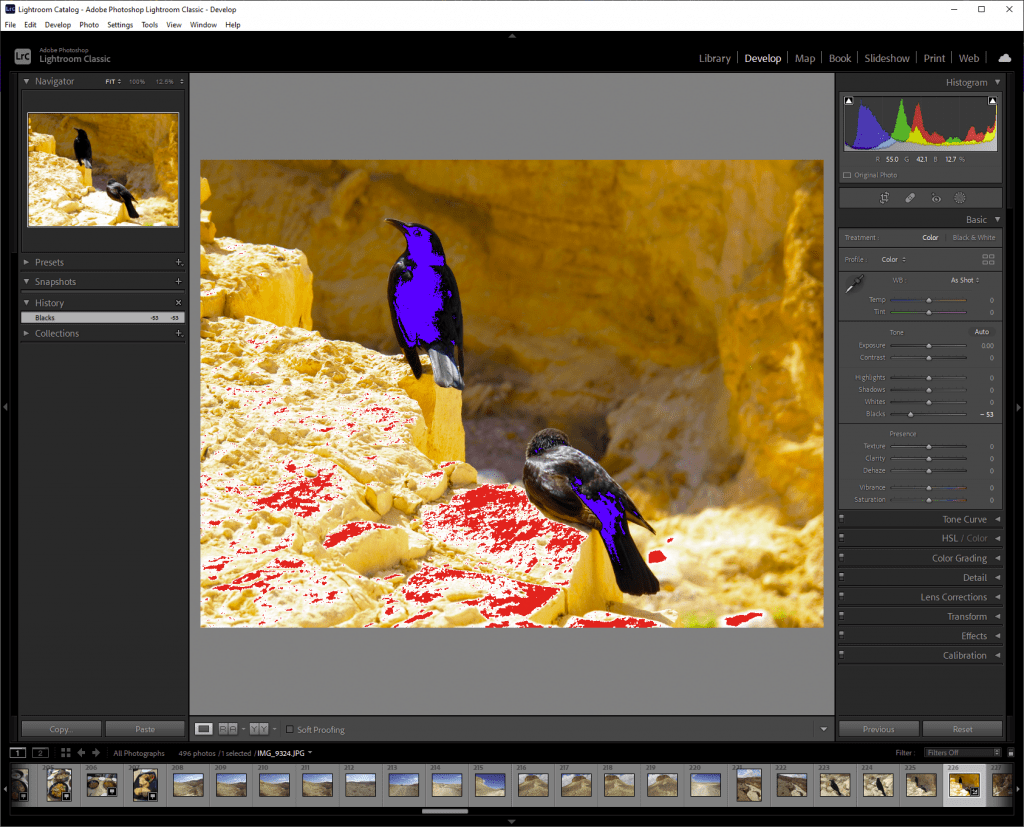
To see exactly how bad the overexposure is, press J. Lightroom Classic will now show you all the areas where clipping has occurred. The clipped Whites are displayed with a red overlay. Clipped Blacks will have a blue overlay.
An overexposed image may be bright, but not have much clipping. A few small spots here and there across your image are often not a problem. The exposure will be easy to correct and editing will achieve a great final result.
When there are large blobs of clipped whites, or those blobs fall across key areas of your subject, your task is tougher.
This is the point where you might choose to abandon an overexposed image and edit better-exposed alternatives instead. If you cannot correct the exposure adequately, there is often no point spending time on retouching or creative editing.
A specific image which is very important can still be edited, but be aware that it might be compromised.
View the clipping in an image to also check that any processing you do is not creating unwanted clipping.
The Basic Panel in Lightroom
When in the Develop module, the Basic Panel is found just under the Histogram on the right.
Sliders under the Tone section adjust image exposure. Editing in the Basic Panel will make global adjustments which affect the entire image area at once.
Playing around with the sliders in Lightroom can give some good results. However, it is highly beneficial if you take the time to acquaint yourself with what each one specifically does.
Adjusting the Tone Sliders to correct overexposure
Using the Exposure Slider seems like the obvious answer to correct an overexposed file. It is definitely going to be part of the solution, but it is rarely the whole answer.
Hover your cursor over each Tone Slider, and the relevant area of the Histogram will be highlighted.
Moving any Tone Slider to the left will darken the relevant tones. Slide to the right to lighten the tones.
The Tone Sliders in Lightroom can be adjusted in any order and moved around many times to achieve your final result. For an overexposed file, we recommend that you begin by adjusting the Tone Sliders in the following order.
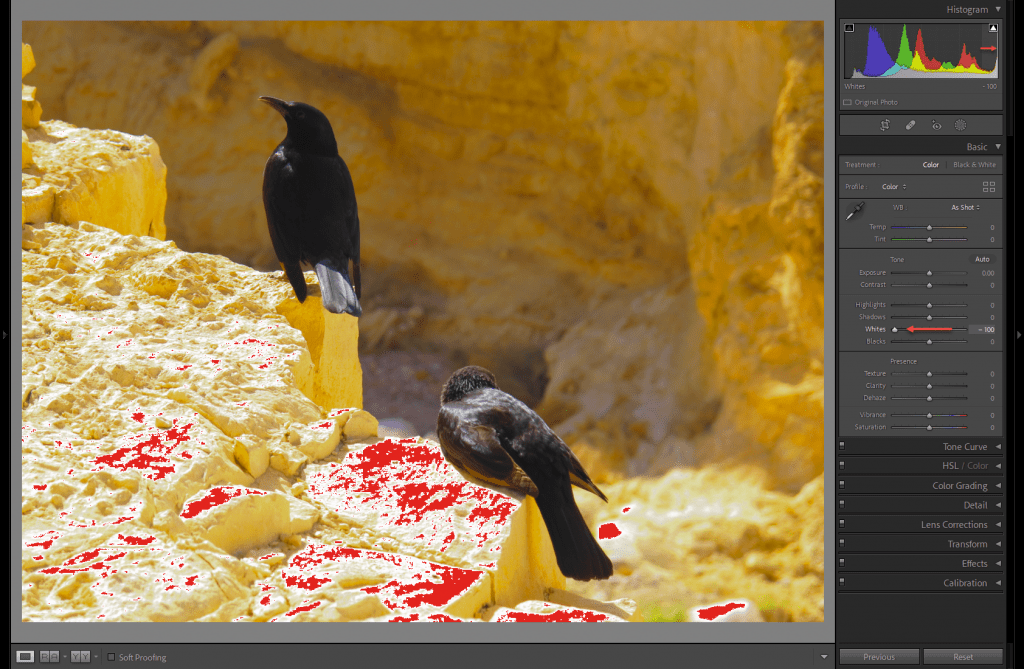
1. Whites
As discussed above, it is in the Whites that clipping may occur. Adjust the Whites first to see how much detail you can recover.
In a file which is 2 or more stops overexposed, you can probably bring the Whites down a lot. Try around -50 to start, but taking it all the way to -100 is also common.
If you only saw very small spots of clipping in the Whites, then you may not need to adjust the Whites very much at all.
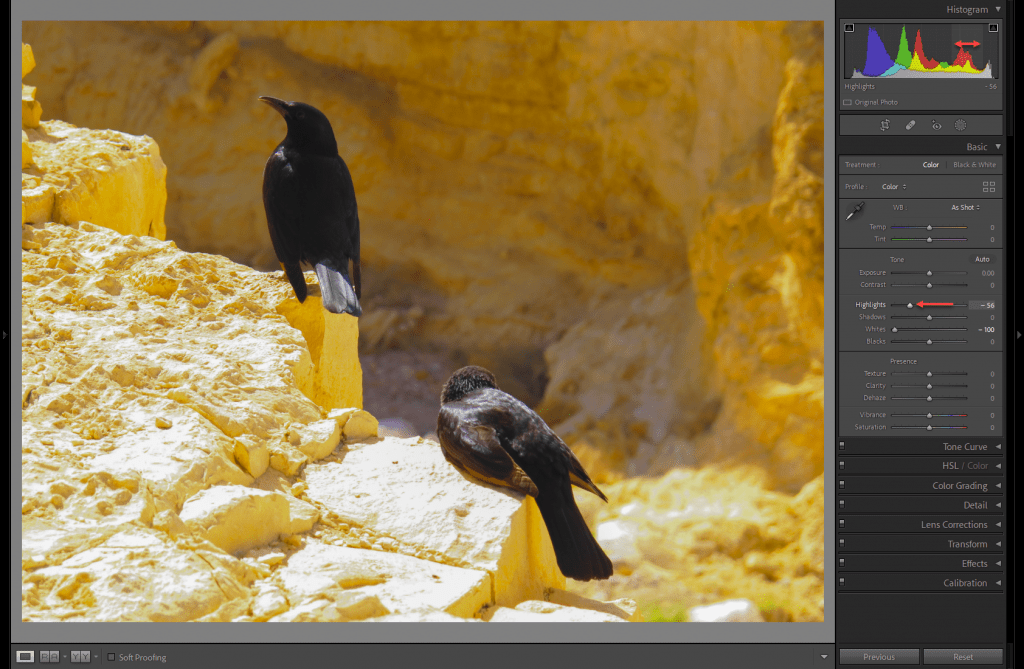
2. Highlights
Now lower the Highlights, by sliding to the left. Try around -20 to -30 to start. The amount required will vary.
Adjusting the Highlights makes a big difference when you have some image areas which are overexposed and others not. It will help bring the lighter areas back into balance with the rest of the image.
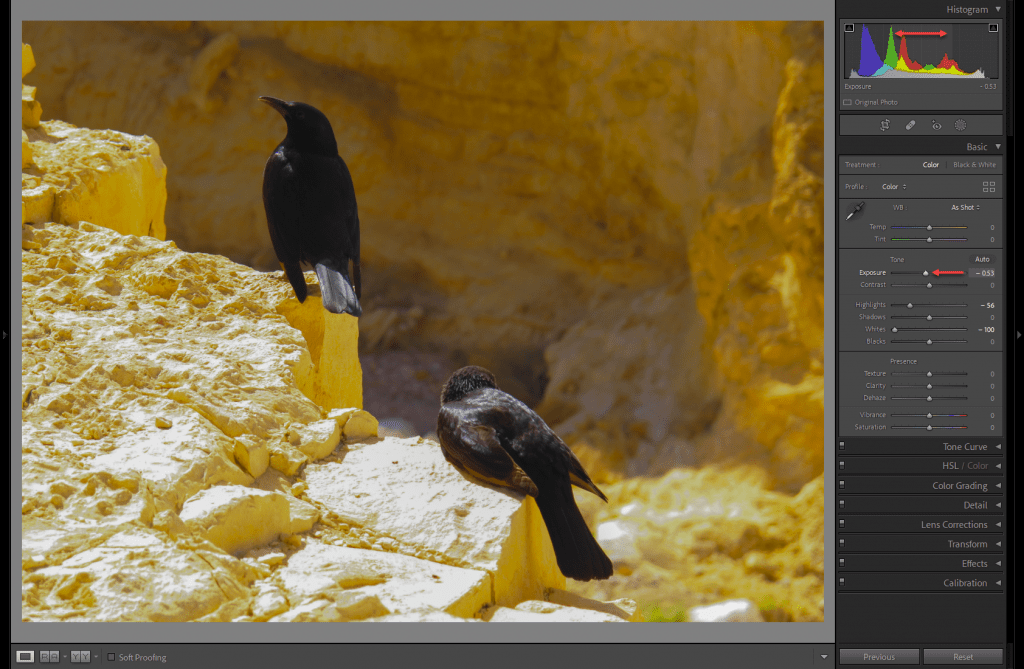
3. Exposure
Now that you can see the level of detail recovered in the Whites and the Highlights, it will be easier to find the right value for the Exposure slider. Keep an eye on the Histogram as you adjust the Exposure.
The Exposure Slider runs from -5 to +5, and is a lot more sensitive than the other tone controls. You can click on the number at the right and type in exact figures to make fine adjustments.
Once you have gone through the adjustments in this order, you can go back and refine them, as required.
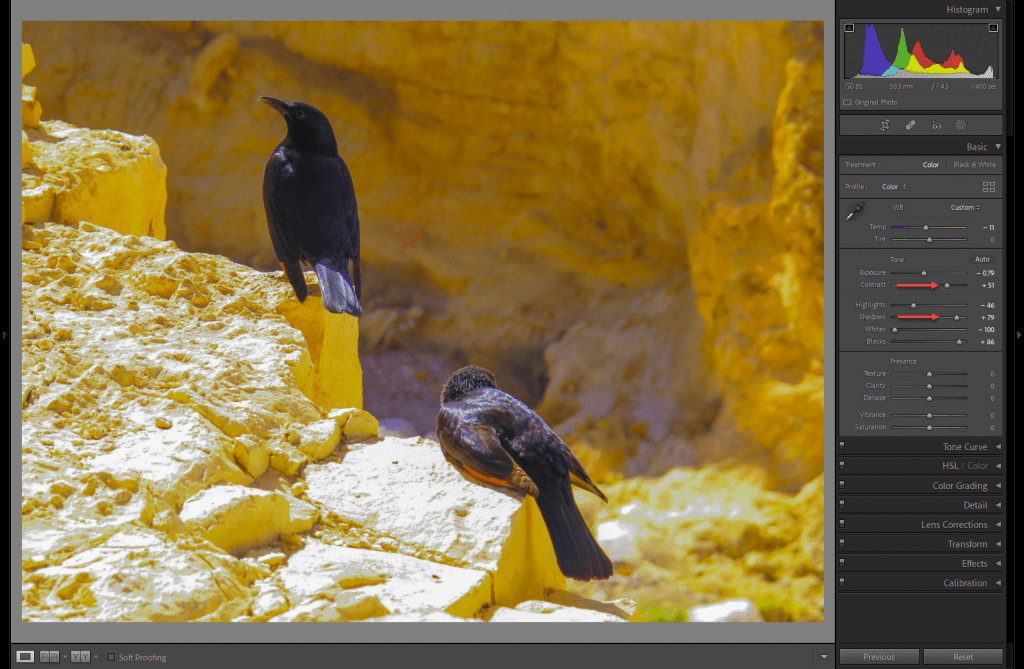
Bring back some definition and contrast
You may find your image is now looking a little flat. Increase the Contrast a little and darken the Shadows to help restore a bit of punch and dynamics to the image.
At the same time, lighten the Blacks to compensate for any unnatural deep tones caused by decreasing the Exposure.
Use local adjustments to target overexposed areas
Sometimes it is not the entire image which is overexposed. There may be specific hot spots. For example, your subject might be well exposed, but the background is blown out and distracting.
Use the local adjustment tools to restrict your editing to only the overexposed areas. They are located in the tool strip underneath the Histogram.
Use the Adjustment Brush tool to paint over any overexposed areas. Then make adjustments to the tones in a similar manner to the global adjustments above. Be careful not to create any unnatural grey blobs.
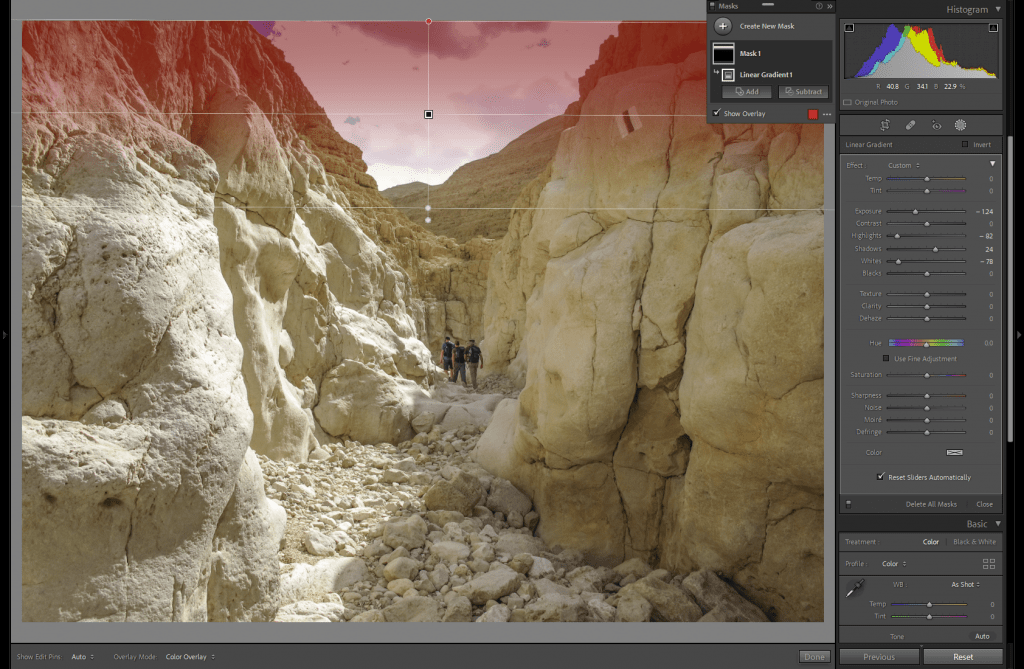
How to correct an overexposed sky with the Graduated Filter (M) and Luminance Mask (Shift+Q)
On bright overcast days, it is easy to end up with an overexposed sky. The Graduated Filter applies adjustments in a gradient across the image and is an excellent way to correct this.
With the Graduated Filter selected (press M, or, you can find it under Masking as Liniar Gradient), you will see a cross-hair cursor when over the image. Click and drag to create a graduated selection area. The further you drag the softer the graduation will be.

You will see three lines—the midpoint, start, and end of the graduation. Press O to toggle on and off the red overlay which shows the selected area. You can click on the grey pin, or the outer lines to move and adjust the position of each. When you hover over the center line the cursor will change to indicate that the graduated selection can be rotated.
Position the gradient so that it covers the sky or problem area of your image. Use the Tone Sliders to correct the overexposure.
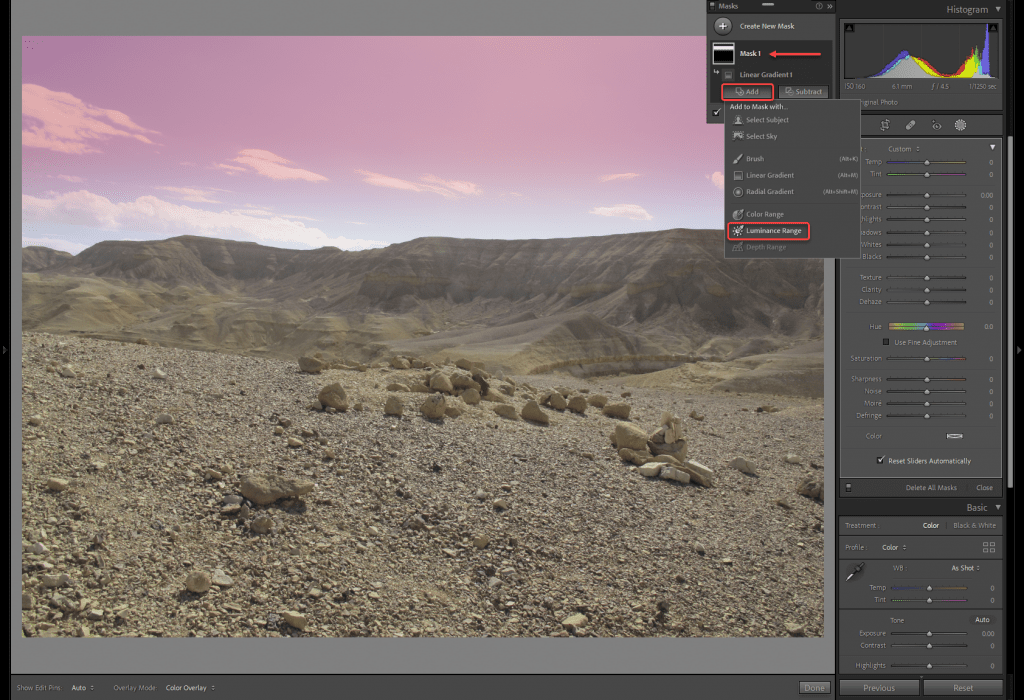
You can also add a Luminance Mask (press Shift+Q, or, you can find it under Masking as Luminance Range). This will target only areas within a specific range, and leave other areas unaffected. You can add the Lunimamce Range to the same Mask as the Linear Gradient (Note: The Keyboard Shortcut Shift+Q, is only for creating a new Mask), or you can Create a New Mask and choose the Lunimamce Range.
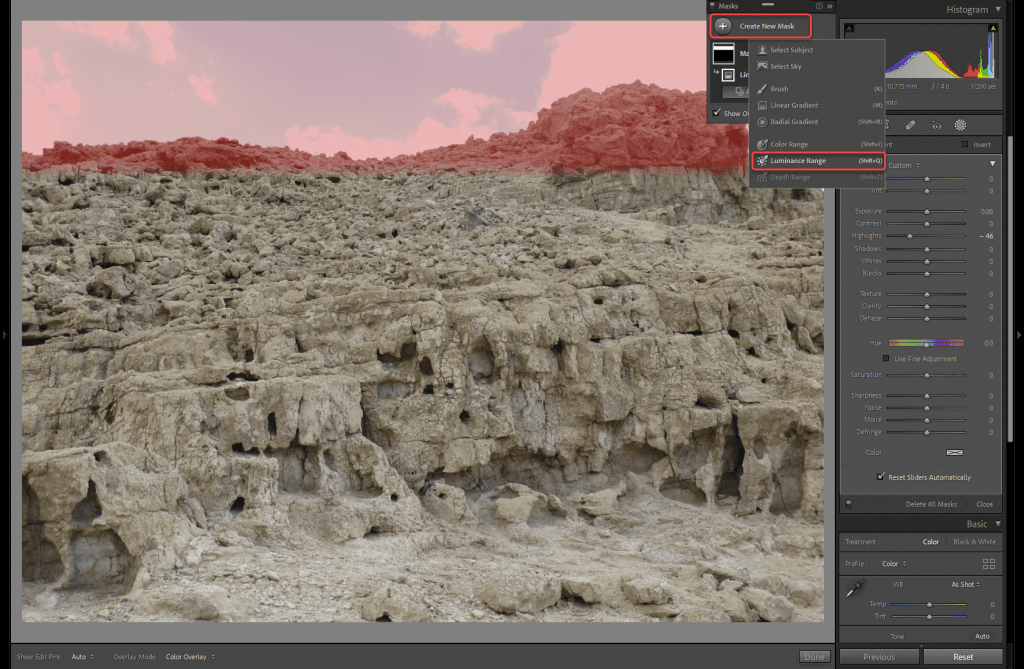
Use the sliders to select the luminance range you want to target. There are two little bracket sliders to control. Smoothness will change the fall-off rate of the effect—something like a feather value.
That covers the best tools in Lightroom Classic for processing overexposed images. We hope that you now feel ready to edit your own mages.
By using a combination of global and local adjustments it is possible to recover the detail in your file and restore a correct overall exposure.
Next, you can move on to retouching and color grading your image.

