Do you have some big shoots and looking to edit all your photos without sitting for days in front of your computer? When you have dozens or even hundreds of photos to edit, the task can seem daunting.
This is the time to harness the real power of Lightroom Classic (LrC).
Lightroom makes managing and editing large numbers of images super-efficient. In other programs, you would need to open, edit and save each image separately.
There are several tools and techniques you can use to speed up your post-processing workflow. In this article, we introduce five ways that you can use Lightroom Classic to process your images in batches.
What is batch editing, and why would I use it?
Batch editing refers to tools and processes which let you edit multiple photos at the same time.
When you have many images you want to edit the same way, you only need to do it once. You do not need to go in and make every change individually. Or, adjust each file one at a time.
In short, it is a massive timesaver.
This is one reason that Lightroom is so popular amongst photographers.
Lightroom’s non-destructive editing
At the core of Lightroom’s ability to batch process photos, is its use of non-destructive editing.
For each edited image, a list of all the adjustments that you made is recorded. No pixels are actually altered. Your original files are not touched in any way.
With adjustments recorded as a list of changes, it is easy to apply the same edits to many images at once. Or, copy various edits between images.
Now let’s look at the tools you can use for batch editing in Lightroom Classic.
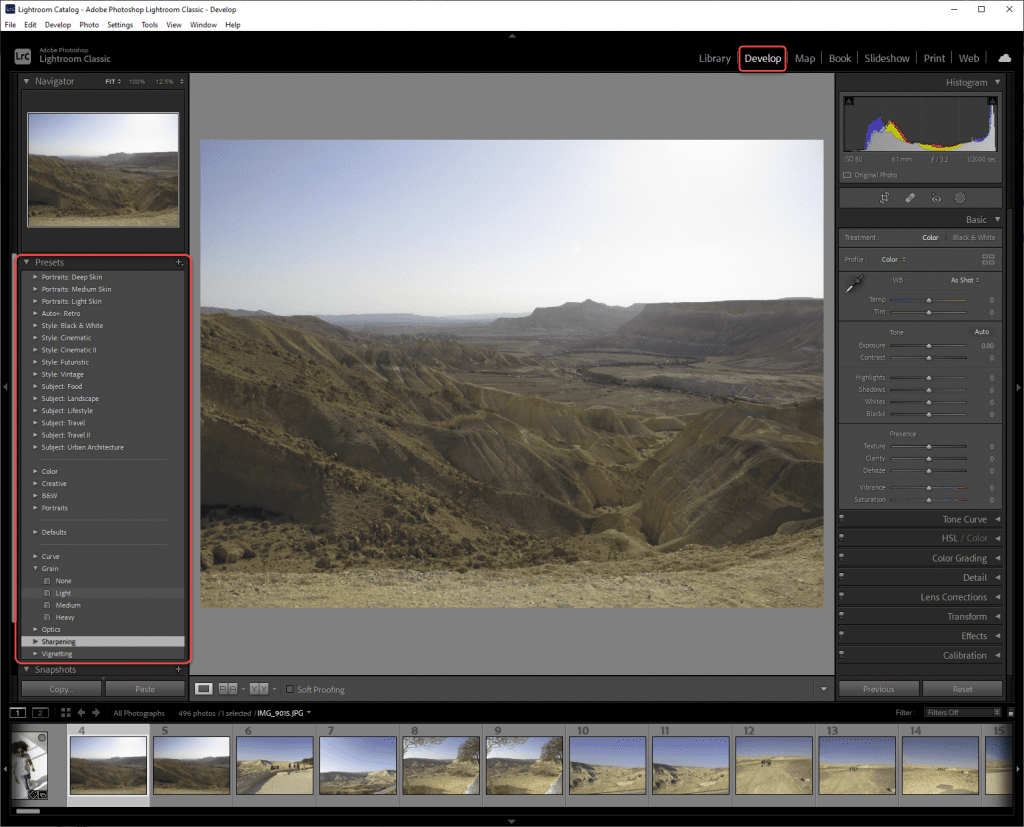
1. Presets
Lightroom now comes with a large range of Presets already installed. You will find the Presets located in the left panel of the Develop Module, underneath the image thumbnail.
Presets are like mini formulas of edits, and an excellent way to dramatically change the look of an image. Importantly for batch processing, they allow you to make many adjustments together.
Presets are arranged into groups so you can easily locate what you are after.
To preview a Preset, hover your cursor over the Preset name in the list. The image will instantly update to show you how the Preset looks.
Click on a Preset to apply it to your image. A Preset will make a range of adjustments which may be quite simple, or be a complex mix of several changes.
Can I apply several Presets at once?
You will notice that in some cases when you select a Preset it will replace the previous one that was applied. You cannot use two Presets which adjust the same settings. For example, you can only use one Preset which changes the saturation and color in an image.
For Presets which add a single effect like grain or sharpening, you will see there are different levels to select from. There is also an option for None to remove the effect.
Some Presets are designed to be layered together. That means you can build the look you want with multiple Presets. Other times a look is applied all at once and only one Preset can be used at a time.
After you have applied Presets, you can always adjust any sliders further to refine the look.
If you have new Presets you wish to import, click on the + at the top right of the Presets panel. Select Import Presets, then locate the Presets on your computer.
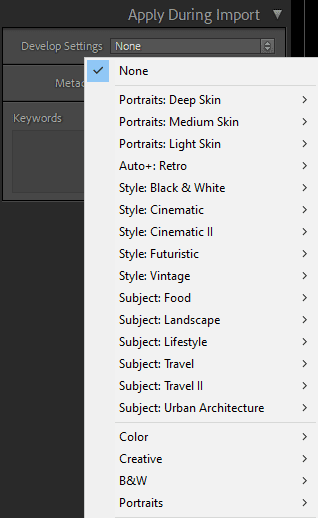
2. Apply Presets when you import your images
There are a few ways to apply Presets to multiple images at a time. The first option is to apply a Preset when you import your images into Lightroom.
Step 1. In the Library Module, click on Import and navigate to select your image files.
Step 2. On the right side of the interface will appear a panel called Apply During Import. Select Develop Settings and choose the Preset you wish to apply from the drop-down menu.
You can only select one Preset. You may want to create your own to apply exactly what works for your images and workflow.
This feature is incredibly useful for studio shoots. Or, anytime your images are all shot in the same conditions. You can also use it to add your favorite regular adjustments—like sharpening, grain, or noise reduction.
3. Synchronize settings for multiple photos
This is an extremely versatile and common way of batch editing images in Lightroom.
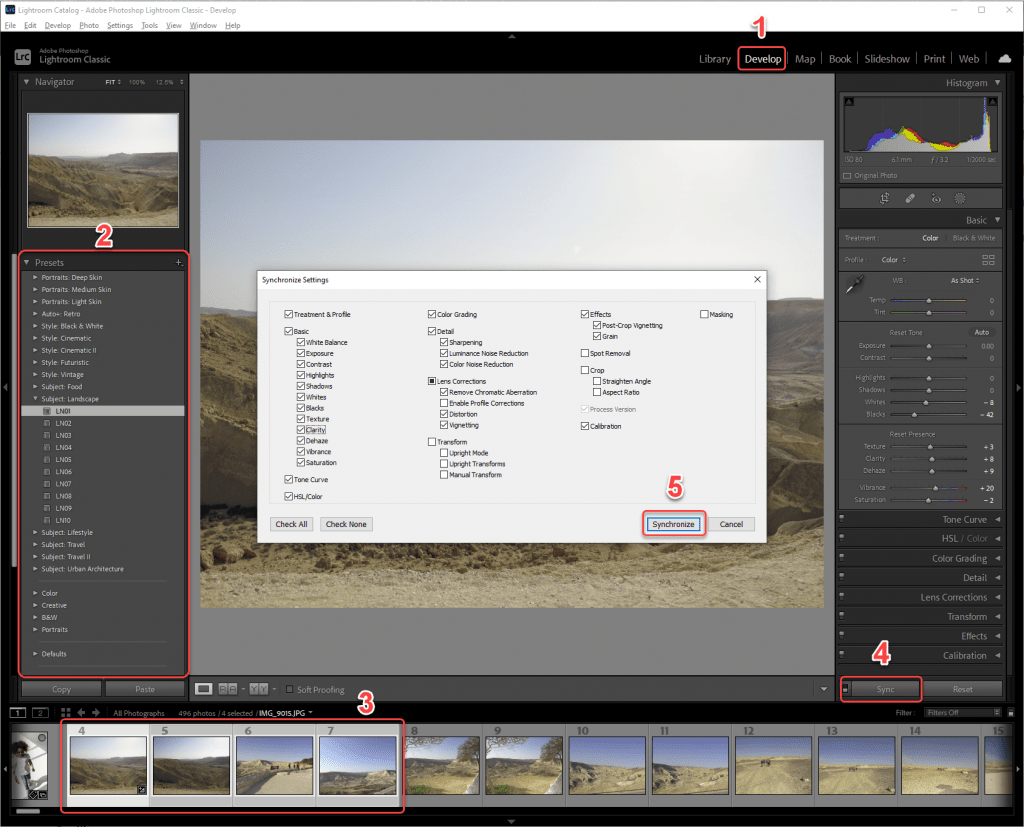
Step 1. In the Develop Module, select any image which is already edited as you want, including any Presets applied.
Step 2. Now select all the images you want to copy the edits to.
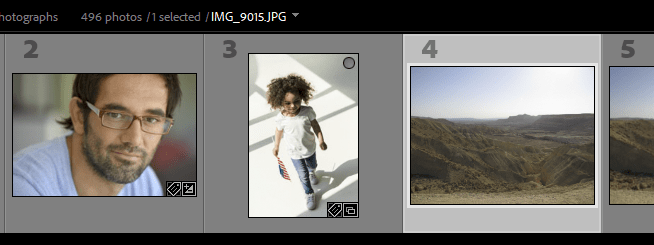
To select multiple images, go to the film strip on the bottom of the interface. Using either Shift-click or Cmd/Ctrl-click, select all the images you wish to edit.
Step 3. You will now see the Sync button at the bottom of the right side panels. Sync will copy the settings of the image you originally selected to all the other images you selected after.
Step 4. Click Sync to open the Synchronize Settings dialogue box. Here you can control exactly which edits you want to copy across.
The dialogue box has a lot of checkboxes. It might appear overwhelming at first, but it is all divided into sections. Most of these correspond to the panels on the right of the interface. One check will activate or turn off everything for each section. Underneath are checkboxes for each of the different adjustments which can be synced.
At the bottom left of the dialogue box are two buttons to quickly Check All, or Check None.
Step 5. Click Synchronize to apply the edits to all the images.
The dialogue box remembers what your last settings were. This is very handy when you get into the flow of copying certain settings to all your images.
You can synchronize your images as many times as you wish and with a different selection of images each time. This means you could apply noise reduction to all your images. Later you could copy exposure and white balance adjustments to only some images.
There is also an option to Auto-Sync. Toggle the Auto Sync switch on the Sync Button to activate it. Now every edit you make on the original image you selected will be automatically repeated on all the other selected images.
4. Quick Develop in the Library Module
You are probably familiar with editing in the Develop Module. What you may not realize is that you can also perform some basic editing in the Library Module.
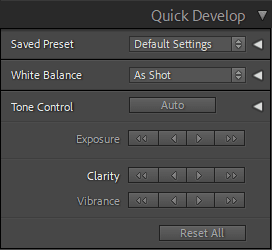
There is a panel on the right side called Quick Develop. Here you can see options to apply adjustments to all images you have selected.
A Preset can be applied, a crop ratio chosen, and color treatment set.
Below is a list of adjustments you will recognize from the Basic Panel in the Develop Module. Instead of sliders, there are a series of buttons that move the settings up and down in increments.
Use the single triangle buttons to move in small steps and the double triangle buttons for bigger steps. For exposure, you can increase or decrease in jumps of 1/3 stop, or 1 stop. For White Balance, Tones, Clarity, and Vibrance the steps are +/-5, or +/-20.
If you want to start again on all your edits for any reason, you can come here and reset everything on a batch of images. The Reset button will return all sliders back to zero. That means every adjustment on the images is reset, including adjustments not listed in Quick Develop.
5. Multi-Batch Export
You can easily export many edited images at once. Additionally, Lightroom Classic has the ability to export those images in multiple batches.
The Multi-Batch Export function allows you to export your selected images into different formats. You can export high-resolution images for print, plus smaller web images all at once.
To use this feature, you will need to create Export Presets first. Lightroom has some included, but these rarely suit.
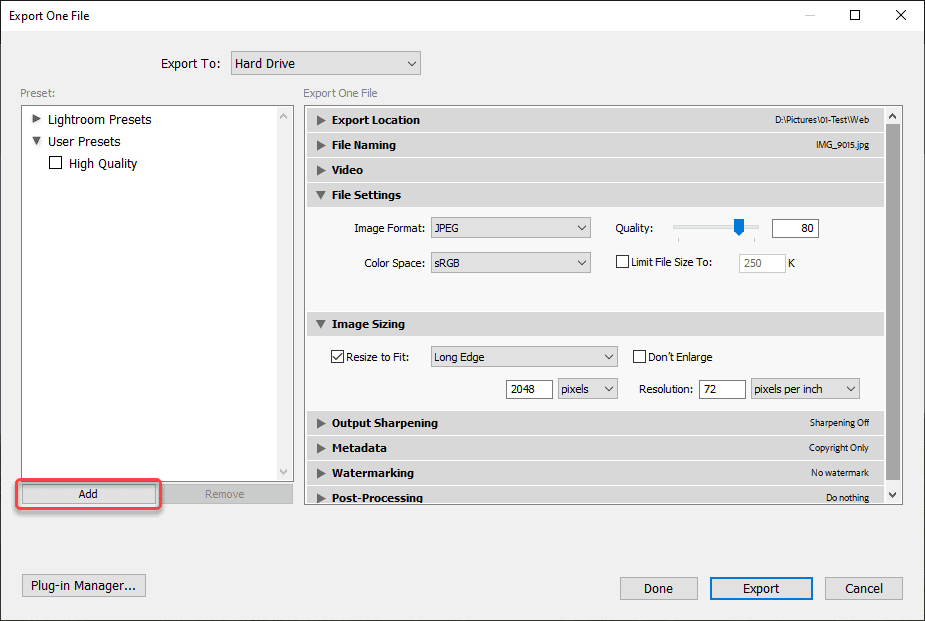
Step 1. Select Export from the File menu, or press Ctrl+Shift+E.
Step 2. In the Export dialogue box enter the file settings, image size, etc. that you need. For a Preset, it is often good to select Choose folder later, as the destination folder option.
Step 3. When you have filled in everything you want, click Add at the bottom of the left panel. You will be prompted to give your Preset a name and select a folder location. When done, click Create.
Step 4. Your Export Presets will be listed on the left whenever you open the Export dialogue box. To Export using multiple Presets at once check the boxes of the ones you want to use.
Step 5. When more than one Preset is checked, the Export button changes to Batch Export. Click to open the Batch Export dialogue box. You can now select the appropriate destination folders and sub-folders.
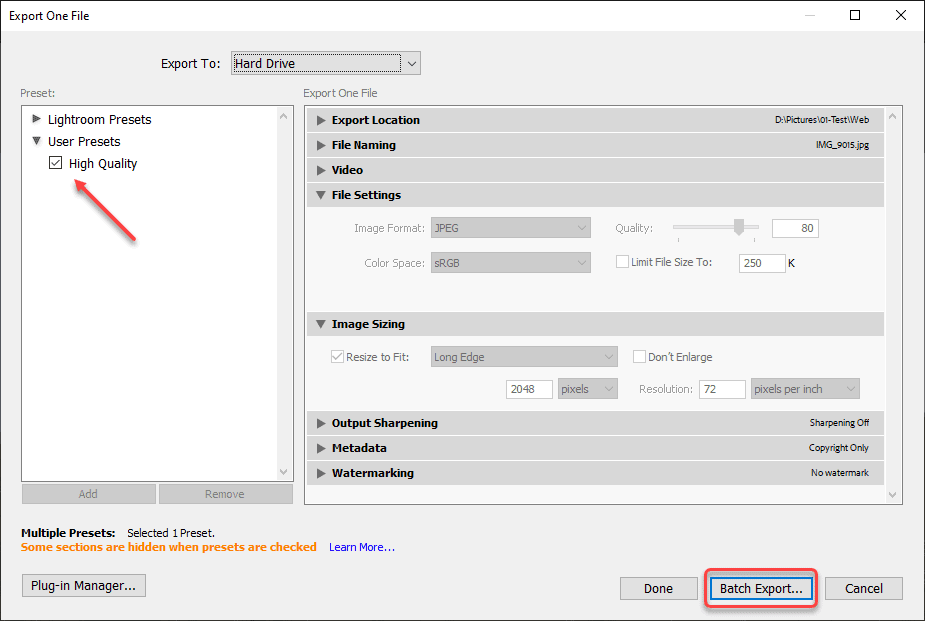
Step 6. Click Export, and then Lightroom will export all your images.
You can even keep working and see the progress at the top left of the interface.
We have now covered five ways you can use batch processing to edit your photos in Lightroom Classic. You do not have to use them all. Pick and choose the ones that best suit your images and workflow.
These techniques should help you keep your editing time to a minimum.
Now we wish you happy and speedy editing.

