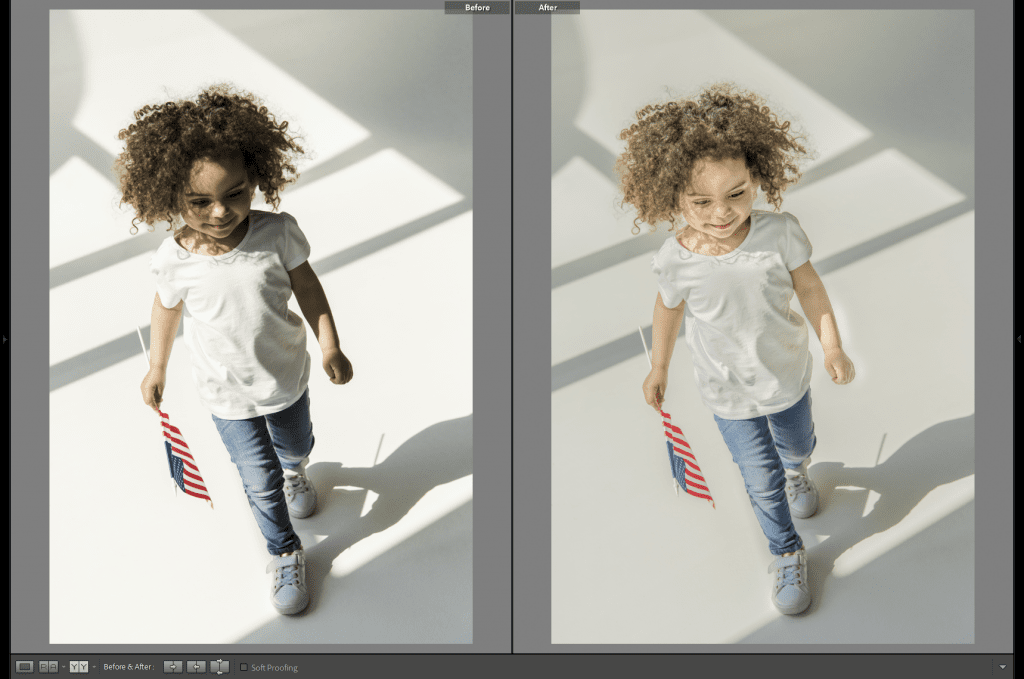
If you shoot outdoors in natural light, you will know how common it can be to have less than ideal lighting conditions. Harsh shadows can be distracting and too often obscure important details in your image.
For portraiture, the issue is especially frustrating. Strong contrasty light can create some very unflattering looks, and the eyes are too dark to be the center of attention.
Here we go through some editing techniques to remove those unwanted harsh shadows from your images.
Forget Photoshop. The tutorial is written for photographers who are editing in Lightroom only. We will talk through the tools and process to edit problem shadows using Lightroom Classic (LrC).
Correcting the shadows in your image should happen before you work on any creative editing, like color grading.
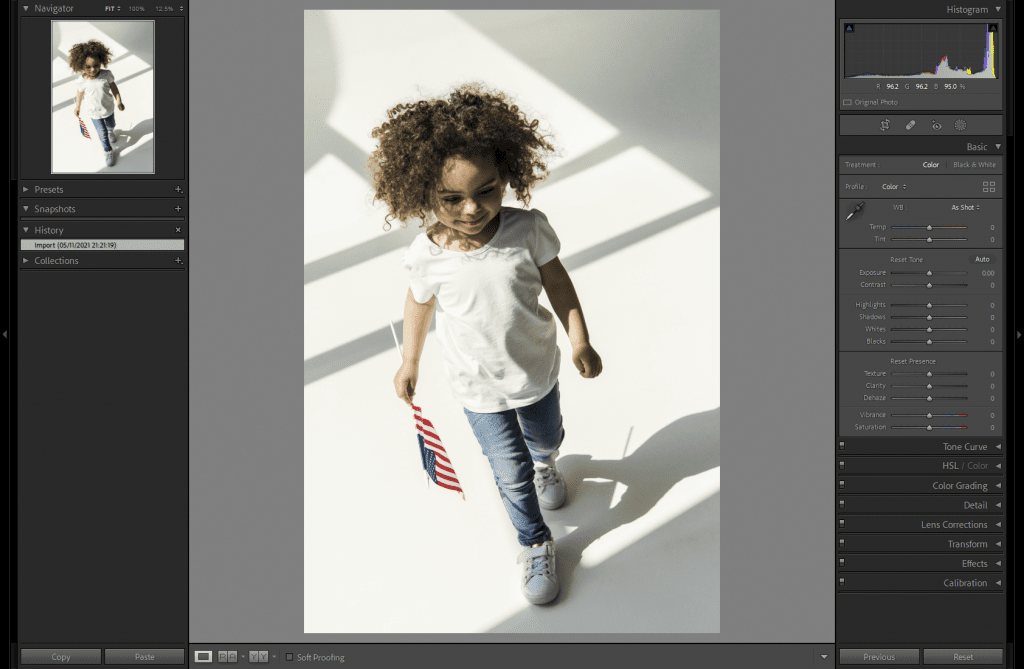
Start with global adjustments
To reduce the harsh shadows start by working on the tones of the overall image.
When in the Develop module, all of the sliders displayed on the right will make global adjustments. That is, any edits will be applied across the entire area of your image.
The tone sliders in the Basic Panel are the best place to start to soften the shadows.
The aim at this stage is to decrease the luminance differences between the shadow areas and the lighter parts of the image.
This will go a long way towards making any harsh shadows look a lot less prominent.
Understanding the Tone Sliders In Lightroom
The Tone Sliders in the Basic panel are quite intuitive. You might be tempted to simply go ahead and start moving them around until you find something that works.
On the other hand, a solid understanding of the Tone Sliders and Histogram will make your editing process faster and more effective.
Not every image is the same. And, the shadow areas will not always be equally dark. So, it helps if you can interpret what is going on in the image and know precisely which tones you are affecting with each slider.
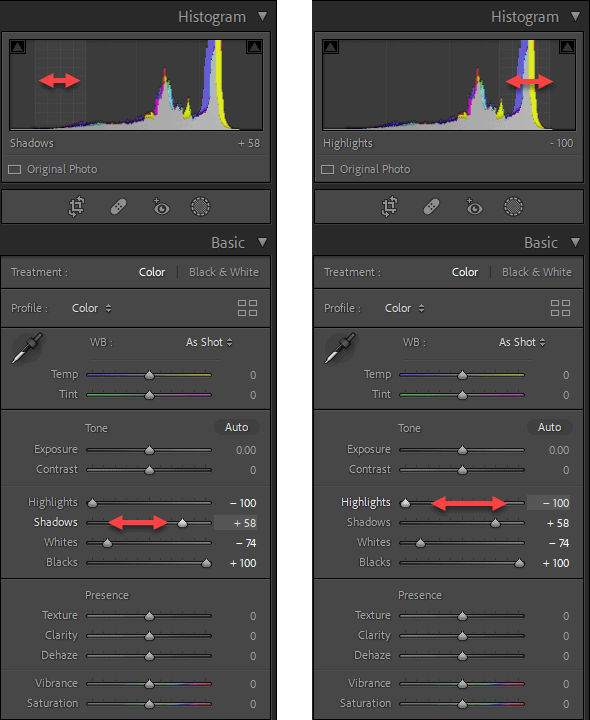
The Tone Sliders are linked to the Histogram
When you hover your cursor over each Tone Slider you will see highlighted in the Histogram which tones it will change. You will see the Whites at the right and the Blacks on the far left. This is a very useful visualization.
You can actually also click and drag directly in the Histogram to move the sliders. The two are connected.
All the tone sliders start at zero. The full slider range is from -100 to +100. The Exposure slider is primarily directed at the mid-tones but runs from -5 stops under to +5.0 stops over.
As with the Histogram, when you move the sliders to the left, into the negative values, it darkens those tones. When you move in the positive direction to the right, it lightens the respective tones.
Adjusting the tone sliders to reduce shadows
You can adjust the slider in any order, but this is how we suggest you proceed.
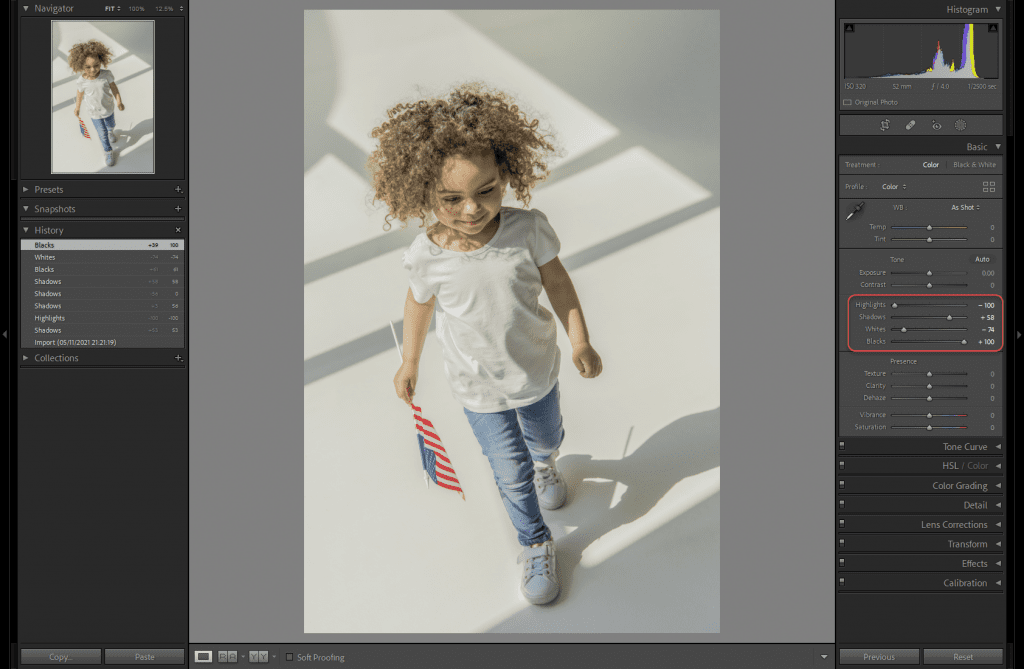
1. Shadow Slider
This slider will give the most dramatic and direct improvement.
Adjust the shadow slider to +50 or more as necessary. In many cases you can bring this slider up quite high and get a good result.
possible to very effectively brighten shadows using only the Shadow slider.
2. Exposure
Often when there is an issue with deep shadowing, it helps to increase the overall exposure of the image as well. It depends on the image what value will be ideal.
3. Highlights
Now lower the Highlights, by sliding to the left.
This brings the luminance of the highlights and shadows ones closer together. It will also correct any burnt-out highlights that the increase in exposure may have created.
Don’t let the highlights in your image get too muddy, though. Look for a balance point before the muddiness, where you are still recovering enough highlight detail.
4. Blacks
If you find that your image is now looking too washed out and flat, adjust the blacks. Try a value of -20 to start.
The Blacks slider will only affect the very darkest areas enough to bring some definition and punch back in the image without losing the edits you have done.
Refine with Local Area Adjustments
Sometimes the global adjustments are not sufficient to remove the shadows. In that case, you will need to work further using Lightroom’s adjustment brush.
If your task is to completely remove an unwanted shadow local area adjustments will be necessary. This might be a shadow on the ground from a pole that couldn’t be avoided when shooting, for example.
The adjustment brush will allow you to target only those problem shadow areas of your image.
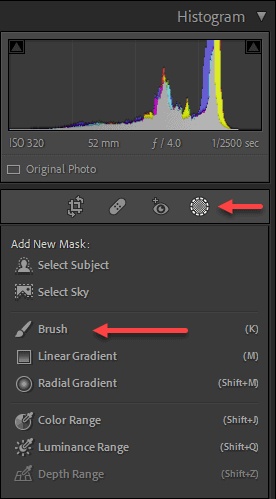
Using the Adjustment Brush
Access the Adjustment Brush with the brush icon in the tool strip under the Histogram.
Local area adjustments have very similar slider controls as the global Basic adjustments. There are some extra detail sliders for things like noise and sharpening as well.
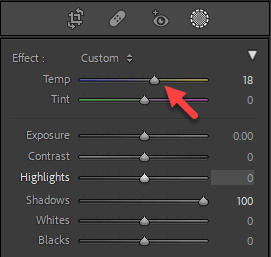
Double-click Effect at the top, to zero out all the settings for the brush before you start.
Unlike the sliders in the Basic Panel, you will not be able to edit them via the Histogram when using the Adjustment Brush. If you attempt to do so, you will only affect the global sliders, not the Adjustment Brush.
1. Select your brush
Use a large soft brush that covers about the width of the shadow area you want to edit. Keep the feather at 100%
You will see the brush size when your cursor is over the image. Quick ways to change the brush size are: the square bracket keys, the mouse scroll wheel, and using two fingers moving up and down on a trackpad.
Click Auto-Mask on. This will stop any nearby highlights or background areas from being selected.
2. Adjust shadow slider
Move the shadow slider to the right. Try at least +50 to start.
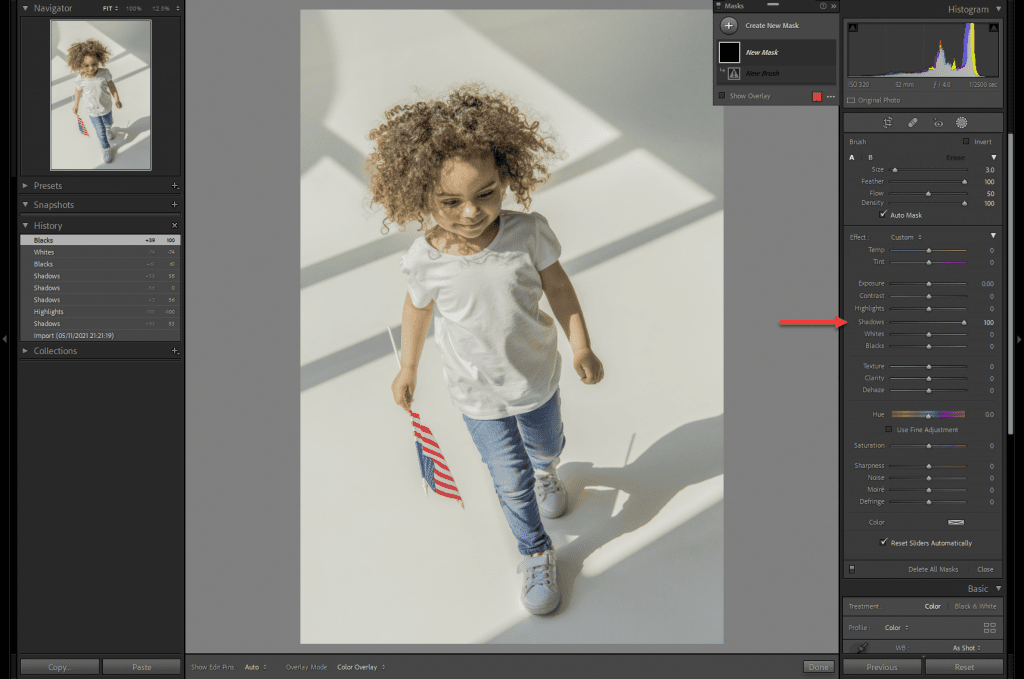
3. Paint over the shadows
Paint over the shadow areas in broad strokes. Hide the red mask overlay by pressing O to see the effect.
4. Adjust and refine
Now adjust the sliders to reduce the shadows to a point that is natural, and not over-brightened.
If necessary you can also click on the grey pin and eraser or add areas to the Adjustment Brush.
If you have different areas of shadow, then add more Adjustment Brush pins to correct those.

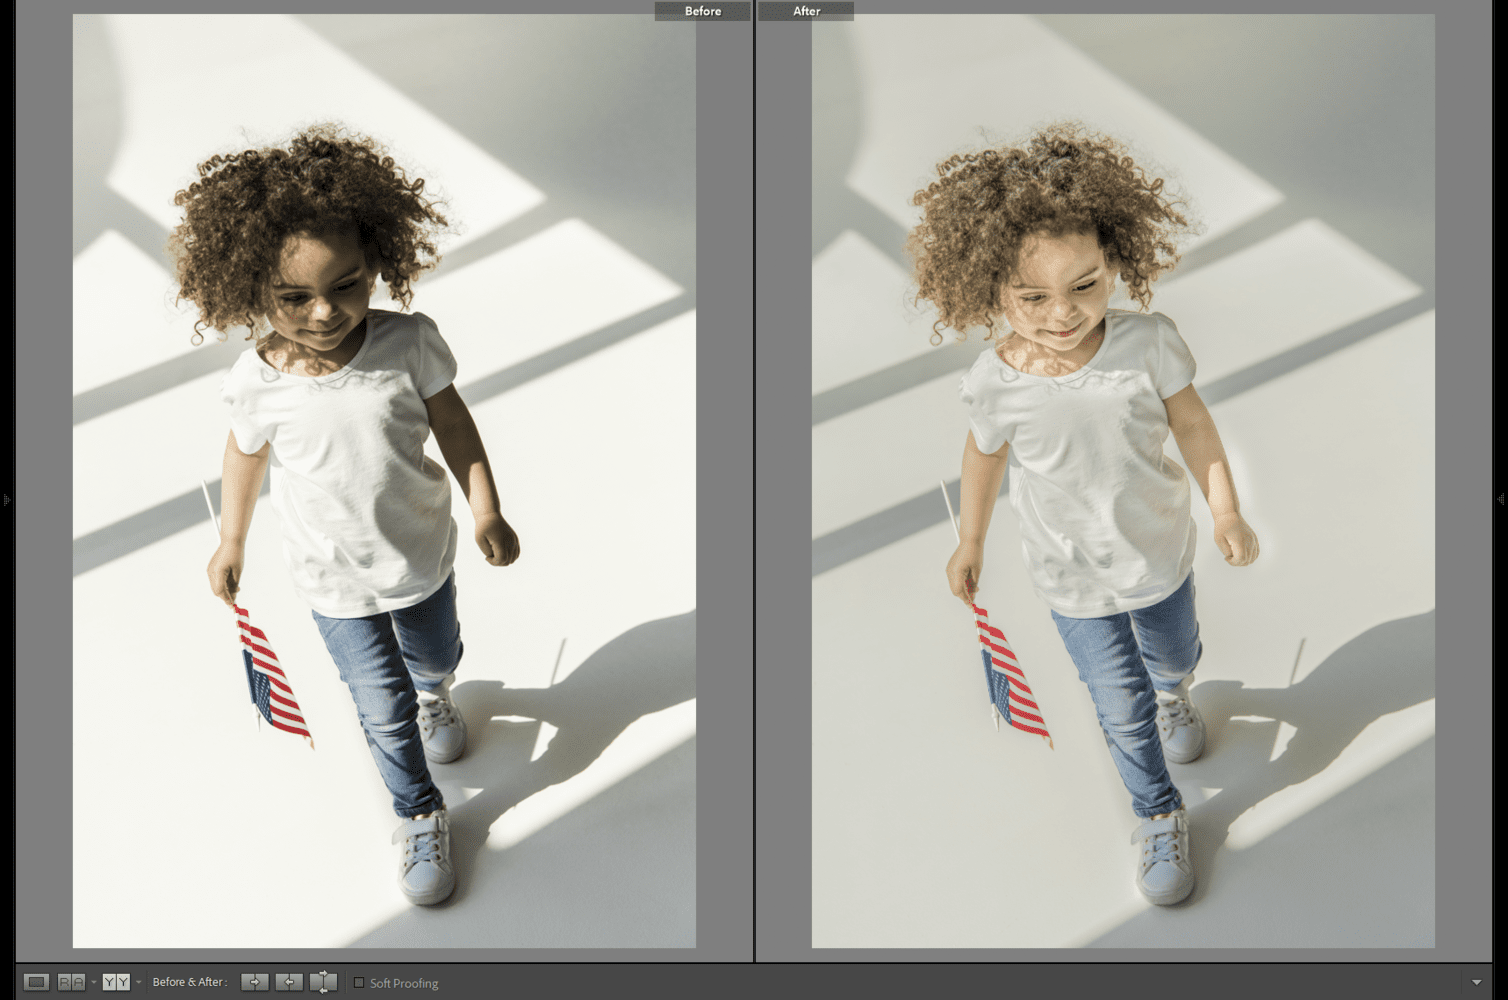
Look at color as well as the tones
Shadow areas are often cooler than areas receiving direct sunlight. To keep your image looking realistic and natural, add some warmth into your shadow adjustment.
This can be done with the Color Temperature slider at the top. Take it a little to the right to add some yellow into the shadow. If there is a green tone, which can sometimes show up in underexposed areas, then increase the magenta with the tint slider.
The adjustments needed to correct shadow color are often only very subtle but make a big difference.
We hope that this has helped you feel more confident to successfully edit images with harsh or unwanted shadows.
With your image tones and shadows taken care of, it is now time to add your creative flair. Adjust the tone curve and add some color grading to pull everything together visually and ensure your edits blend in well with the overall image.