Taking a great portrait can be one of the most satisfying photographic experiences. There is so much to control and keep in balance, and it feels amazing when it all comes together. Strong portraits have an elusive quality too.
It is about more than just setting up a perfect shot. There is a relationship as well.
It is this extra dimension of having another person involved which can keep beginners away from portraiture. Yes, it adds a bit of pressure. But, you shouldn’t let that stop you.
So, let’s jump in and explore the top things you need to know to start shooting portraits.
The right lens for portrait photography

I am not going to go into a full equipment run down, but I do want to say a little about lenses. Or, specifically focal length.
Choose the wrong focal length and it can alter the look of your subject in unpleasant ways.
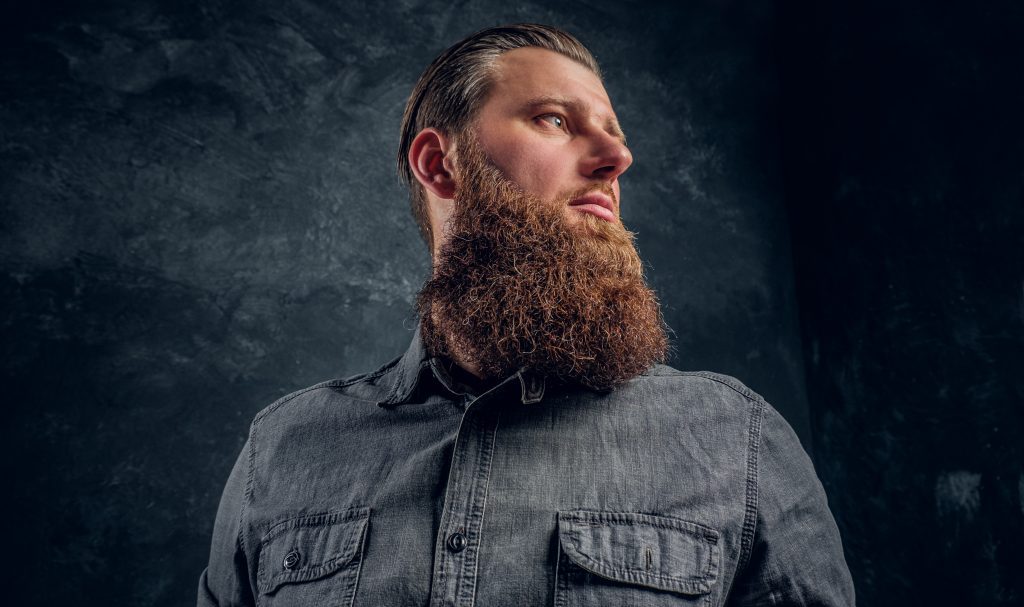
For shooting portraits you want a lens that achieves a look close to our natural vision. This is going to give you images that feel right, and are generally the most flattering.
A good prime lens around 85-135mm is a typical choice for portraits. In this focal range, the distortion will be minimal. You can also shoot from a reasonable distance from your subject. So you won’t be too close and risk making them feel uncomfortable.
Get your background right
This is the first thing you want to consider when composing your portrait image.
You want the person to shine. So the background should not take over or distract from your subject. Avoid messy, busy backgrounds with too much going on. They will draw the eye away from the subject and make it hard to create a clean composition.
Bright or high contrast areas will also grab the viewer’s attention. A background which is reasonably even and darker than your subject’s face is the ideal. Yes, there are many exceptions to this, but it is a good place to start.
There are also some classic things to avoid once you place your subject into your chosen background. Trees coming out of people’s heads and lines cutting across right at eye level happen when photographers aren’t paying attention. And, very easy to avoid when you do watch out for them.
Also ensure you don’t letting your subject appear to merge into the surrounds. Some visual separation between the subject and background will help the viewer understand what is happening in the image. It will allow the focus to remain clearly on your subject.
Always think about lighting
There is no photography without light. Whatever you choose to shoot you are going to need to consider your lighting.
A large amount of professional portrait photography is shot in a studio setting. Here the lighting can be perfectly controlled. This is great for having consistent and reproducible results.
If you are just starting out, you may not have access to a studio, so I will talk here about using ambient and natural light. In many cases, studio lighting actually aims to reproduce a soft natural light. It is the ideal.
Aspects of lighting to consider and manage are intensity, direction, and color. How easy each of these is to control out on location will vary at different times.
Working with natural and ambient light means you will get lots of practice observing light. You need to take note of how the light looks on your subject. Look closely at how it makes the facial features appear and what looks most flattering.
The main enemy for portraiture is light which is too harsh and casts strong shadows on your subject. Unfortunately, you cannot just turn down the sun.
However, light intensity can be controlled by moving the subject into an area that has some soft shading. Or, by shooting at a different time of day. At other times, literally waiting for some clouds to cover the sun for a few minutes is all that is needed.
Light direction can be controlled by how you face your subject. When indoors, think about placing your subject close to a window for some directional outdoor light. When the main light source comes from the front at about a 45˚ angle to the subject this works well. You will need to adjust the angle of your subject finds exactly what is best for their face.
To control intensity and direction, a reflector and a helpful assistant can also be incredibly handy. With a simple reflector, you can add fill light to the shadows, or bounce additional light in from a different angle.
The color of your lighting becomes an issue when you have multiple light sources. Like different indoor lights, or some signs or street lights if shooting at night.
When shooting indoors or at night you will find the next biggest problem you might face is not enough light. Here is where you will need to call upon some knowledge of basic camera controls to get a good exposure.
Don’t be afraid to push up the ISO a little if needed. How much is acceptable will vary depending on your camera body, so experiment to see how much noise you get. If you need some help to understand ISO and why you don’t want it too high, check out this fun video from Phlearn.
Shoot from a natural angle
The angle you shoot your subject from changes the look of the person hugely. When starting out you want to keep it simple and natural. This is one time when getting too experimental can get in the way of a good image.
You want to match the eye height of your subject or shoot from just slightly above. This will give you the most pleasing images in most cases.
This may mean you have to adjust your own height. Lower the camera if the subject is seated, or raise it for a tall person.
Do not position yourself so you are looking down on your subject. They will look small and it can be awkward to compose well.
Also, avoid shooting from a really low angle. This can be a very unflattering angle and you won’t be doing your subject any favors.
Be mindful of how you crop the body

When photographing people you also need to think carefully about how an image is cropped. Specifically, where the body is being cut off. What falls in the frame and what is outside.
You want to avoid the edge of the frame cutting off just hands or feet. It looks awkward and can be distracting.
Shoot a full length portrait if that is what you want. Or, move in closer and shoot a three-quarter length or half body, cropped just below the knees or around the hips.
Depth of field

A solid understanding of depth of field will help you take stronger portraits.
The term depth of field is used to describe the area of a photograph which is in acceptable focus. Depth of field is primarily controlled by changing the aperture on your lens. A smaller number means a wider aperture, and a shallower depth of field.
The actual depth of field is also affected by how close or how far away the main subject is, and the focal length of your lens. When you focus on a subject very close to the camera the depth of field will be smaller than when focussing on objects in the distance.
If you look at snapshot images of people, and then professional portrait work, a shallower depth of field is one key difference you will notice.
For portrait work you want to hit just the right depth of field. You need find the sweet spot. Too large or too small can both detract from your image.
Let’s take a look at a couple of examples of how to use depth of field to create a better portrait.
Reducing your depth of field is how you can better separate your subject from the background. Open up your aperture a little. You will now be able to focus on just the person and the background will be softened.
When you have a busy background this can be exactly what will save your image. As mentioned above, you want to avoid background distractions. Restricting your focus to the subject makes it less prominent.
When you are shooting up close, you can also use depth of field to focus very clearly on the eyes of your subject. It depends how close you are, but the hairline and sides of the face may then soften a little. This will take more practice to get right, but when done well is very striking.
A word of warning. Remember that when you change the aperture you are also changing the exposure. If you are shooting in low light, it might not always be the best idea to open your aperture right up. It will be harder to focus and you may end up with not enough of your subject being sharp.
Aim for a balance. You do not want everything in perfect focus, but also want enough of your subject in focus to achieve a clear image of your subject.
Posing and interacting with your subject

Alright, now you are ready to get your live subject and place them in front of your camera.
So, what do you do with them? Will they just know what to do? How much do you direct and control their pose?
There is no easy answer here. But, when you are starting out the best advice is to keep it simple.
First, one last check. Make sure you cast your eyes over every aspect of your subject.
Watch out for clothing sitting wrongly, buttons undone, hair sticking up, and jewelry hanging off center or flipping over. And, for guys make sure there is no mobile phone in the jeans.
If your subject has some modeling experience, great. Let them do what they know. Mostly this won’t be the case though. So, they will look to you for some guidance.
Make it relaxed. Ask them to shift their weight more to one leg. Put a hand in a pocket. Seated is also a good option.
You will often get a stronger image when the subject’s shoulders are straight on to the camera. Angling the body makes people look smaller and can be harder to get right.
Additionally, have your subject turn their head in a slightly different direction from their body. It can add interest and make the composition more dynamic.
For a tight crop, facing forward and looking directly to the camera can be a strong option too. The look will be more composed than natural though, so it is not always the right choice.
You will find that people more naturally drop into a comfortable natural pose when they first move into a position. As opposed to having a carefully controlled pose that you have been perfecting for ten minutes. That can make people look very stiff.
A good trick is to have your subject stand up and sit down again. Or, walk into the frame and stop in the right spot. Then shoot, before they have time to think about controlling what they do too much.
It is immensely important to get some rapport going between you and your subject. Warm up them before you start shooting.
And, talk a little to your subject, as you shoot. Don’t get them to talk so much, but instead listen to you. Then you can shoot their facial reactions. Nothing too dramatic. They should relax, maybe smile as they listen.
Some people are a lot more comfortable in front of a camera than others. It won’t always be the same. Gaining experience working with different people will help you.
And, being comfortable and confident yourself goes a long way.
In Conclusion
I hope this guide has given you some confidence to start taking portrait images. It can be incredibly rewarding and will also improve your photography overall.
It really is all about working with people and balancing the technical aspects. If you love people and love what you do, it will show. And, you will be able to create great images.
You never know, you might even get to make a career out of it.
Let us know on our FB page which points you found most helpful. And, don’t forget to share this article if you know other people will enjoy it too.

