
Cell phone cameras might be fine for grabbing a quick image or video of something you see during the day that you want to share on social media. You might wish that you could share some of those videos on your large screen TV, though, or enlarge a portrait or a landscape into a poster size print to hang on your wall or to give as a gift.
However, the image might be blurred or the sharpness and resolution of a cell phone image might not be high enough to make that transition successfully.
When you begin to yearn for higher quality images, you should consider making the transition from your cell phone camera to an easy-to-use, lightweight, dedicated camera with features that let you focus on creating those better quality images that you want.
Here are five cameras on our list for the best point and shoot camera under 200 that will help you to make the transition successfully:
Our Best Point and Shoot Camera Under $200 For 2024
- Minolta MN35Z 20MP 35X Optical Zoom – Best Super Zoom Point and Shoot Camera Under $200
- Kodak AZ361-WH PIXPRO Astro – Best Budget Point and Shoot Bridge Camera Under $200
- Sony DSCW830 Digital Camera – The Best Sony Point and Shoot Camera Under $200
- Nikon Coolpix A300 20 MP Point & Shoot Digital Camera – The Best Small Point and Shoot Camera
- Canon PowerShot ELPH 190 IS Digital Camera
Let’s dive into our list and look at the top point and shoot cameras under $200.
Minolta MN35Z 20MP 35X Optical Zoom Wi-Fi Bridge Camera
The Best Super Zoom Point and Shoot Camera
The Minolta MN35Z features a 20MP still photos, and with a 35X optical zoom, you can capture close-up details and shoot from a distance.
If you want to take real photos that you can have blown up and turn into artwork for the wall, like photos of your dog or your kids playing out on the baseball field, and get in real close right into the action you definitely want something that’s going to give you that big super zoom.
Create videos that have greater vividness and clarity than a standard-definition video with its 1080p HD video recording.
Minimizes camera shake and blur with its Optical image stabilization.
It has 27 Intelligent Shooting Modes like HDR, TimeLapse, Panorama Shooting, and Face Detection, to cover a variety of shooting situations.
Once you have set the mode suitable to your shot environment, the camera will adjust settings automatically to obtain the optimal shot.
Capture everything from wide-angle landscapes and group shots to telephoto shots.
Easily compose your shots and review photos, with its large 3 Inch Lcd Screen.
transfer photos to your smartphone and tablet with the built-in Wi-Fi, and you can also use your smartphone as a remote shutter.
PROS
- 35X Optical Zoom
- 1080p HD video recording
- Optical image stabilization
CONS
- No touch screen
Kodak AZ361-WH PIXPRO Astro
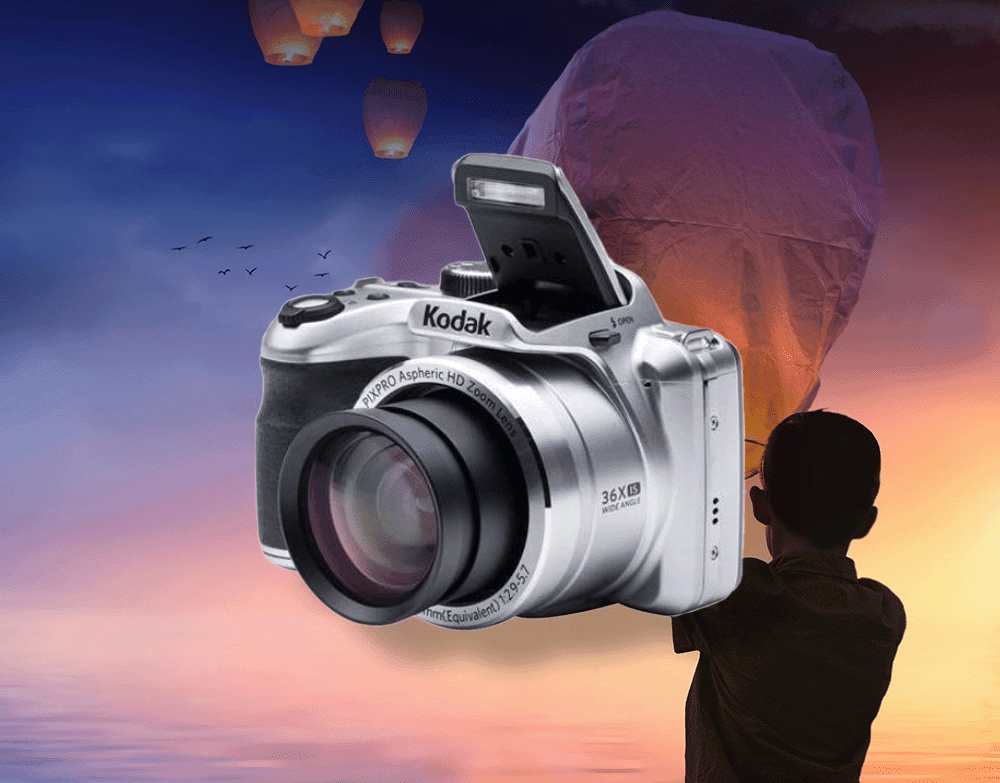
Best Budget Point and Shoot Bridge Camera
The Kodak AZ361-WH PIXPRO Astro combines a 16 MP 1/2.3 inch CCD image sensor with an optical zoom lens that ranges from 24mm to 864mm, so this camera captures wide-angle group selfies, architecture, and landscapes as well as zooming in for tightly focused action shots or for nature photography that lets you catch wild animals and birds without disturbing them. With macro mode, you can shoot from as close as 5 cm.
In addition to the standard modes, the Kodak AZ361 offers separate pet portrait modes for dogs and cats, a mode for photographing text, a mode for taking ID photographs, a mode for shooting inside of a museum, and a mode for shooting through glass. It can shoot panoramas up to 180°, and in panning mode, you can pan to follow a fast moving object, creating a blurred background that demonstrates the movement and speed. The ISO sensitivity settings range from 80 to 3200, covering almost all lighting conditions.
It can be set for up to nine focal points and includes face detection, smile detection, and blink detection. The shutter timer can be tied to smile detection. The Astro can track a single subject.
Like the ELPH 190 and 360, you can take full manual control of the AZ361 Astro. Unlike any of the above cameras, though, you can create and save your own custom setting. So, if you will be taking a lot of pictures under fairly consistent lighting and photographic conditions, once you find the perfect setting for that scene, you can simply save those settings and, when you’re ready to take more pictures, you can then select your custom setting just as you would a scene mode. With this feature, you can simply start shooting without having to set up the camera each time. The Kodak Astro retains the last custom settings that you saved in its memory until you replace it with a new set.
The Kodak Astro uses Kodak’s optical image stabilization system. It captures images in JPEG format and movies in at a resolution of 720p. With an Eye-fi SD card, which you will need to purchase separately, the Kodak Astro can print to PictBridge printers and upload images and movies to the internet.
PROS
- Optical zoom lens ranges from 24mm to 864mm
- ISO sensitivity settings range from 80 to 3200
- Less common scene modes such as a mode for shooting through glass and a panning mode for following fast moving objects, creating a blurred background
- Features nine focal point, face detection, smile detection, and blink detection
- Can track a single active subject
- Can save a custom setting
- Full manual control of the camera
CONS
- Only shoots panoramas up to 180°, not 360°
- Lacks RAW format
- Lacks full HD format
- Must buy an Eye-Fi SD card in order to be able to upload photos to the internet or use PictBridge printers
Sony DSCW830 Digital Camera
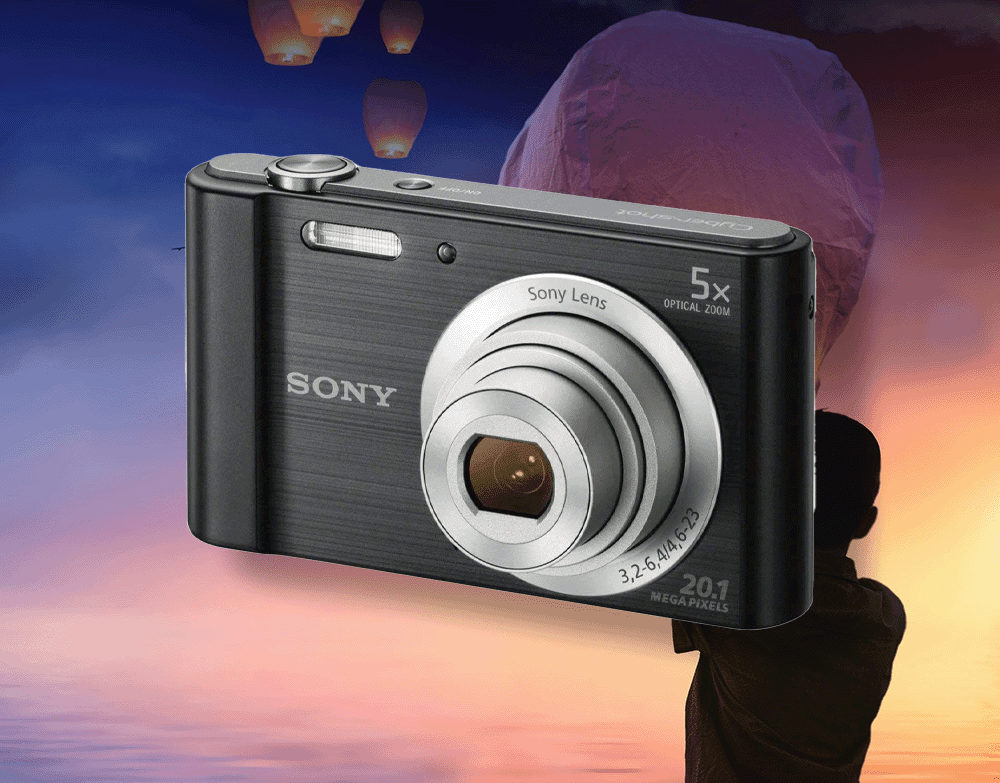
The Best Sony Point and Shoot Camera Under $200
The Sony DSCW830 pairs a 20.1 MP 1/2.3 CCD image sensor with a Carl Zeiss Vario-Tessar optical zoom lens that ranges from a wide angle 28mm to 200mm for tightly focused long-distance shots. For macro photography, the Sony DSCW830 closes in to 5 cm.
The Sony DSCW830 offers smile detection and recognizes up to eight faces in group shots. The timer can be set to wait until it recognizes a smile before tripping the shutter. For portraits, you can set the smile detection priority to either a child’s face or an adult’s face. The DSCW830 also can continuously track the movements of one subject. For panoramas, simply sweep the camera across the scene up to 360° as you hold the shutter button down. The camera matches the images up and weaves them together.
Vertical and horizontal optical image stabilization lets you walk or run as you shoot movies or still images. ISO sensitivity compares to film speeds from 80 to 3200, covering a wide range of lighting situations. The DSCW830 captures still images in JPEG format and movies in HD 720p meg-4 format.
PROS
- Optical zoom lens ranges from 28mm to 200mm with a macro range of 2 inches
- Detects up to eight faces and smile detection can be tied to the timer
- Horizontal and vertical optical image stabilization
- ISO settings from 80 to 3200
CONS
- Does not offer RAW format
- Lacks Wi-Fi and NFC connectivity
- Users notice the processing lag time of the CCD image sensor.
Canon PowerShot ELPH 190 Digital Camera
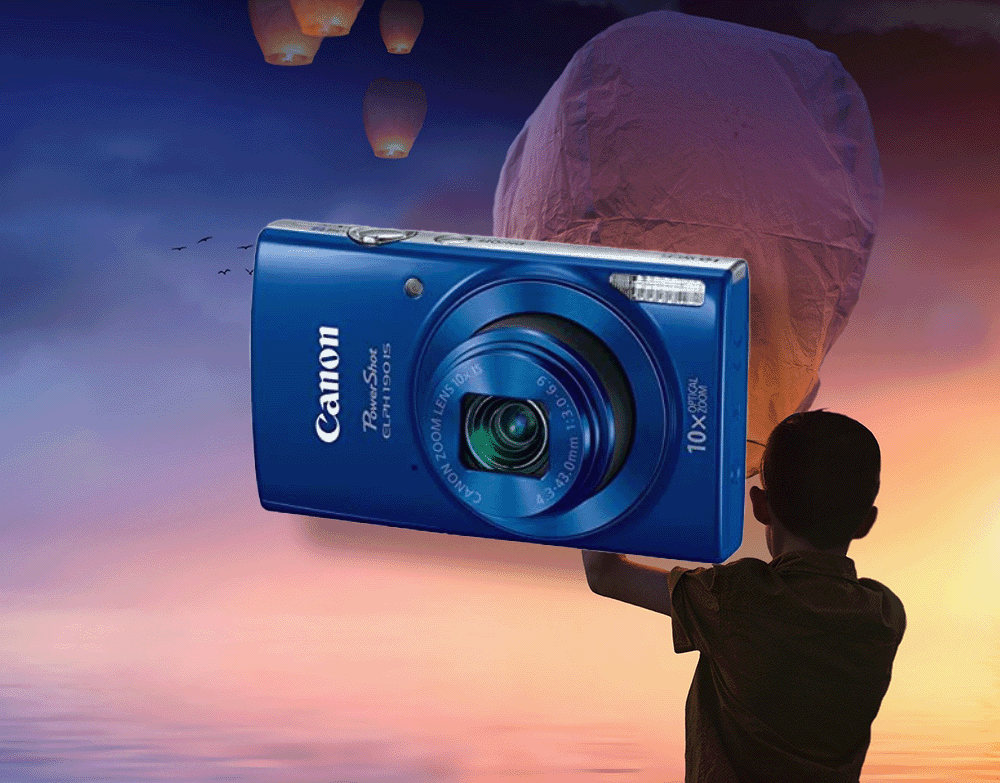
The Canon PowerShot ELPH 190 contains a 20.0 MP 1/2.3 inch CCD image sensor and includes an optical zoom lens that ranges from a wide angle of 24mm to a telephoto range of 240mm. In macro mode, you can shoot from as close as 1 cm. The Digic 4+ Image Processor enhances the processing speed and the photographic results from the CCD image sensor. The ELPH 190’s ISO sensitivity settings range from 100 to 1600. In addition to the monitor screen, the ELPH 190 also has an LCD viewfinder.
The ELPH 190 recognizes up to 9 faces for well-focused group shots, and the timer can be set to delay shooting until the camera detects the appearance of an additional face entering the group so that the photographer can join the group. It can also track the movements of a single subject. The ELPH also offers a long exposure mode that allows time-lapse photography of, for example, nighttime urban street scenes. This Canon PowerShot also has “P” or program mode which allows you to take manual control of more of the camera’s settings, so this is a camera that allows you to grow as a photographer.
Canon’s optical Intelligent Stabilization system can be fine-tuned for shooting while walking or running, while panning the camera in panorama mode, or while using a tripod for shooting still images or movies among other situations. The ELPH 190 captures HD movies with monaural sound at a resolution of 720p in MP4 format. It captures still images in JPEG. It offers both Wi-Fi and NFC connectivity. You can print directly to PictBridge printers, share images between NFC devices, and directly upload images and movies to social media sites for sharing or to your internet storage site for later editing. You also can take complete remote control of the ELPH 190 from your Android or iOS or phone.
Use ECO mode when you’re out for extended periods without access to a way to charge the camera’s battery. ECO mode conserves battery power while preserving your ability to store a high number of images.
PROS
- Optical zoom ranges from 24mm to 240mm with a macro range of 1 cm
- Face detection can be tied to the timer
- Allows access to manual control of settings
- Image stabilization system can be fine-tuned for specific photographic situations
- Wi-Fi and NFC connectivity
- Canon’s Digic 4+ Image processor improves the operation of the CCD image sensor
- ECO mode conserves battery power
CONS
- Does not offer RAW format
- Lacks smile detection
Nikon Coolpix A300 Compact Digital Camera
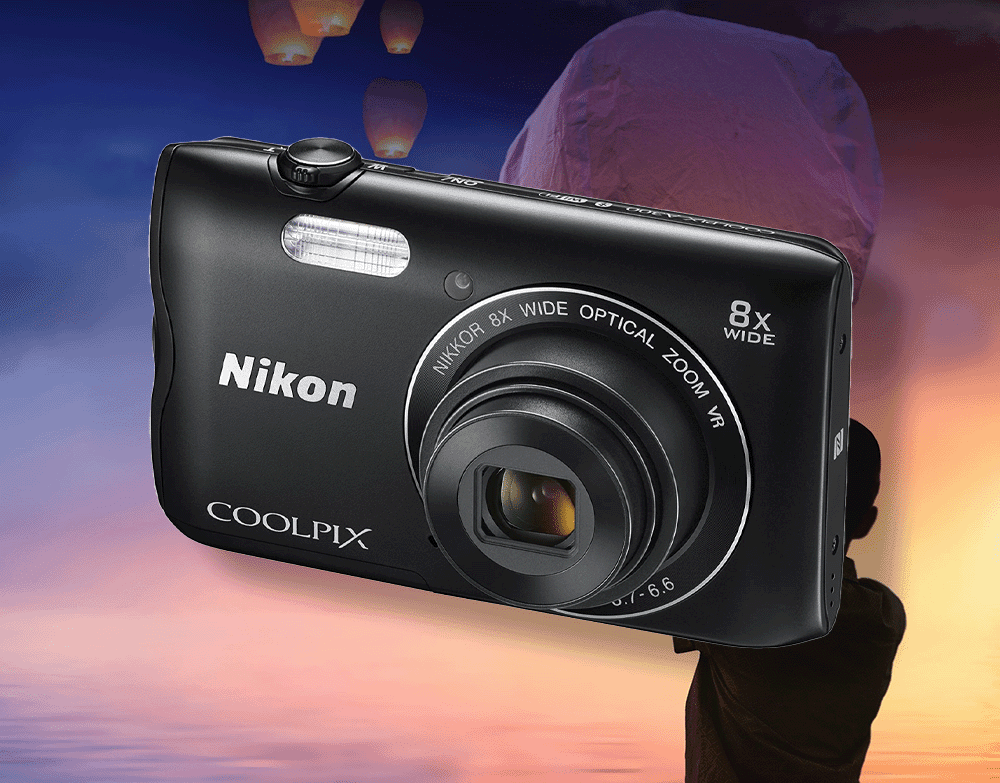
The Best Small Point and Shoot Camera
If you shoot portraits, selfies, landscapes, and architecture, but you don’t zoom in on distant or fast moving subjects, then the wide angle lens of the Nikon COOLPIX A300, with its 8x optical zoom covers a 25-200mm equivalent focal length range, is exactly right for you. The COOLPIX A300 comes with a 20 MP 1/2.3 inch CCD sensor.
The A300 automatically recognizes faces, and when in Smart Portrait mode, it detects smiles and shoots automatically. It can track a single active subject, and it uses Nikon’s electronic Vibration Reduction (VR) to stabilize images. It captures images in JPEG format and HD videos at a resolution of 720p in Motion JPEG AVI format for more compact files, and with built-in Wi-FI compatibility, you will be able to transfer your images directly to your computer, and with its NFC & Bluetooth capability, you can connect with close-by Android smartphones. ISO sensitivity range of 80 to 1600, which can be extended to ISO 3200 for working in most lighting situations.
PROS
- Wide angle lens for those taking pictures of architecture and landmarks, landscapes, portraits, group photos, and selfies.
- It can be set to recognize when a subject smiles and immediately take a photo.
- Optical VR (Vibration Reduction) image stabilization helps to provide a steady picture at any zoom range
- ISO range from 80 to 1600
CONS
- Lacks adequate long distance, telephoto capacity
- Lacks full HD format
- Lacks RAW format
- Low resolution LCD
- Image quality not so good
Point-and-Shoot Cameras
Point and shoot cameras have several features that contribute to creating a sharper, more detailed image — the tracking system that focuses the camera, the settings that determine how sensitive the camera is to the light let in through the shutter, and the systems that control the speed at which the shutter operates and how wide of an opening, or aperture, the shutter creates when it opens.
All the best digital cameras under 200 have a fully automatic, point-and-shoot mode that allows you to rely on the camera’s focusing and light metering systems to select the right scene mode and focal point for the image received by the image sensor. The best digital cameras also have scene modes with preselected settings that, in most situations, are the standard settings for that particular lighting or photographic situation. Even advanced photographers may sometimes rely on these modes to capture an image when they don’t have time to adjust the settings.
Some point-and-shoot cameras have a manual setting option that will let you take full control of the camera’s settings. While you may be wary of taking full control of the manual settings while you are learning how to operate the camera and improve your photography, having that manual option will allow you to explore those settings when you’re ready. That option means you can keep that same camera as you continue to grow as a photographer.
For travelers, these cameras can be quite handy, as they are easy-to-use and portable, and if you want to work remotely while traveling, you can check out this article for more information
Image Sensors Sizes and Types
Image sensors come in two types, CMOS and CCD, and they range in size from 1/1.7 inches, which are the larger ones, to 1/2.3 inches measured across the diagonal. Cellphone cameras pack a lot of features into a slim, compact case, so most use the smaller 1/2.3” image sensors. Cameras, too, are becoming more compact, so point-and-shoot cameras, and others, now use the same size image sensors as cell phones.
Image Sensor Types
Both types of image sensors use photoreceptors to receive the image from the camera’s lens. In digital cameras, photoreceptors take the place of film, and each photoreceptor represents one pixel in the image. So the more photoreceptors and pixels there are the more fine details and subtle gradations between colors the image will display. In addition, the more photoreceptors and pixels there are, the higher the resolution of the image, and, as long as you are starting with a clear, sharp, well-focused image, the more you can enlarge the image.
Photoreceptors on CCD image sensors are connected to the image processing circuitry in groups. All of the photoreceptors in a single row, or even all of the photoreceptors on the image sensor, might be wired together before being connected to the image processing circuitry. This leaves room for more photoreceptors on the image sensor, but it also means that all the information from all the photoreceptors that have been wired together is processed in a large batch, which can take longer. Consequently, CCD image sensors may capture more actual details from the image, but they also may operate more slowly.
On the other hand, each photoreceptor on a CMOS photoreceptor is connected to the image processing circuitry separately. The information from each photoreceptor is processed more quickly, so CMOS image sensors operate more quickly than CCD image sensors. However, the image processing circuitry that surrounds each individual photoreceptor on a CMOS image sensor takes up space that would be occupied by more photoreceptors on a CCD image sensor.
That means two things:
- Because there are fewer photoreceptors on a CMOS image sensor, each photoreceptor receives a larger percentage of the image as compared to the percentage received by the photoreceptors on a CCD image sensor. Because the photoreceptors on a CCD image sensor receive a smaller percentage of the overall image, they are able to receive more of the details and changes in light, shade, and color. Because each photoreceptor on a CMOS image sensor must receive a larger percentage of the image, some of the fine details and the more subtle changes in light, shade, and color may be lost.
- While, on a CCD image sensor, the entire image falls on spaces occupied by photoreceptors, on a CMOS image sensor, parts of the image fall on spaces occupied by image processing circuitry. To compensate, the image processing circuitry compares the details and changes in light, shade, and color received by all of the adjacent photoreceptors and tries to fill the spaces in between with what appears to be missing.
While all this might seem technical and complicated, its worth keeping in mind when choosing a camera. If you take a lot of photographs of active pets or of your kids as they play sports, or just play, you might notice the lag time, however slight, as a CCD image sensor processes the image. On the other hand, if you enjoy nature or artistic photography and you want fine details with subtle, realistic gradations of light, shade, and color, then you might be unhappy with the way the image processing circuitry fills in the details that are missing from the spaces between the photoreceptors on a CMOS image sensor, however small the space.
The Tracking and Focusing System
Most digital cameras, point-and-shoot cameras included, now use hybrid focusing systems that combine phase detection systems, or motion tracking, with contrast detection systems that make features such as face detection and smile detection possible.
The phase detection system splits the image from the image sensor into two images in a way similar to the way your optometrist splits the image that you are looking at into two images during an eye exam. The camera then measures the changes in the separation between the images from side to side and front to back to track movement by the subject and bring the subject into focus. If you have a stationary subject, then the camera simply adjusts the focus until the two images merge. If you have set the camera to continuous tracking mode to capture an active subject, the camera uses its measurements of the changes in the speed and direction of the two images of the subject to predict where the subject will move in order to keep the subject generally in focus.
The contrast detection system takes over from the phase detection system to achieve an even sharper focus. The contrast detection system compares the part of the image received by each adjacent photoreceptor as it checks for and eliminates overlaps. Contrast detection systems sharpen the focus by making the part of each image received by each photoreceptor as clear and distinct as possible, so it works by detecting and heightening the distinctiveness or contrast of each pixel contained in image.
Contrast detection systems can have problems focusing when a person isn’t facing the camera, when you compose your photograph with the subject off-center, or when the contrast between areas of the image is difficult to detect. Many times, you can correct this by locking the camera’s focus and then recomposing your image. Simply turn your camera toward your subject or toward an object that is the same distance from your camera as your subject, press the shutter button halfway down to lock the camera’s focus and continue to hold the shutter button halfway down as you turn back and recompose your image, and then push the shutter all the way down to take the picture. Alternately, for an off-center subject, you can select one of your camera’s focus points that are directly over your subject rather than allowing the camera to choose a focus point at the center of the image.
The Settings That Control the Light
If a point-and-shoot camera does not offer a setting that allows you to take full control of the camera’s settings, you won’t be able to take direct control of your camera’s choice of lighting settings. You can use scene mode to take control of the scene selection yourself.
Point-and-shoot cameras commonly have scene modes for daylight portraits, daylight landscapes, beach scenes, snow scenes, sunrises and sunsets, food, sports scenes, and indoor or party scenes. Scene modes for fireworks, nighttime portraits, backlit portraits, pet portraits, and nighttime landscapes also are common. It’s less common, but not unusual, to find scene modes for taking photographs in a museum or through glass.
Even point-and-shoot cameras that don’t have a manual option will allow you to lighten or darken the overall lighting of the image by three settings up or down and control some other settings such as:
Flash settings – auto, red-eye correction, fill flash, slow sync, and off
White balance – auto, daylight, cloudy, fluorescent, incandescent, flash, and, usually, custom which allows you to focus the camera on a white card or sheet of paper and set the white balance for the scene yourself when you have two or more different types of light sources
ISO sensitivity – compares to film speeds of 200 or lower for bright light to 1000 or higher for low light and action photography
Metering – spot to create a narrow depth of field and focus tightly on a distant subject so that the camera reads only the lighting conditions surrounding the subject and is not influenced by the foreground or background; matrix for landscapes to create the widest possible depth of field so that the camera reads the lighting conditions across the entire scene; and center-weighted for portraits and still lifes so that the camera gives priority to the lighting conditions immediately surrounding the subject but also reads the lighting conditions for the background and foreground so that the subject is well-lit with sufficient lighting for the background and foreground so that objects in those areas are distinct, sharp, and appropriately vibrant.
Aperture priority – for low light, widen the aperture; for bright light, narrow the aperture; for telephoto subjects that lack sharpness, narrow the aperture to widen the depth of field so that the subject is completely inside the box defined by the depth of field; the camera chooses the shutter speed and ISO sensitivity based on the aperture setting.
Shutter priority – slow the shutter speed to let in low light settings; use higher shutter speeds in bright sunlight, in snow, or at the beach where sand and water reflect bright sunlight; also use high shutter speeds for fast, action shots; the camera chooses the aperture opening and ISO sensitivity based on the shutter speed.
Learning how to use these settings will help you adjust your camera when it has difficulty focusing, improve your photography, and help you to take the clearest, sharpest images your camera can produce.
You May Also Like the Related Articles:
- Best Point And Shoot Camera Under $300
- Best Point And Shoot Camera Under $500
- Nikon Coolpix L840 Digital Camera Review
- Best Mirrorless Cameras Under $500
- Best DSLR Cameras Under $500
Our Best Point and Shoot Camera Under $200
Actually, that should be “Our Two Best Point and Shoots Cameras Under $200” because we have chosen co-winners – the Canon PowerShot ELPH 360 and the Kodak AZ361-WH PIXPRO Astro. Both cameras have manual options, so if you or someone in your family wants to grow as a photographer and experiment with the camera’s settings, these cameras allow that. These aren’t cameras that you will outgrow, and yet anyone in the family can still take quality photographs using these cameras in automatic point-and-shoot mode.
The ELPH 360 does have the edge when it comes to its built in Wi-Fi and NFC connectivity and its ability to capture movies in full HD with a resolution of 1080p in MPEG format. The Kodak Astro’s movies with a resolution of 720p in MOV format are fine for sharing in emails or on the internet, but they will not display well on a big screen TV. In addition, as far as we are concerned, people are accustomed to being able to share their videos and photos on social media immediately from their cell phones, so any camera that wants to compete with cell phones should have Wi-Fi and NFC built in.
What gives the Kodak Astro an edge, though, are its super zoom optical lens that extends over a range from 24mm to 864mm and its less common scene modes, such as the one designed to take photographs through glass, not only display cases, but also windows. You could capture candid shots of your kids as they play outdoors, birds at your birdfeeder, wildlife in your yard, or snow scenes without having to be out in the snow. Finally, the Astra lets you store a custom setting, so once you find a setting that works for the location you’re in, you can just select it and keep using it as long as the shooting conditions remain unchanged.

