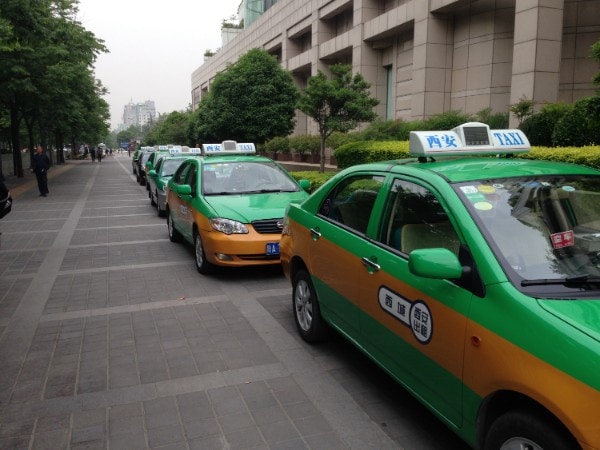
As a street photography enthusiast, I like the adrenaline when taking pictures in the public without making people curious. Taking pictures of strangers was often hard; however, I soon discovered that almost everyone likes to be photographed if you respect their privacy and feelings.
Street photography is all about documenting life and our society. It does not have to be shot on the streets as photographers also take pictures inside malls, airport, and many other public places. The purpose of these pictures is to capture human emotions, feelings, and soul.
This guide is written to introduce you to this fascinating art, which can often become addictive as you start enjoying its different themes.
Street Photography for Beginners – Legal Concerns
Disclaimer: Because I am not an expert in this matter (or a lawyer). Do your own research into your local laws, regarding the law and street photography. Do not hold me (or photographertouch.com) accountable for what is said here, these are my own beliefs, based on my research. Do your own due diligence, and get familiar with the laws in your area, or places where you travel.
Street photography requires you to consider ethical and moral responsibilities when capturing images in a public place. If you have read about street photography, you may have heard about a model release. A model release is a contract between the photographer and the person who is photographed. In simple words, the contract dictates that you have gained explicit permission of the subject to be photographed.
In reality, getting a model release from everyone around you is not possible, which is why you need to understand what and when to take a photo. The model release also proves a dilemma because you can’t ask every person in Times Square to sign a contract with you only because you will be capturing the image of the bustling activity in Times Square.
Due to these ethical and moral responsibilities, you should understand when you need a model release and when you can take a picture without worrying about formalities. If common sense prevails, you can capture images in the public as long as people around you are not bothered by your activity. On the other hand, it’s not wise to take photos that can annoy a specific subject. For example, I heard about a guy once who took photos of the monks in Thailand where there were many other people around. Suddenly, a policeman approached at him and politely instructed him to take permission from the monks before photographing them.
More on, you should pay attention to the place you are taking the photo at, you may think you are at a public place but the matter of fact you are not. Shopping malls, military bases, amusement parks, airports, theatres, and museums are all private places, and they are subject to restrictions imposed by owner or operator, and you are legally obligated to follow their terms, and those terms may include the restriction of photography. If you are not sure, then check it in advance. Ask permission, even send them an email. You may be surprised by the answers you will get. Worst case, you will get NO for an answer.
You should also be careful in taking pictures of landmarks. For instance, you can’t take a photo of the Eiffel Tower at night because the city government wants to protect its light show. Museums, military installations, airports, and private properties are some of the other places where common sense should prevail.
| Australia | North America | Europe | Asia |
Equipment and Camera
The equipment you will want to use can vary, depending on the type or style of street photography you are going to take. For flexibility and capturing the image, whenever the opportunity arises, a big lens DSLR can be too heavy and clumsy, and you may want to select a camera that doesn’t make you conspicuous in the public. It means that a smaller camera or prime lens will be much more suitable, even a point-and-shoot camera or your mobile phone camera can work if you know when and how to capture images.
These simple cameras are effective because street photography mostly requires instant decision-making from the photographer. As a street photographer, you don’t have the time to set up your tripod. In fact, some photographers shun zoom lens because they want to capture the subject in quick succession.
Based on the type of street photography, heavy cameras can also provide much better results. For instance, if you’re interested in taking photos of landmarks at a distance, zoom-lens is a better choice. Similarly, 35mm lens may be the perfect choice for someone wanting to capture a rainy day on a village street. Just make sure, you are comfortable with the camera.
Camera Settings
For beginners, it’s always fascinating to understand how experts were able to capture amazing street images. Here are some street photography tips and trick for your inspiration, which will help you set your camera from an expert perspective:
Auto-Focus
Instead of using auto-focus capabilities, expert street photographers used “pre-focus” to capture an image. A pre-focus is a standard point for you to focus your camera. Anyone, who enters the pre-focus range, will be a potential candidate for capturing an image.
Pre-focus can be a great tool for beginners in an area where there is either a lot of activity or you are sure that a large number of people will pass through your pre-focus area. Whenever the subject enters a pre-focus area, you can capture the image, if you like. It is also important to use small apertures such as f/5.6 and f/8, which work seamlessly for a designated range.
Lights and Shadows
One of the most defining features of street photography is to be able to work with any kind of light. In fact, there is no bad light in street photography. You need to embrace every moment, which also means that light and shadows are an intrinsic part of the experience.
Don’t try to adjust the light, colors, and shadows in your computer software. Because people always associate street scenes with natural elements. In simple words, let nature dictate its path while you wait for that perfect opportunity to take the picture.
If it’s raining, it may be better to highlight the blurred effect that naturally comes with the rain. For instance, think of the dramatic effects of light reflecting from street lamps on a rainy night. Overall, you don’t want to fiddle around with the dramatic and mysterious impact that nature creates.
Unlike other forms of photography, it will be a grave mistake to change the environment that we all have become accustomed to. In street photography, lights and shadows are your friends; use them wisely, and you may get a picture of a lifetime.
Shutter Speed
If it’s the first time you are going to set parameters for street photography, you can always put your shutter speed on automatic settings. Automatic setting allows you to capture images without fiddling around with the camera settings.
If you need a definite answer, then expert recommends that your shutter speed should always be above 1/250th because street action is fast (you can go up to 1/500th even). Keeping shutter speed above 1/250h will allow you to freeze the motion of both your own and your subjects, you will be able to take spontaneous action without losing the moment. For still photography, where the action is very slow, going below 1/250th doesn’t hurt either.
ISO
While aperture settings and shutter speed are somewhat easy to adjust, ISO remains a critical element that will take time to learn. For ease of use, experts recommend leaving ISO setting to auto. Automatic ISO settings are preferred for amateurs and starters because it is a somewhat of an art to perfectly align ISO setting with hundreds of different combinations of shutter speed and aperture modes, available today.
In fact, I’ve seen many expert photographers leave ISO setting on auto. If you want to manually set ISO, then don’t let it go beyond 1600.
Composition and Light
Here are the seven most well-known street photography tips to compose your photos:
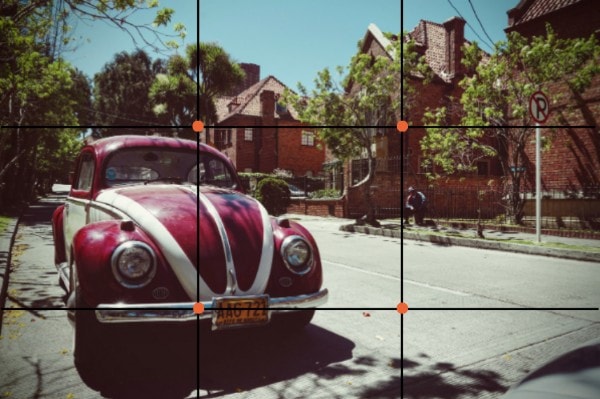
1.Rule of Thirds – The rule suggests dividing the image between three vertical and three horizontal lines. Accordingly, the inner intersections of the grid show the four points that a viewer’s eye tends to seek out. Placing a point of interest at the center is less natural, but placing points of interest at the intersecting points creates a more balanced and has a more meaningful result. For single-subject photos, the left line is also important as viewers are accustomed to reading from left to right.
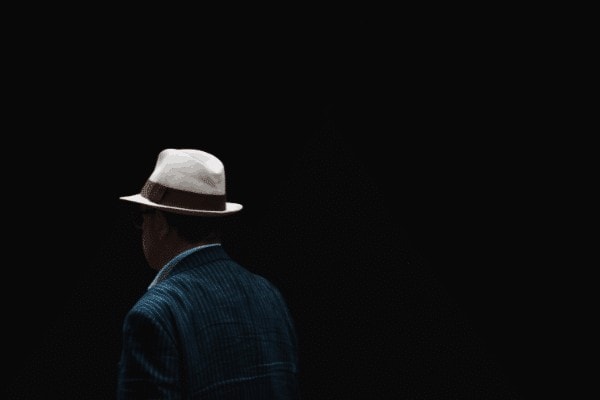
2. Negative Space – Sometimes, you want both the subject and background to provide a strong feeling. The negative space is the background, which can offer intriguing insights. Too much clutter in negative space can also prove problematic.
3. Depth of Field – Depending on your taste, you may want to highlight specific areas of an image. Using a wider aperture can help focus on the subject; whereas narrow aperture can tell a greater story from a wide perspective.
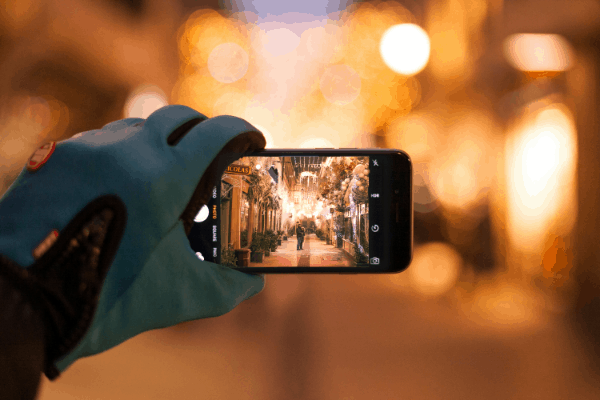
4. Textures – Human eyes are trained to discern complex textures. As a street photographer, you can include a variety of textures as backgrounds or subjects emphasizing different moods.

5. Pattern – Just as textures, patterns also play an important role in our lives. Street photography is tailor-made for finding patterns on the street. Patterns can come in a variety of colors, shape, and objects.
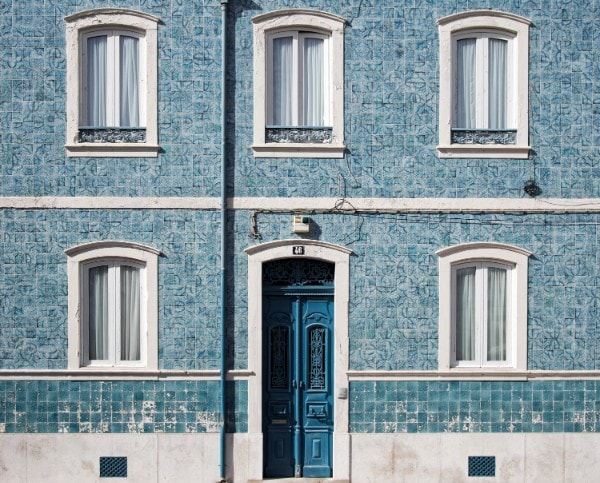
6. Perspective – Everyone sees the world from a different perspective. The same is true for photography, where you can take a photo from different angles enabling the photographer to find interesting elements that sometimes remain hidden.
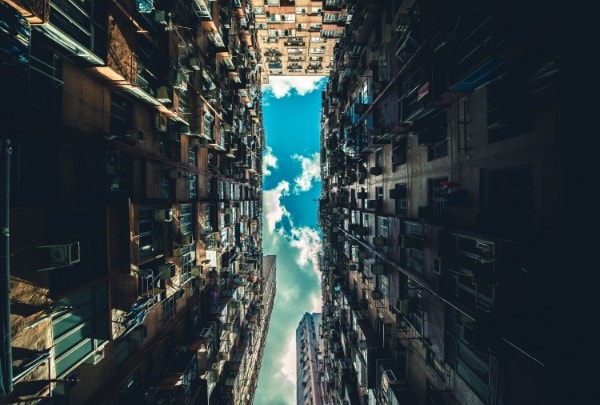
7. Color – You can easily create emotions using color. Humans are accustomed to associating colors with emotions; therefore, the choice of particular color can play an important role in offering a more immersive experience.

Advanced Photography Tips for Beginners
Learning to take photographs may seem a daunting process because we forget about simple techniques that make a great photo. The following techniques will help you get out of your shelf and feel the world around you without the camera in your hands.
Try to start using your eyes instead of the viewfinder. Sometimes, you can miss the perfect image outside the frame. Likewise, you should embrace spontaneity. It means you should trust your gut feelings to take a photo without thinking about how others will respond to the image.
Instead of finding that perfect image, it also pays to find consistent themes in your photography. Working with themes can lead to a collection of photographs fit for full-fledged projects and books. Another tip for great photography is to keep taking photos. Regular photos will enhance your mental ability, keep your eyes focused, and improve hand-eye coordination.
Showing emotions and gestures are also a great way to capture great photos. Always be on the lookout for capturing emotions because emotions shown on people’s face can often be the single most fascinating fact of a picture.
Street Photography Mistakes
Just like some of the advanced street photography ideas, which are very simple, street photographers also continue to make simple mistakes that can easily be fixed. Here are the top five mistakes:
- Low ISO – The old school always recommended using low ISO, which may not be true in this tech-age. As new technology is introduced, high-tech cameras are able to use high ISO to grasp perfect pictures. It’s one of the reasons why I suggested using automatic ISO settings in the earlier paragraphs.
- Fear of Subject – Most photographers feel shy taking photos of strangers. If you can’t take a photo you like, street photography may not be for you because it requires courage and communicating with people around you
- Getting Close – Sometimes, you need to get closer to the object to get a great angle. Overcome your fear by trying to take pictures from various distance and angles.
- Removing the Camera – Often, photographers remove the camera from the eyes quickly after taking the photo. Instead, try to keep your posture without removing the camera allowing the subject to walk through.
- Focusing on a Single Person – When trying to focus on a single subject, remember that street photography can create sudden opportunities to take photos of multiple subjects. As a result, always be ready to combine elements into complex scenes.
Hopefully, these street photography ideas will help you take the first steps in the right direction. As street photography can be different from other types of photography, try to keep things as simple as possible. Don’t try to complicate matters by learning too much. Keep on taking pictures whenever you get time because street photography is all about learning from your experiences and gut instinct.
Tell me (on my FB page) if you learned something new and which points you found most helpful. And, don’t forget to share this article if you know other people will enjoy it too.

