
Adding a watermark to your photos is a simple thing to do in the export process.
The process includes a few options and stages:
- How to make a watermark in Lightroom.
A watermark in Lightroom can be as a Text, or as a Graphic. - How to add watermark in Lightroom.
- Saving your watermark as a preset for further use.
So let’s dive in.

How to make a watermark in Adobe Lightroom Classic
there are 2 main types of watermarks:
- simple text watermark
- graphic watermark
To make a simple text watermark or graphic watermark, go to Edit > Edit Watermarks.
In the Watermark Editor, you can set all the relevant parameters to shape your watermark.
On the upper right, you have the option to choose the Watermark Style, Text or Graphic.
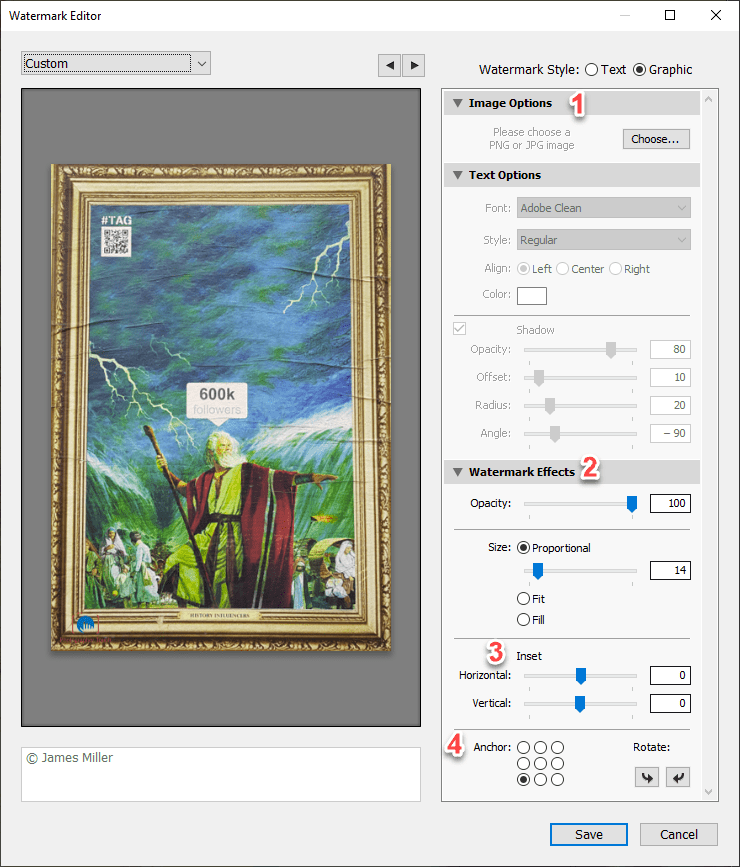
How to Add Graphic Watermark in Lightroom
As a general recommendation, it’s preferred to use a custom PNG file to use as a watermark, because PNG files support a transparent background.
It means, using external software like Photoshop to design yourself a personal signature.
- In the first section, the Image Options, you can choose a PNG or a JPEG file that will be your watermark.
After you click on the Choose button, In the navigation window, pick your signature file. once you pick your file, the Watermark Style checkmark on the top right will switch from Text to Graphic, and the Text Options section below will turn gray. - Next, in the Watermark Effects section, you can set the Opacity levels, and set the size of your text, by using the slider, or you can check to see if the Fit and Fill options can be good for you.
- The Inset slider will move the watermark away from the edges of the photo.
- The Anchor will let you set your watermark on a specific location on your photo, and if you want to rotate your watermark, just use the Rotate buttons to set it as you see fit.
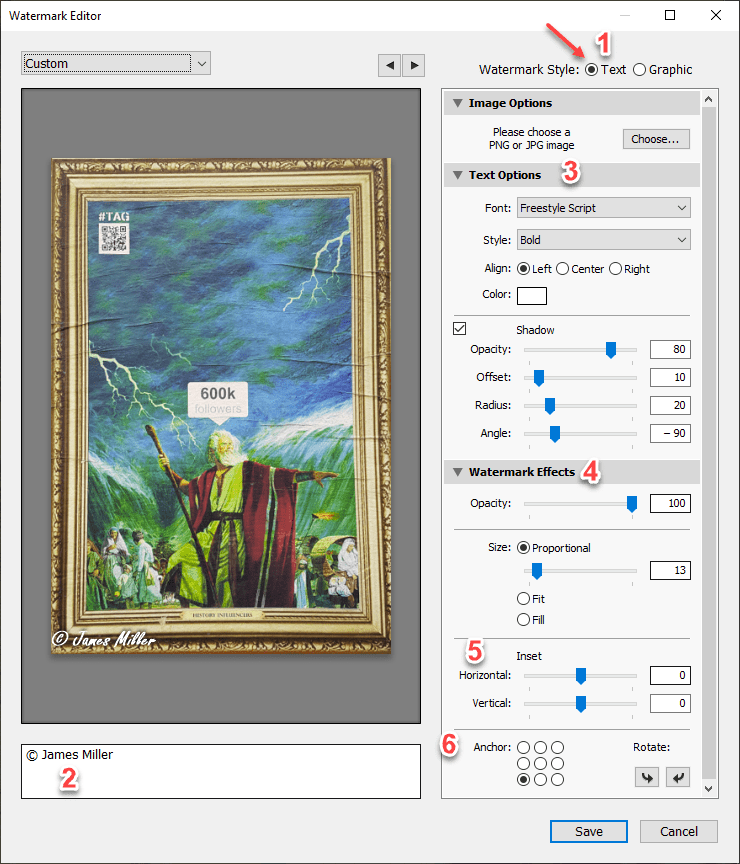
How to Add Text Watermark in Lightroom
- On the upper right, you have the option to choose the Watermark Style to be Text.
Ignore the Image Options. - On the lower left, you can write the text you want to use as your watermark.
- In the Text Options section, you will set the definitions related to the text. You can choose a Font, font Style, and the color of the font.
Check the Shadow if you want one.
Set the Opacity to define the transparency levels for the shadow.
Use the Offset, to define how far away the shadow will be from the text.
The Radius slider will set the Dispersion / softening levels of the shadow.
And the Angle slider will set the shadow angle. - Next, in the Watermark Effects section, you can set the Opacity levels, and set the size of your text, by using the slider, or you can check to see if the Fit and Fill options can be good for you.
- The Inset slider will move the watermark away from the edges of the photo.
- The Anchor will let you set your watermark on a specific location on your photo, and if you want to rotate your watermark, just use the Rotate buttons to set it as you see fit.
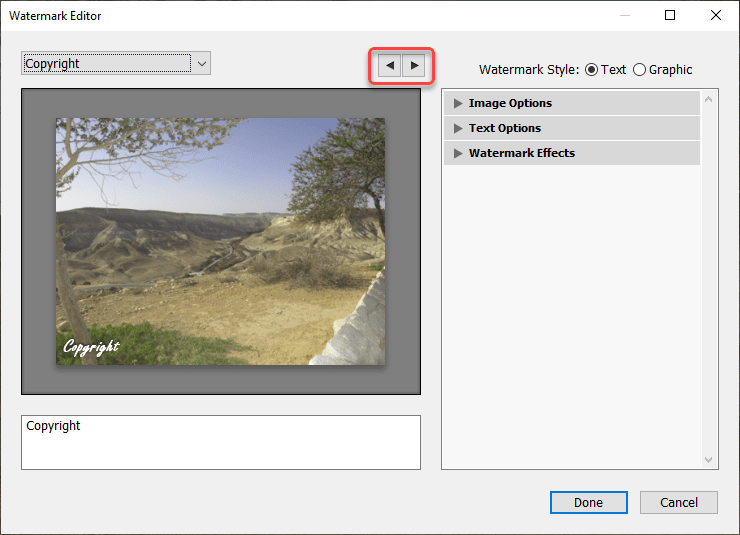
Pro TIP: You can choose multiple photos. Go to the Filmstrip at the bottom of the interface, and select all the images you want by using Shift-click or Cmd/Ctrl-click. Click the Left and Right navigation arrow buttons to preview the watermark on each photo.
Saving Your Watermark As a Preset For Further Use
After you set your configurations for the watermark, it’s recommended to save these changes as a preset for further use., after all, you don’t want to repeat all the settings all over again every time.
Click on the drop-down menu in the upper right corner, and choose Save “Current Settings as New Preset”, give the watermark preset a name, and hit the Create button.
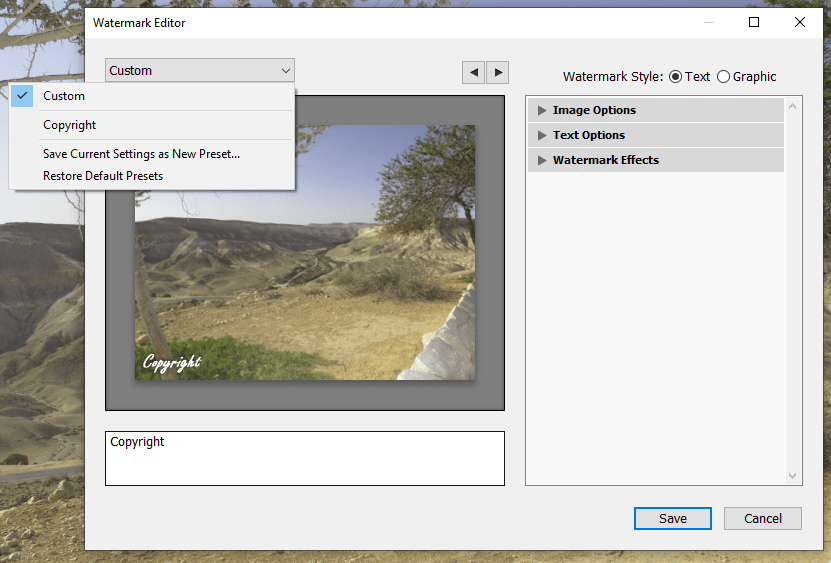
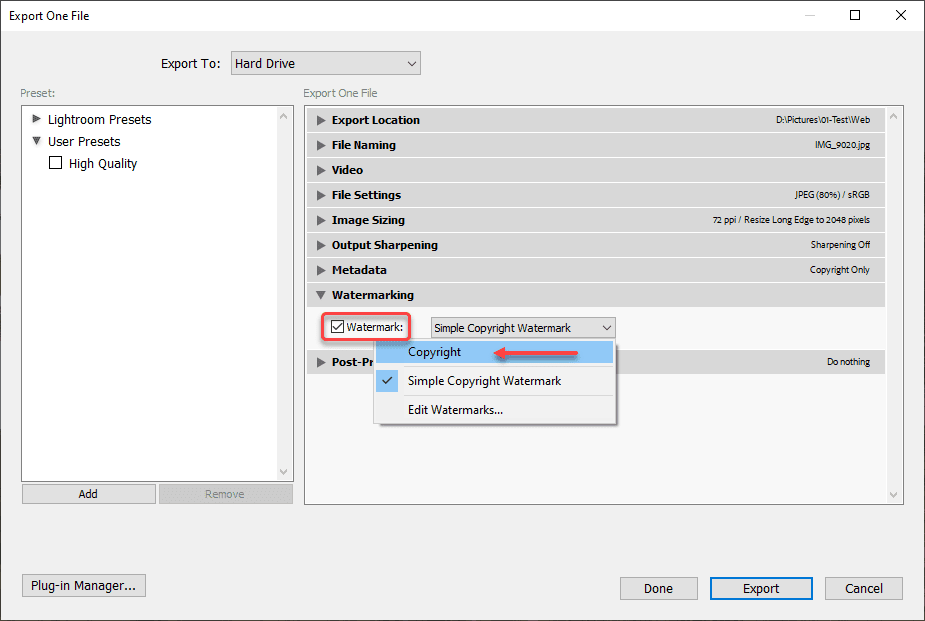
Now, you can choose that watermark when you’re exporting your photos in the export window.
NOW…
After you finish designing and setting up your signature, GO and export a photo with your new signature.
If you don’t remember how. Check out the How to Export Photos From Lightroom Classic Guide, or How to Use Lightroom – Introduction for Beginners.

