When you start post-processing your images, there is a lot to learn. Dodge and burn can sound complicated and unattainable at first. Or, downright confusing.
In fact, it is a very simple and powerful technique. Used effectively, it will add depth and dimension to your photography.
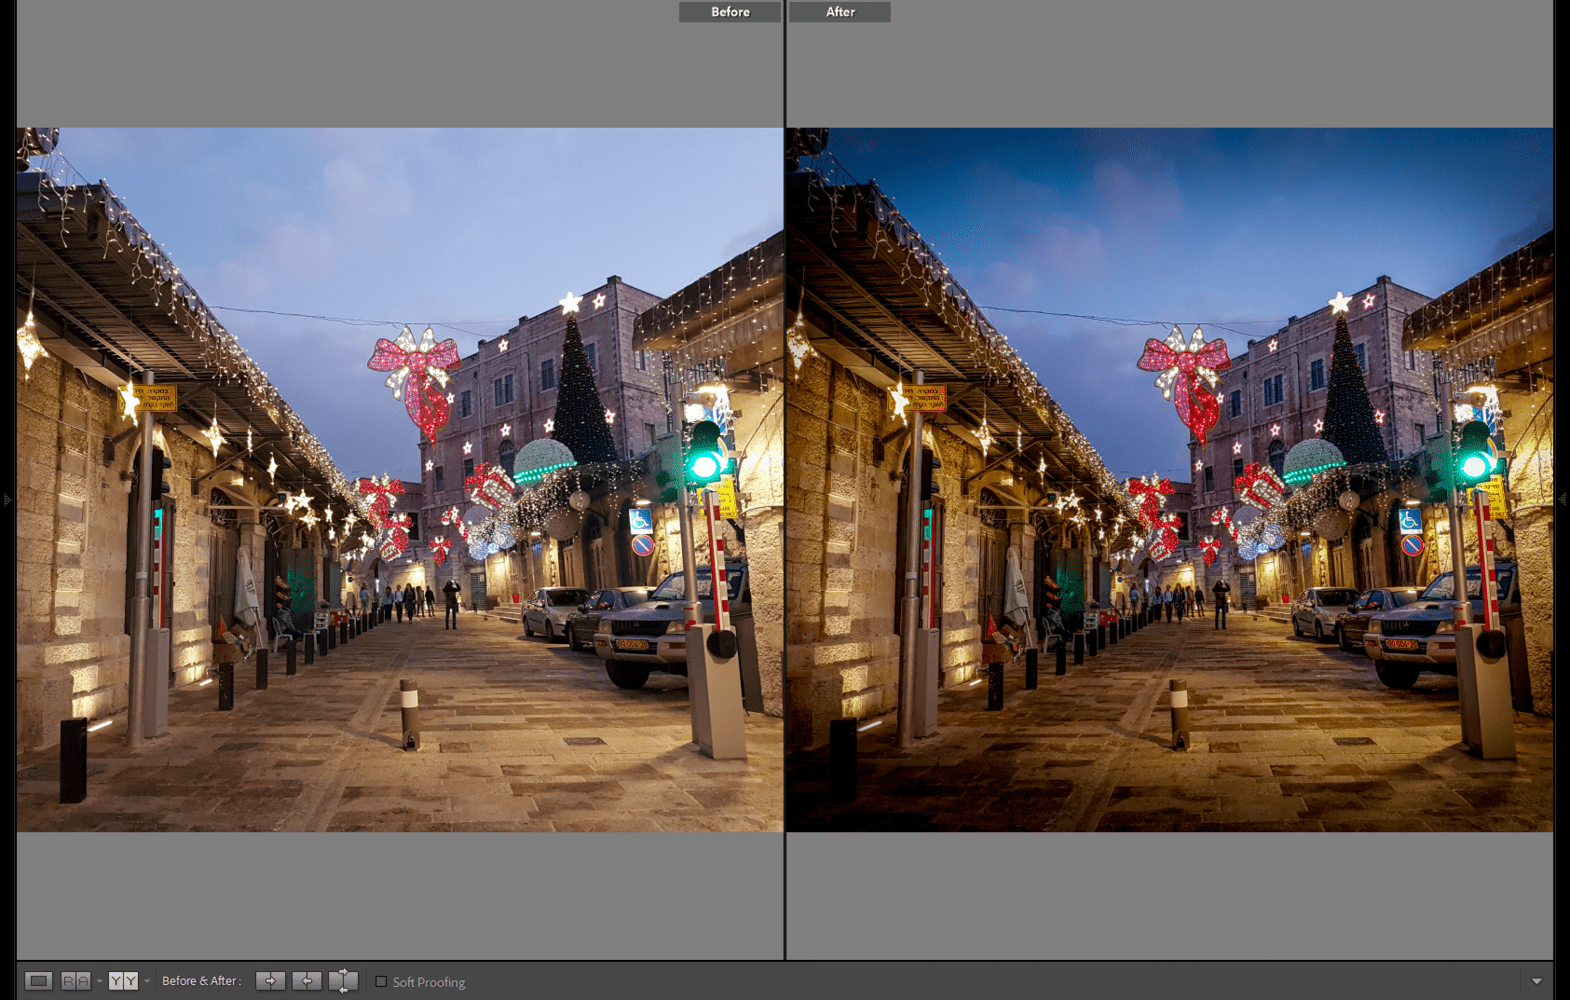
This article breaks down the mystery of dodge and burn and shows you exactly how to do it in Lightroom Classic.
What is dodge and burn anyway?
Dodge and burn are terms that originate from the old techniques of darkroom printing.
To dodge an area of an image is to make it lighter. This was originally done by covering part of the projected image. The photographic paper in that area was then exposed for less time.
In contrast, burning refers to making an area darker. A selected area of the image gets exposed for longer.
Digital techniques mean this is now easier than ever.
Improve your image composition with dodge and burn
The purpose of using dodge and burn is to improve the overall look of a photograph. Careful control of the light and dark areas leads the eye to what’s important in an image.
A lighter area will grab attention. Add some dodging on your main subject to bring it out and make sure it is the focus.
Darken an area to make it recede. Got a highlight in the background that is competing with your subject? Burn in the area to help it blend with its surroundings.
Skillfully applied dodge and burn can add a dynamic and dramatic feel. Use it to enhance the shadows and highlights of an image in a very controlled way.
Now let’s go through how to dodge and burn your photos in Lightroom.
Make basic corrections first
To clearly visualize where you should dodge and burn, complete basic editing of your image first.
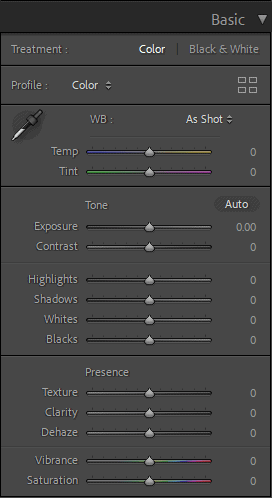
Start with the Basic panel in the Develop Module. Most importantly, you should get the exposure and tones of your images correct.
You can also go ahead and complete other edits on your photo. This includes the color temperature, adjusting the tone curves, sharpening and lens corrections.
Local Area Adjustments
The edits you make in the Basic panel and other panels affect the entire image at once.
In contrast, the aim of dodging and burning is to improve a photo by darkening or lightening specific areas.
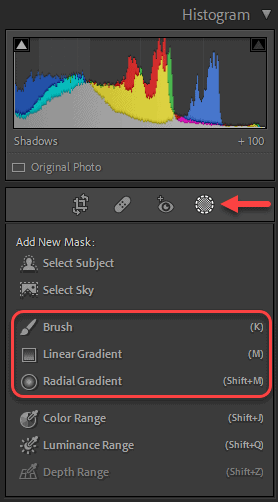
Lightroom has three main tools which let you select areas and apply edits exactly where you want. The Adjustment Brush, the Graduated Filter and the Radial Filter.
You will find all three located in the tool strip under Masking (Shift W) below the Histogram.
The Adjustment Brush
The Adjustment Brush lets you paint on image corrections anywhere you wish. It is extremely versatile and you can edit anything from very fine details to wide expanses of your image.
Select the brush icon (K) from the tool strip between the Histogram and the Basic Panel.
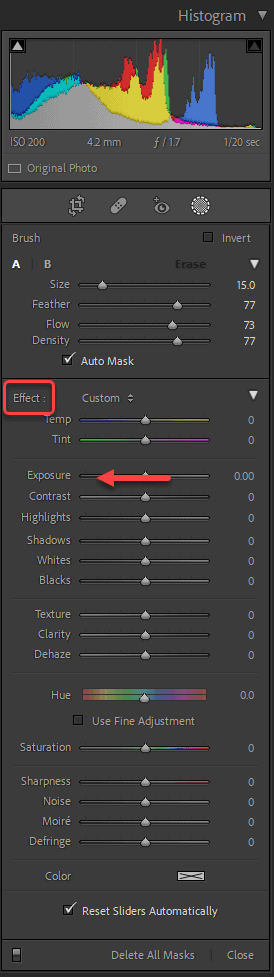
A new panel opens up and you will see the top section of the panel is labeled Effect. Here are a range of sliders, which are roughly the same as those of the Basic panel.
The Exposure slider is the primary adjustment you will use to apply dodge and burn.
How the Adjustment Brush works
The Adjustment Brush lets you create multiple different edits on different areas of your image.
When you start painting on the image a black and gray pin will appear where you began. You can keep painting more areas and they will be added to the same pin.
Press O to hide and show the red mask overlay which indicates where the effect is applied. There is also a tick box for this under the main work area.
All areas associated with a pin will have the same adjustments.
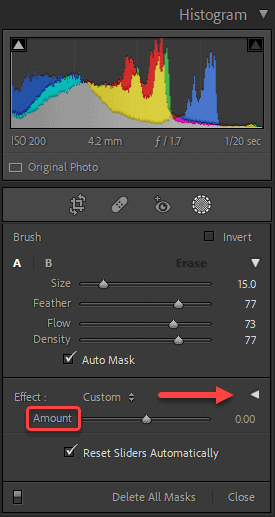
To control the intensity of the overall effect of a pin, click the triangle at the top right to collapse the sliders. Now you can adjust that pin with a single slider that says Amount.
Dodge and Burn Presets
There is one Preset for Dodge (Lighten) and a second one called Burn (Darken). The helpful names mean you don’t need to remember which is which.
Find the Presets tucked in the drop-down list which sits to the right of Effect. It will say Custom when you start, but may also show any other Preset from the list.
The only setting on the Presets is an increase or decrease of Exposure. If you are not happy with the amount, you can still adjust the Exposure slider as required.

Editing and adding new pins
When you start painting with the new brush, a new Masks panel with a New Mask will open for you to work on.
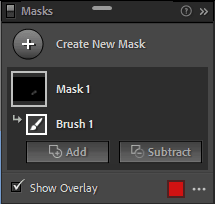
There are two options:
- Create New Mask, at the top of the Masks panel.
- To edit; use the New brush or add a new Brush to the current Mask.
Use Edit to work on an existing pin. To add another pin select New.
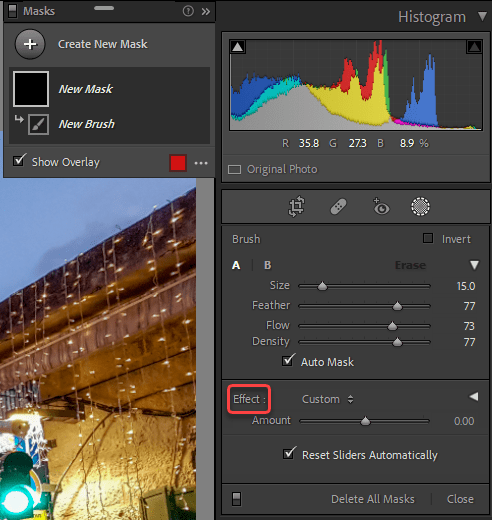
To reset the sliders, double-click the word Effect.
You can add as many pins as you need for different adjustments. However, don’t make it more complicated than necessary.
Start with one for Dodge and another for Burn. The fewer pins, the easier it will be to manage.
You can edit your pins as many times as you need by returning to the Adjustment Brush. If you don’t see your pins, press H to reveal them. You can also control the view with the Show Edit Pins setting at the bottom left under the work area.
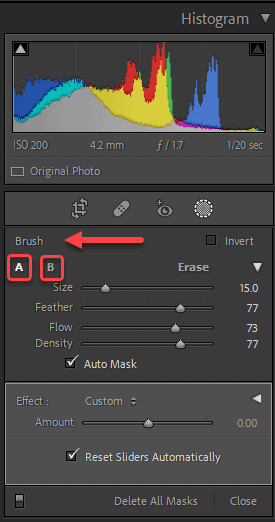
Control your brush settings
At the bottom of the Adjustment Brush panel, you will see a section labeled Brush. Here you have sliders which control the brush size, the feather value and brush flow.
You can select settings for two different brushes, labeled A and B. There is also an Eraser.
The exact settings you choose depend entirely on the areas you plan to dodge and burn. Experimentation and experience will teach you what works best.
When you hover the cursor over the image, you will see it as two circles with a cross in the center. The inner circle is the brush size and the outer circle the feather size.
The cursor will also appear near the Brush panel when you hover over or move the Brush Size or Feather sliders.
Brush Size: Use the slider to choose a size which suits the area you wish to edit.
The left and right square bracket keys, a mouse scroll wheel, and moving two fingers up and down on a trackpad also work.
Feather: Use this to control the edge softness of the brush.
In most cases for dodge and burn you will want to keep the feathering at 100. If you wish to work on a very defined object only, then bring it down a little to suit.
Flow: This will control the opacity of the brush.
It is good to build up dodge or burn slowly to get the right look. Set the opacity to around 25 to maximize the control you have.
Density: Here you can set the maximum opacity of your brush.
This can be useful at times for dodge and burn, but in general, leave this at 100.
Keep Auto-Mask off in most cases.
When turned on, it can create unnatural hard edges that do not work for dodge and burn.
The Graduated Filter or the Linear Gradient
The graduated filter allows you to add an effect in a gradient across the image. You can apply the same adjustments and use Presets the same as the Adjustment Brush.
It is a useful option when you need to lighten or darken one side of an image or the top or foreground.
Select Graduated Filter by clicking on the Rectangle icon (M) in the Masking panel.

Click and drag the cursor across the image to create the gradient.
You will then see three lines. These represent the two ends and mid-point of the gradient. Click on the pin, or move each line to adjust the position of the gradient.
The Radial Filter or the Radial Gradient
The Graduated filter is the third way to select areas to add dodge and burn. Choose the Radial Gradient tool (Shift+M) from the Masking panel.
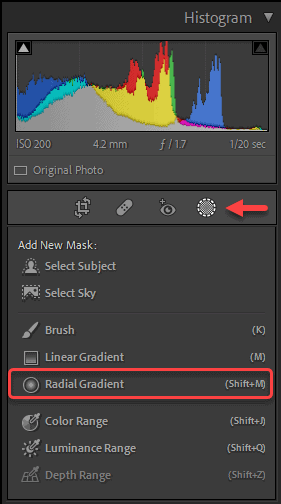
This time the selection is a circular or elliptical gradient. It gives a great even fall off and is especially useful for highlighting a subject, like someone’s face.
Drag your cursor across the image to create a circle marquee over the object you want to dodge or burn.
Holding Shift will create a perfect circle. Use the handles and the pin to position the effect as required.
If you hold down Cmd or Ctrl and double-click, the selection will jump to be the exact size to touch the edges of the image.
By default the area of the effect is outside the marquee you draw. Invert the selection using the check box at the bottom of the panel when needed. There is also a slider here to control the feather of the selection.
One great feature of the Radial Filter is that it also has a Brush tool. You can combine brushed areas with the Radial gradient. This means you can make the selection perfectly suit the composition of your photo, but keep the softness of the gradient as well.
At the very top right is an option to select Brush. It works just the same as the Adjustment Brush described above.
How to create a Vignette
One classic use of dodge and burn is to create a vignette. Lightroom has a dedicated tool for this, so it is worth a quick mention. This is especially useful when editing batches of images that all need the same look.
A vignette typically involves darkening the edges of a photo to give it a frame. It works to hold the eye within a photo composition or to add drama.
Though less common now, you can also create a light vignette. This will give a soft and dreamy quality or old-world feel, and suits black and white imagery. Use sparingly for a classic look on high-key portraits or newborn photography.
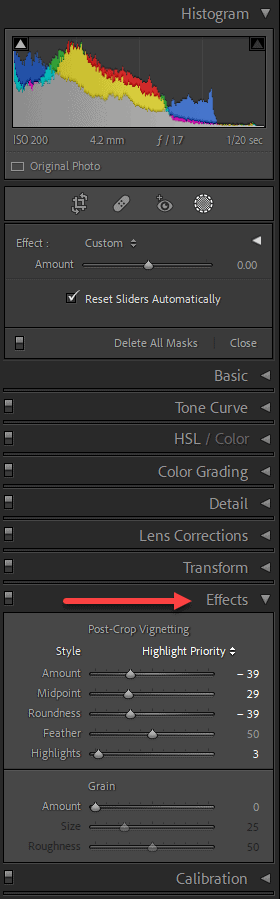
Head to the Effects panel near the bottom of the Develop Module panels on the right.
The top section of the panel says Post-Crop Vignetting. There are three styles and a few sliders underneath that control the look. The sliders are fairly intuitive, so play around until you achieve the desired balance.
At times the Effects panel won’t give you the result you are after. In that case, create a custom vignette with the Adjustment Brush or Radial Filter.

We have now covered all the options for dodging and burning in Lightroom Classic. A solid understanding of the concepts and tools is the basis you need to master the technique.
Start slow and develop your eye with practice. You will soon get a feel for the art of dodging and burning.

