Sophisticated masking was once considered the domain of Photoshop. Lightroom Classic now includes some powerful masking options built-in.
Masking is a central technique to help you take your photo editing to a higher level.
In this article, we take a look at all the different ways you can mask your images in Lightroom Classic.
What is a Mask?
In a nutshell, masking is a way to isolate certain parts of an image. This allows effects to be applied only to specific areas of your choosing.
When you create a mask you are dividing your image into areas that are active for adjusting and those which are protected.
Adjustment sliders in Lightroom Classic then let you control the color, tones, exposure, and other qualities of your selected areas.
Related Articles:
How to Use Lightroom (an intro to Lightroom)
How to Import Photos Into Lightroom Classic
How to Export Photos From Lightroom
How To Batch Edit In Lightroom Classic
How To Use Color Grading In Lightroom Classic
How to See Before and After in Lightroom
Dodge and Burn in Lightroom
How to Blur Background in Lightroom
How To Zoom In Lightroom
Masking options
To create a mask click the round Masks icon in the tool strip underneath the Histogram.
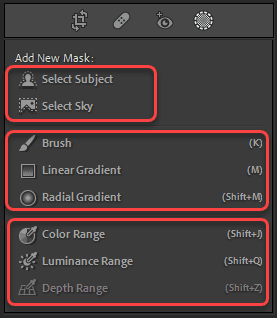
There are eight different mask options listed. To add a mask, click on the kind of mask you wish to create. Each of the masking options gives you a specific method for selecting the area you want to edit.
The local adjustment tools—the Brush, Linear Gradient and Radial Gradient tools—are located here. Select Subject and Select Sky are two powerful options for automated mask creation. The final three options let you create masks based on range selections.
We go through each masking method in more detail below.
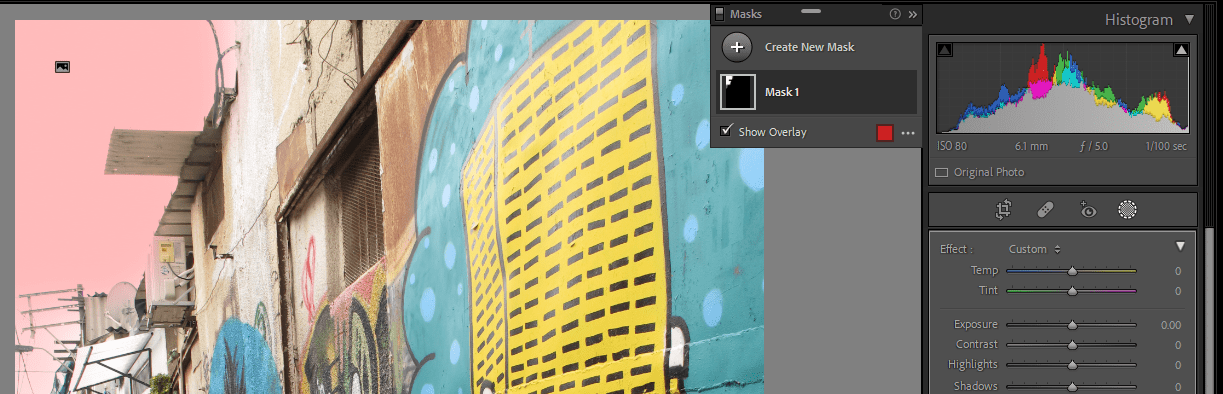
The Masks Panel
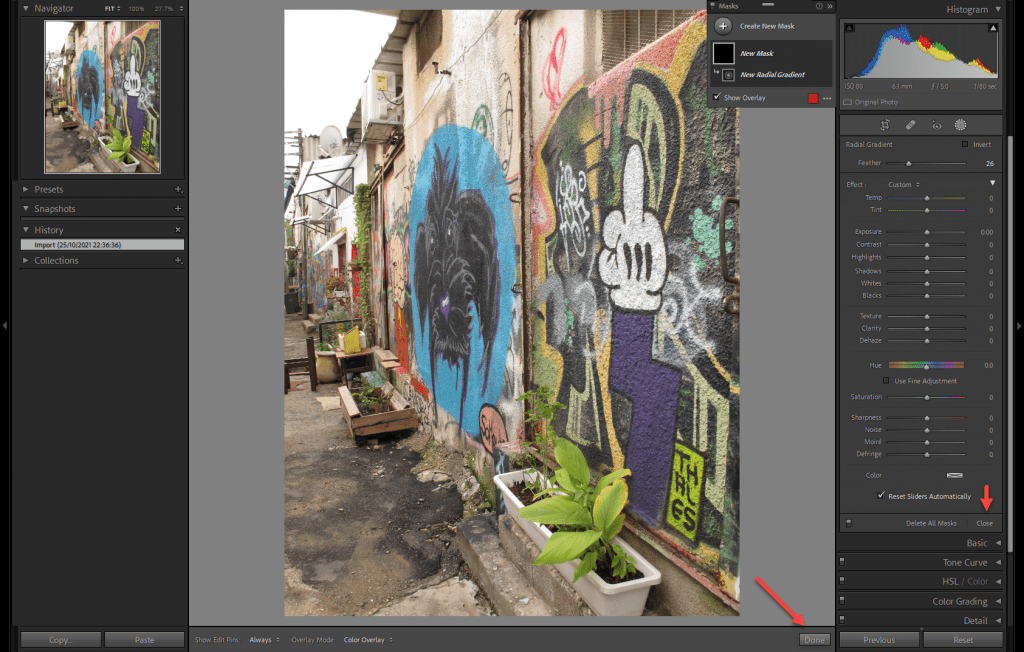
When you select a mask type, the Masks Panel will pop up next to the Histogram.
Adjustment sliders will now display in the right-side panel. Here you can make the edits you require.
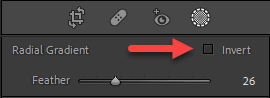
Any mask can be inverted by checking the Invert box above the adjustment sliders.
Click Done on the Toolbar or Close at the bottom of the adjustments panel when you finish making your edits. You can always return to edit your masks as much as you need.
A neat feature of the Masks Panel is that it can be moved around. Place it anywhere on your screen. It can also be docked into the panels on the right side of the interface and will sit under the tool strip. Drag it into place, or double-click on the header of the Panel.
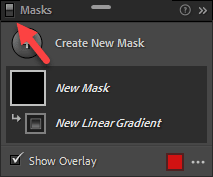
The two arrows at the top left will collapse the panel when you are not using it, or want to just see the mask thumbnails. Click on the question mark at the top to see a handy list of the shortcuts for masking.

The small on/off toggle at the top left will hide and show all your masking adjustments at once.
Once you have at least one mask, click anywhere on the top row of the panel with the plus button to create a new mask. The same list of masking options will appear to select from.

Mask layers
The introduction of layers makes masking in Lightroom look and feel more like Photoshop.
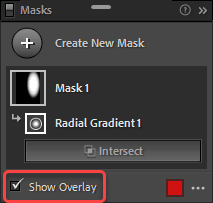
In the Masks Panel, your masks get created in layers. This lets you easily select and organize the different masked areas.
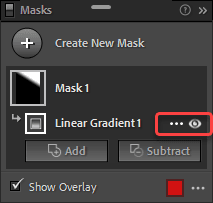
Use the eye icon on the right to hide and show each mask individually.
To change the name of a layer click on the three dots at the right of the layer and select Rename, or double-click the layer. In the dialog box, add a name which helps you identify the Mask.
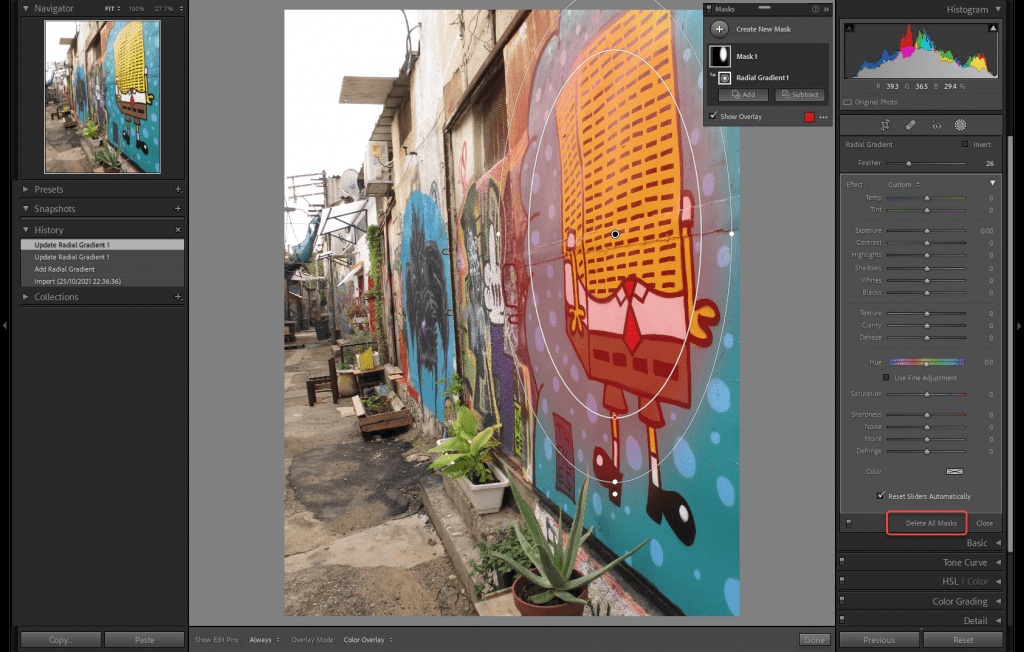
Press Delete to remove the currently selected Mask. To remove all masks at once, click on Delete All Masks underneath the adjustments sliders. You can also select the command from the three dot menu on any mask layer.
How to view your mask overlay
To hide and show the mask overlay Press O. You can also use the tick box in the Toolbar under the main work area, or in the Masks Panel. Hovering over a mask thumbnail or the pin is another way to show the overlay.
Whenever you use the sliders the Overlay will hide again. This is so you can see and control the adjustment you are making.
The mask overlay is red by default. In some cases you will find a different color will work better with your imagery. Select another color by clicking on the red square at the bottom of the Masks Panel.
In the dialog box which opens, you can also adjust the opacity of the overlay and choose to show either the affected or unaffected areas.
Mask overlay modes
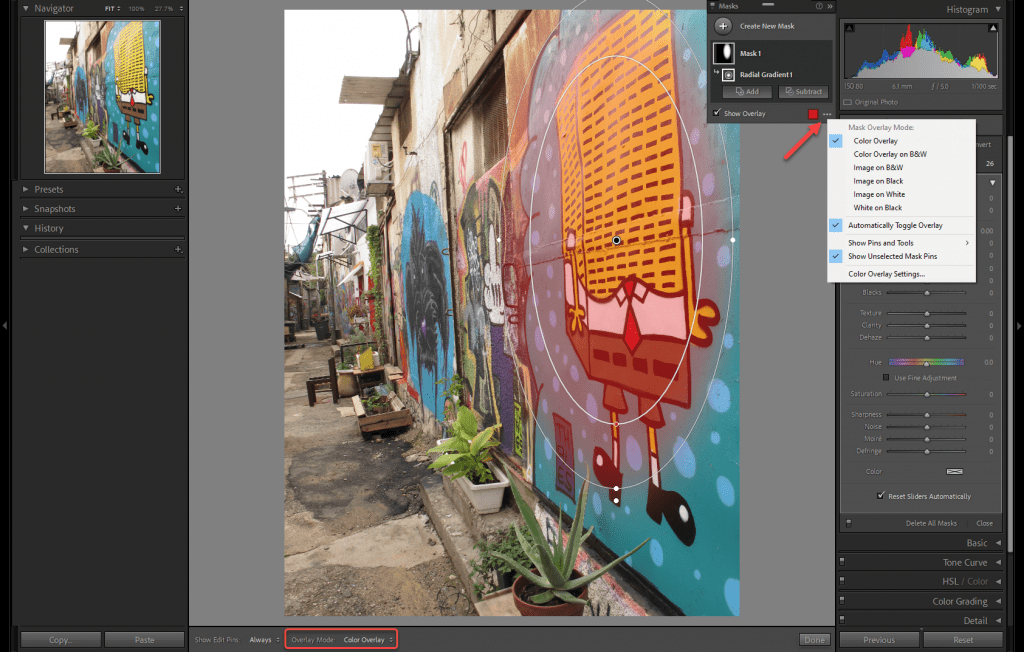
To access other Mask Overlay modes, click on the three dots at the bottom right of the panel to open the drop-down list. The same list also appears in the Toolbar as Overlay Mode.
There are six modes in total. Besides the default, you can view the color overlay on a B&W image, the image on B&W, Black or White, and finally as a White on Black. A quick click through the list will easily show you what exactly these all look like.
The Black on White mode is very useful to clearly see the masked area. Use this mode when you want to clean up a mask and make sure no odd patches are left unmasked.
How to use the AI-assisted masking tools
Lightroom includes two masking tools powered by Artificial Intelligence. These both do an impressive job of selecting the requested areas.
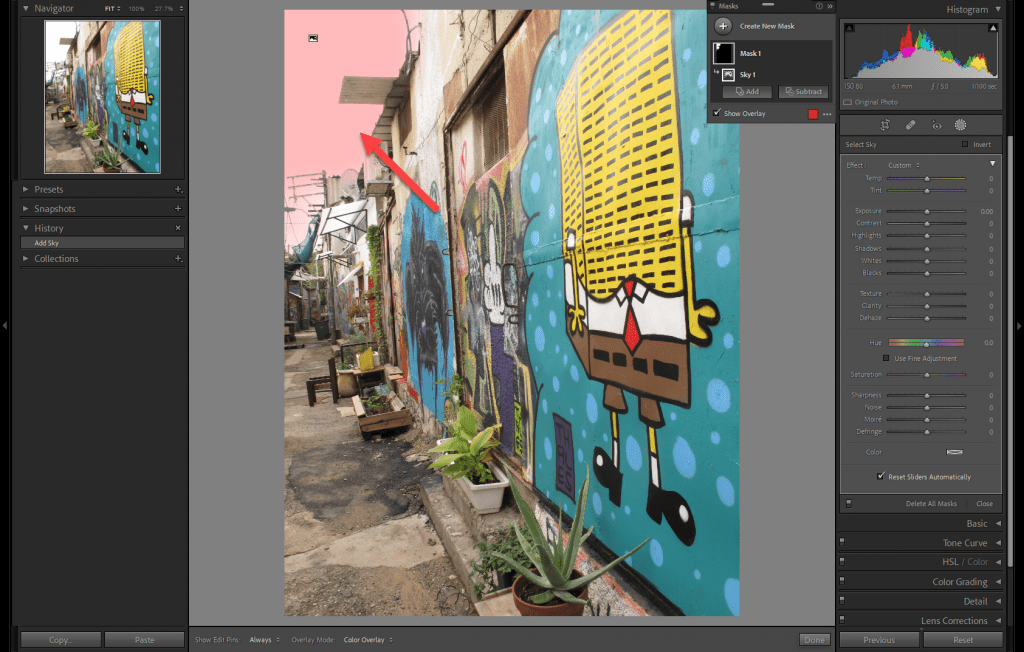
The two options are Select Sky and Select Subject. They do exactly what they say. Select Subject is designed to isolate an object, a person or animal.

Click on the option you want to use. You will see a box appear that lets you know Lightroom is processing the request.
Once completed you will see the red overlay and the newly created Mask layer.
How to use the local area adjustment tools
Brush
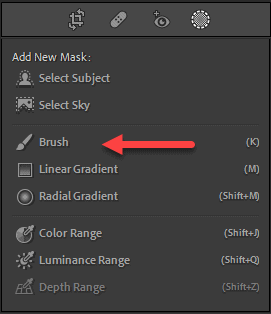
This tool gives you a brush to create your mask. It is a free form tool that allows you to paint over the exact areas you wish to select.
The Brush options appear at the top of the adjustment panel. Use the Size, Feather, Flow and Density sliders to control your brush. The left and right square brackets change the brush size without using the slider.
Check the Auto Mask box to limit your brush strokes to areas of a similar color. Hold down Option or Alt to switch to the Eraser temporarily.
Linear Gradient
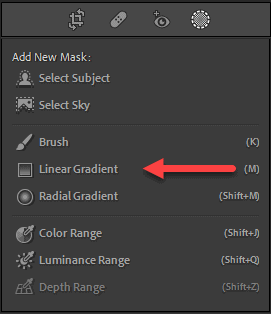
Select this option to create a mask using a gradient applied across your image.
Click and drag on your image to make the mask. The three lines which appear indicate the center and two end points of the gradient.
Reposition with the pin in the center, or rotate by clicking and dragging on the center line. Edit the softness of the gradient by dragging the outer lines.
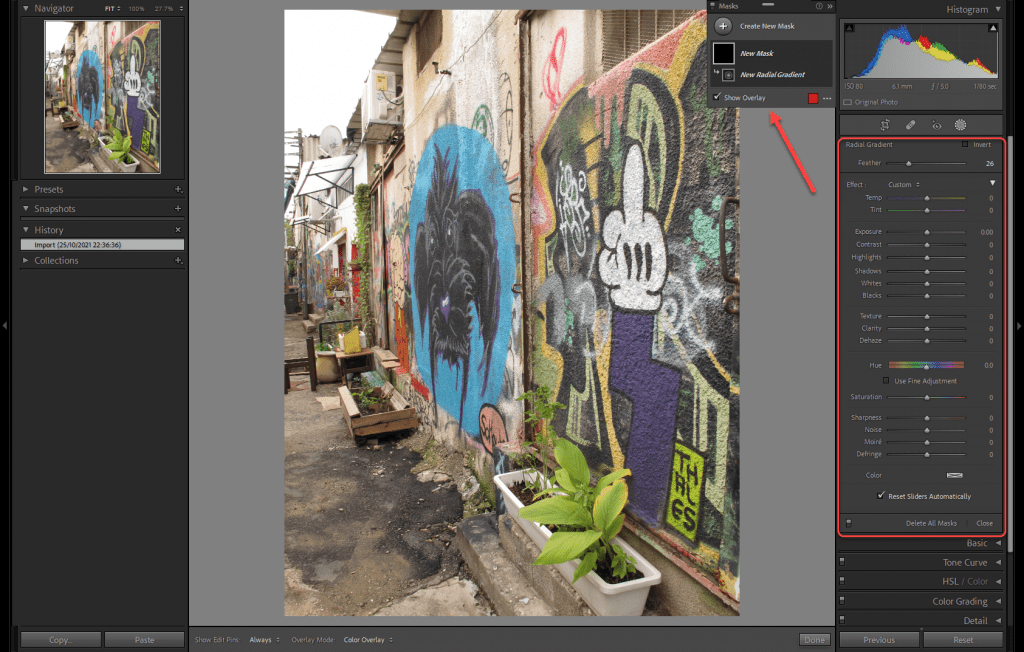
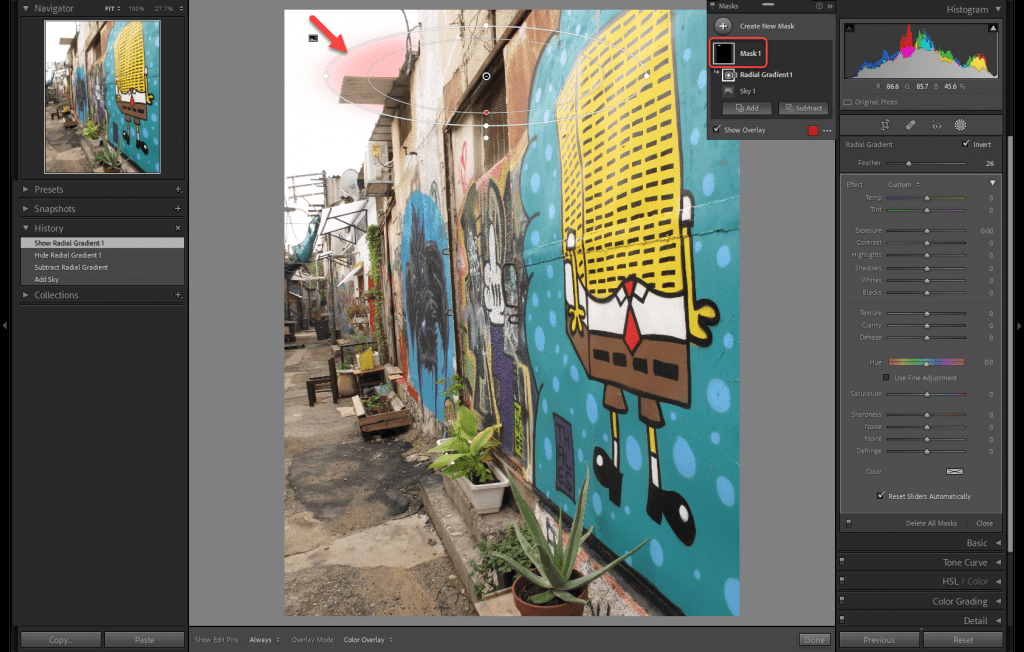
Radial Gradient
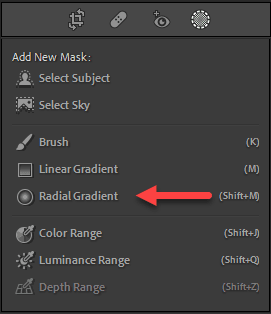
This mask option lets you create a mask with an elliptical selection.
Click and drag to create the mask. Hold down shift as you drag to constrain the mask to a perfect circle.
The selection can be easily moved around by grabbing anywhere within the circles. You will see the hand icon. Use the feather slider or drag the red dot of the inner circle to increase or decrease the feather of the gradient.
Grab any of the four handles to reshape the ellipse. Hold down shift to resize the ellipse with the proportions constrained.
Range Selection Tools
The range selection tools used to be options within the local adjustments. These are now listed as separate mask options.
Color Range
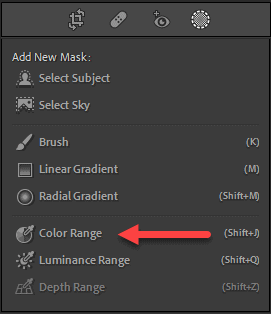
This option will create a mask based on the colors you select. This is very useful to make subtle and sophisticated color edits of your images.
You will see an eye dropper icon. Click once or drag a rectangular marquee over the area of color you want to select.
You can add extra colors to the selection by shift-clicking to add more samples. Five is the maximum number of color samples. You will see little round wheel icons at each selection point.
Option-click or Alt-click on any icon to remove color samples.
Use the Refine slider to select how wide you want the color range to be. Slide to the left and it will constrain closely to the exact colors you chose. Slide to the right to include more adjacent colors in the Mask.
Luminance Range
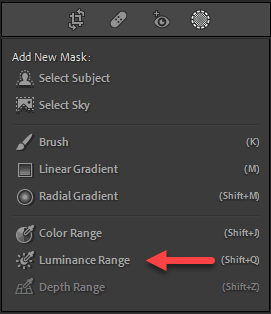
This Range Mask uses image brightness to create a mask. It is a great tool for making very specific and defined changes to the tones of your photos.
You have two options to make the selection. Use the slider to select the range, or click directly on the photo to choose the area you want to adjust.
Check the Luminance Map option to see the tones of the image in black and white. The red overlay indicates the areas already included in the mask.
Depth Range
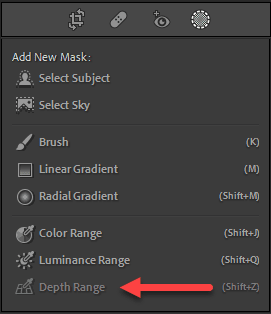
This mask option works with the photo information which identifies how far different areas are from the camera. If your image has no depth information, Depth Range will be grayed out.
Once again you can either use the slider, or click with the eyedropper to define the areas you want to edit.
The Depth Map information can be viewed by checking the box. White areas are closest to the camera, and black in the distance.
How to create complex mask selections
So far we have looked at the different ways to select areas to create a mask. You can also combine these different methods together.
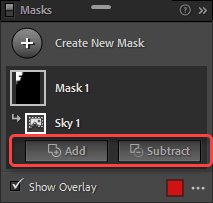
Add or Subtract areas
Clicking on an already selected layer reveals the Add or the Subtract buttons. Use these options to include more areas or remove areas from your mask. Select the masking method you want to use from the menu that drops down.
The different elements which combine to create a mask will remain editable individually. You will see each one listed as a child mask tucked under the parent layer.
This is an incredibly powerful feature. For Select Subject or Select Sky this lets you add brush or gradient areas to get the exact mask you need.
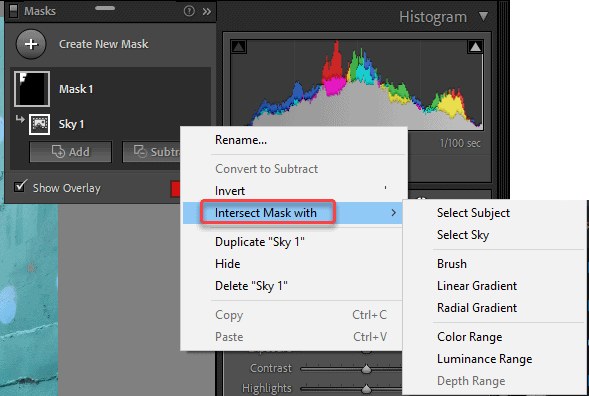
Intersecting Masks
It is also possible to intersect two masks with each other to create a new selection.
Select the mask you wish to start with. Click on the three dots icon at the right, and select Intersect with Mask Using from the drop-down menu. Then, choose the second masking method you want to use. The two selections will appear as sub-layers. A minus icon indicates the subtracted selection.
The parent Mask layer will now show the result of the intersection—that is where the two selections overlap.
That covers the key tools you need to know to effectively Mask your images in Lightroom Classic. There is quite a lot of information to get familiar with, but absolutely worth the effort.
Focus on those editing choices which compositionally improve your image or achieve the look you are going for. Then pick the best masking methods to create your desired adjustments.

